I do a LOT of voice-over recording using Reaper. I also worked for years (before Reaper) using Adobe Audition for all my editing needs. So I have some deep neural pathways for using a separate audio editor for final processing of any audio I record, including the stuff I record in Reaper. HOWEVER, reaper is an incredibly capable piece of software and can handle most – if not all – of your audio editing needs. I always seem to be learning something new you can do in Reaper that I’ve always used Audition for. The video I just watched over on The Reaper Blog today is a really good example.
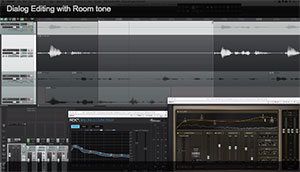
The shows how to take a track of dialogue – in this case, a list of ingredients for a recipe – and first, remove the noise in between the phrases. Then once that silence has been created, you replace that digital silence, which can sound unnatural, with the original room sound of the space the voice was recorded. One thing I really like about the workflow shown in the video is use of multiple tracks, each one with a different purpose. As the audio gets processed, it sort of progresses down to the next track underneath for the next treatment, until you end up with your finished product on the very last (lowest) track. It’s an interesting take (no pun intended:-P) on track use.
Some of the tools used in the video is something I have taught before – see my article, Voice Over Recording Tips: Editing Conversations In Reaper for how to use Auto Trim/Split and Reposition Selected Items (video included). Also, the Reaper blog video shows the narrator using two plugins – iZotope RX dialogue denoiser (part of the iZotopeRX suite of tools) and Izotope Nectar EQ. These are excellent plugins. But you don’t need them to do the editing shown in the video. For noise reduction, you can use the free effect that comes with Reaper, called ReaFIR. For a video on how to use it for noise reduction/removal, see my article ReaFIR Madness – The Hidden Noise Reduction Tool in Reaper. And if you want to use EQ (equalization) on your voice, you can do that using another bundled effect in Reaper called ReaEQ.
Watch the Reaper Blog video here: http://reaperblog.net/2015/03/video-dialog-editing-with-room-tone/
voice-over
Craig Anderton's Six Favorite Home Recording Studio Accessories
Craig Anderton, who is famous in the recording and electronic music making world for his books, articles and, of course, as a musician, just published an article about his six favorite home recording studio accessories. That definitely caught my eye as something our readers might be interested in. So I checked it out.
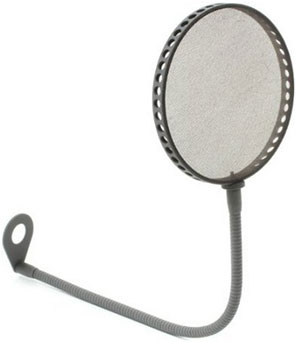
There are some very useful items on that list (which you can see for yourself at the link below), but the one that truly made me sit up and take notice was a pop filter. These are really common and usually pretty inexpensive – around 20 bucks – but I have never really had one that worked so well that it eliminated ALL of my vocal p-pops/plosives (see our article, How to Fix a “P-Pop” in Your Audio With Sound Editing Software for more on this topic). In the past, I have usually had to edit them out with audio software. I’ve even doubled up, using two pop screens when recording vocals, but some plosives still get through.
Well Craig swears he has finally found a pop filter that actually, REALLY works…and I hope so, because it’s expensive! Even so, I’ll be getting one to try out, and I’ll post the results of my review right here. This super pop filter is the Pauly Ton Superscreen pop filter.
Below is Crag Anderton’s full list. Enjoy!
http://blog.discmakers.com/2014/12/six-home-studio-accessories/
Filter The Mourning Dove Hoot Out Of The Voiceover Recording
I was working on a long voiceover recording job last week. After it was all recorded, I began the long process of editing it for the client. That involved not only optimizing the volume and minimizing the noise, but also creating 27 separate files. Things were progressing nicely, but then I heard an odd sound behind the voice at one point. You can probably guess by the title of the post what that sound was. Sigh.
Keep in mind that most voiceover jobs do not involve multitrack recording. That is to say, there is only one single track of audio being recorded. So if you hear a bird’s hoot AND your voice together on the recording, you can’t just “delete” the bird sound. In multitrack recording – such as you would use for most music recording – you purposely put different sounds on their own tracks so you can adjust the volume of each sound until it all mixes together nicely. THEN you render (mix down) the result to a single file. But I did not have the luxury of simply turning down the bird hoot. How in the world do I get rid of it?
OK, sure. I could just re-record that part when the bird is NOT outside my window. But that smacks of effort. I like to do things the easy way if I can. Yes, you may substitute the word “lazy” into that last sentence:-P. Anyway, there are some audio editing tools that you can use to reduce (or even eliminate) one type of sound, while leaving the desired audio alone. One of the best of these tools is EQ (short for “equalization”).
If the undesired audio has a much different frequency than the desired audio, then EQ can help filter out what you don’t want to hear. Sadly, this is not always the case. Sometimes, in order to remove one sound, you end up removing some or most of the sound you want to keep. But in this case, I was in luck.
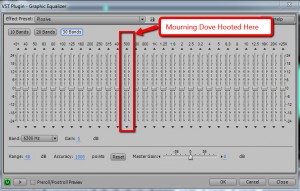
One other piece of good fortune was that a small amount of the dove noise was sounding during a section when the voice was not talking. It wasn’t enough to sample into a noise-reduction effect (unfortunately – because that is another good way to filter out the bad while leaving the good). So I highlighted the small bit of audio that had ONLY the mourning dove hoot in it. Then I opened the Graphic Equalizer tool in Adobe Audition (I still use version 3, but Audition is also part of Adobe CC – Adobe Audition CC [Digital Membership]). While listening to the hooting on a loop, I just started dragging down sliders (each slider is set to a specific frequency). If it didn’t silence the bird, I reset the sliders and tried the next one. It only took me about 10 seconds to locate the right frequency, which happened to be 500 Hz.
Awesome. Now that I knew that this particular mourning dove hooted at 500 Hz, I went back to the audio with both the voice AND the bird hooting in it, and highlighted that section. Then I just opened the Graphic Equalizer and started moving the slider at 500 Hz down, which turns down the volume at just that frequency. Now voices also produce sound at 500 Hz, so it I turned things down too much, the voice would also be affected. But in this case, by the time I moved the slider down enough to get rid of the dove, the voice still sounded fine. It probably helped that it was a female voice.
And the bird was gone! the entire process took about 60 seconds, which is a lot less time than it would have taken me to re-record the voice.
So the next time you have a bird outside your window threatening to ruin your recording session, remember this method. It might save you time and money. Of course, you could always build you own vocal isolation booth to record in. But that’s another topic altogether.
20% Off Acoustic Fields Acoustic Foam Until Saturday, May 24th
[The sale from 2014 is now over. That obviously does not mean it isn’t worth the regular cost. Far from it. I would go so far as to say the piece of your home studio budget currently dedicate to your next microphone should instead go to acoustic room treatment instead (unless your room is already treated.]
If you’re ready to get yourself out of your closet (folks often use closets for makeshift recording booths), get your microphone out of the box or other foam thing people sometimes stuff them in, get out from under the covers (yup – people do that to:)), and/or stop having to set up and move bulky baffles on extra mic stands, etc., check out all the information about this amazing foam by CLICKING HERE to be taken to the Acoustic Fields web site.
Hear Some Audio Samples for Yourself
I do not affiliate myself with any product that I don’t personally use and believe in. And to be honest, I was skeptical about this foam. So we tested it thoroughly in my home studio, which is a converted bedroom like so many folks have. You can read about my tests and hear “before-and-after” audio samples in my post Improve The Quality Of The Audio You Record At Home – Tip 6: Acoustic Foam. We were blown away by the results. All the room echo and reverb was gone from our vocal recordings. This allowed us to back off the mic by a few inches, which reduces p-pops (plosives) by a lot, which translates to spending much less time editing a voice recording! It also allowed me to use the “omnidirectional” setting on my Rode NT2-A microphone, which is impossible without room treatment because it makes the echo problem much worse! But omni mics do not have the “proximity effect” that cardioid mics do, which means less low frequency build-up when the mic is close to your mouth. That translates into even fewer p-pops! AND it allows me to get very close to the mic, if I want to create a more intimate vocal sound, without worrying about p-pops. So awesome!
Check it out for yourself! Acoustic Fields offers a 30-day money-back guarantee, so there’s nothing to lose. Just click the button below to find out more and to get some for yourself.
Improve The Quality Of The Audio You Record At Home – Tip 6: Acoustic Treatment
We’ve been doing a series of posts over the last 5 weeks – giving you tips on how to improve the quality of the audio you record in your home studio. The first of the series is here: Improve The Quality Of The Audio You Record At Home – Tip 1.
The first 4 tips were all about technique – ways to immediately improve your audio without having to buy or build anything. A huge majority of people recording in home studios using converted bedrooms and don’t use any acoustic treatment in their rooms. I’ve recorded this way for over 10 years. The problem with doing it this way is that the rooms in our houses have notoriously bad acoustics – making your audio sound reverb-y and echo-y.
So the first 4 tips in this series showed you how to reduce that bad room sound in your recordings immediately, without having to buy or build anything. Then last week, week 5, we talked about microphones – how no matter what mic you currently use, you can almost certainly improve your audio by upgrading to a different mic without having to spend a lot of money – in fact most can do this for $100 or less.
The Best For Last
In this week’s tip I will share something that has completely changed my life (yeah, sounds dramatic but it’s true). II put acoustic foam on my walls that just about totally eliminates that bad, echo-y room sound!
NOTE: This final tip – though it is super helpful in a home studio – is not strictly necessary to get professional sounding audio. I recorded everything for my voice-over and music careers in this same studio with only tips 1-through-5 for several years. But if you CAN afford to do it, make it happen ASAP.
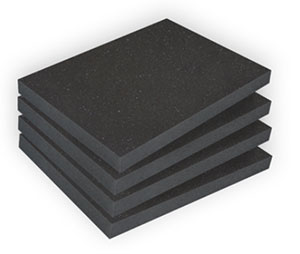
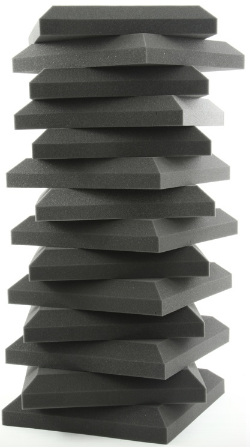
There are several types of acoustic foam that you can use to treat your room with. Auralex is probably the most popular manufacturer, and they have several packages to choose from. I went with a less popular (but a bit more expensive) brand called “Acoustic Fields.”
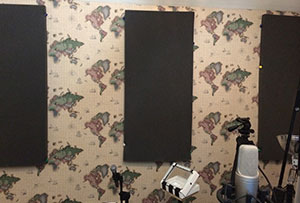
Regardless of the brand you choose, You’ll want to cover up a pretty fair percentage of the walls in your recording room. Look at the picture at the top of the page to get an idea of how much foam I have on my walls. I put foam starting at about my waist level and going up to the top of the wall.
Overall, I’d say about 20 to 25 percent of the walls have foam on them. You can probably get by with less than that if you place them on the wall opposite where you face when you record, and also on the wall behind your normal recording position.
I recommend starting with about one pack of 14 of the Auralex 1-foot square panels. then if you need more, you can add panels until those echoes are tamed.
Once some of this foam is on your walls, it absorbs the bad room reflections without sucking the life out of the sound of your voice, as is the case so often with other room treatments.
Our Tests With The Foam
Before putting any foam up on the walls in my converted bedroom studio, we wanted to do some before and after tests to make sure it would truly make a difference. So my wife (Lisa, fellow voice-over artist and singer) and I did a series of male and female vocal recordings – spoken, shouted and sung – with no foam on the walls.
Anyway – the tests. After recording samples with no acoustic treatment on the walls, we basically covered the walls with foam, leaving no more than a couple of inches between panels. Then we recorded the same samples. We – were – blown away! There wasn’t even a hint of room sound after the foam went up.
Next, we removed every other panel to find out how much treatment was enough. It is possible to overdo it. Well, it sounded great with no hint of room sound at all. Removing every other panel opened up the sound slightly as well —- “letting the audio breathe a little” is probably the best way to put it.
Below is a bit of the before and after audio. The samples were recorded 18 inches from the microphone to maximize the effects. The shouted phrases were also chosen to send a quick loud vocal through the room. This song for the singing sample was chosen for the same reason, AND the fact that it’s in the public domain. Also, the before and after samples have been normalized to be the same volume to eliminate loudness as a factor. Though the difference is clear listening on your speakers, to hear how truly dramatic the difference is, try listening with headphones;).
Before
Male “Before”
Female “Before”
After – WITH The Foam On The Walls
Male “After”
Female “After”
Close Voice Over Samples
The above audio was used for putting the foam through a tough test of absorbing the worst reflections the room could generate – recorded 18 inches away from the microphone. As we know from Tip #1 in this series, recording far away from a microphone in a room with poor acoustics gives you a LOT of room sound. So if we have no treatment on the walls, we need to get very close to the mic. Most people aren’t going to record from 18 inches away, so the above is maybe not your typical use.
So we recorded fairly close to the microphone (about 6 or 7 inches away) using the foam, and the “omnidirectional setting” on the mic (which we couldn’t use pre-foam due to how much extra room sound that pattern picks up) to demonstrate how good the foam allows our voices to sound now.
Male Voiceover With Omni Setting and Foam on Walls
Female Voiceover With Omni Setting and Foam on Walls
More Testing
After we conducted the above tests, we removed all the foam panels and decided to test the foam against another product, which purports to remove poor room acoustics in vocal recording. It fully encompasses a microphone with acoustic foam – you stick you microphone inside of it. Our goal was to play each sample in headphones, and NOT tell the person listening which sample was being played. In other words, it was a blind test.
We both chose the wall treatment foam as by far the best. In fact, not only did the other product not even eliminate the bad room sound despite completely encompassing the microphone. It actually made our voices sound worse – all muffled and unnatural.
The audio recorded with acoustic foam on the walls, on the other hand, sounded fantastic; no room sound and it actually made our voices sound better than usual. What was really happening was not that the foam “imparted” anything extra to the recordings, but rather it absorbed the undesirable room echoes and what remained was ONLY what should be there – our natural voices – with nuances and polish like we’d never heard.
Life Changing? Really?
So how did this “change my life?” Well, for one thing it will cut my production time by more than half of what it was. Without the foam, in order to reduce the amount of room sound in your recording, you have to get very close to the microphone (that was tip #1 in our series). But that results in a lot of p-pops, which have to be edited out (that was tip #5) after the fact. At least half of my vocal recording production time was devoted to editing out the p-pops! But now I don’t have to get close to the mic, so there are no p-pops.
Just that alone would have been awesome. But more than that, our voices sound better than ever. And we don’t have to fight our room anymore. We don’t have to set up bulky baffles or stuff the mic into anything. We don’t have to go into the closet. We get to use the room! Also, I can now use the omnidirectional and figure-8 settings on my microphone, which is pretty much impossible in a bad-sounding room because those settings make room sound even worse. This means we can record small vocal groups (try fitting THEM into a closet!), podcasts with multiple people using a single mic, and a lot of other things that were simply impossible in a bad-sounding room if you wanted the audio to sound professional.
So the final tip in the series is “try the new acoustic foam from Acoustic Fields.” It will basically make it unnecessary to employ any of the usual counter-measures to fight the room sound in home studios, making it easier and faster to produce great-sounding voice recordings.
Here is how to get started
Like I said, there are several brands of acoustic absorption foam. But one of the most popular and easily available is Auralex. Below (on the left) is a package of their 1-foot square panels to get you started:
Yes, there is a cost involved here – an investment really. Consider this. Even the most expensive microphones will sound bad if used in a room with bad acoustics without applying tips 1-5. Two very popular vocal mics are the Neumann TLM-103 and the Sennheiser MKH 416 shotgun mic. These cost $1,100 and $1,000 respectively. If you are serious about a career in voice overs, I recommend treating your room BEFORE you purchase that expensive microphone. You might find that a much less expensive microphone is all you need, once your room is not adding echo-y, reverb-y ickiness to your voice.
Join Us For More Home Recording Awesomeness
Att Home Brew Audio, we are trying bring professional audio recording into reach for regular, non-engineer and “techy” folks. To get you started producing professional sounding audio from your house, see the picture below to get access to the first 6 lessons in our tutorial course “The Newbies Guide To Audio Recording Awesomeness.” In this course, you will learn how to set up and start using your home recording studio for a budget of about five bucks (or less) in about 30 minutes.