 Trying to record an audiobook for ACX? Are you confused or frustrated by the “ACX Audio Submission Requirements”? You might wonder “why do I keep failing the ACX Check?” You are not alone!
ACX is Amazon’s marketplace for audiobooks. If you’re an author, you can find someone on ACX to record your book so you can have an audiobook version of it. If you are a voice over actor, you can sign up to be the one recording those audiobooks and getting paid for it. Also, if you’ve already created an audiobook, you can sell it on ACX.
Those Confusing ACX Audio Requirements
This article is for the folks trying to record an audiobook for ACX. It seems simple enough. Get a microphone. Attach it to your computer. Download the free Audacity recording software (see our course – The Newbies guide To Audio Recording Awesomenss 1 for more on Audacity). Record the book.
But then you try to submit the audio to ACX and you are told it doesn’t meet their requirements. Now what? When you go to their page on what those requirements are, you’re presented with a bunch of technical jargon that may not make much (or any) sense to you whatsoever. The requirements are:
- 192 kbps or higher MP3, constant bit rate (CBR) at 44.1 kHz
- Be between -23dB and -18dB RMS
- No peak values can exceed -3dBs
- Have a maximum -60dB noise floor
Gah!! What? OK, if you are into audio recording, or are a recording engineer, you might know what all this means. But for the typical non-audio person, this can be super confusing. So let’s just take these one by one.
The MP3 Stuff
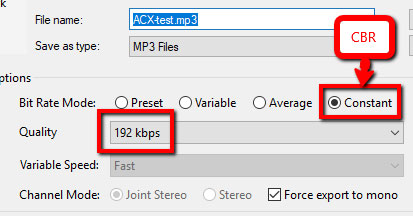 Any program that allows you to export or save audio as an MP3 will have these options available for you to just put a check mark in. So you absolutely do not need to understand what it all means. Just make sure you choose these.
The only exception is the “44.1 KHz” thing, which needs to set BEFORE you record. In Audacity, it’s the default. So you don’t really need to worry about it. See the pic on the right for the other settings in Audacity.
Being between -23dB and -18dB RMS
This is average volume. Seems simple when you say it like that, right? And it makes sense to want the average volume to be in a certain range so you can have consistency. So what does this particular set of numbers and letters mean?
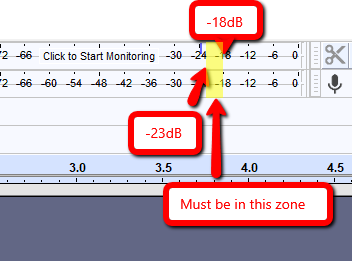 First, let me clarify that digital audio is measured in negative numbers. One of the many weird things about it. Remember back to school math when you did negative numbers? It’s like that. For audio, 0dB (dB = “decibels”) is the maximum. It’s the ceiling. Anything higher than that (anything in positive numbers) gets distorted and sounds awful. So audio at, say, -2dB is much LOUDER than audio at -18dB. Once you understand that, things get easier.
Also, “RMS” (stands for root mean square) is just one of the ways average audio levels are calculated. Don’t worry about what it means.
So ACX audio must have an average level at least -23dB. But it cannot be louder than -18dB. How do you get your average volume in the zone?
Well, there are several ways. Tools you can use include a combination of Normalization and Amplify tools in Audacity. But to really understand this, it helps to think about your school years again.
Remember how to get an average? If you have 5 numbers, say 7, 3, 8, 7, and 6. You find the average by first adding them up 7+3+8+7+6 = 31. Then you just divide that total by however many numbers there are. There are 5 numbers. So 31 divided by 5 gives us an average of 6.2.
If someone told you that you needed an average of between 7 and 9, what could you do? Well, how about making one or two of those numbers bigger? If you change the 3 to an 11 (so you have 7, 11, 8, 7, and 6), your average goes up to 7.8. And that would be great. We’re between 7 and 9.
With your audio loudness, if you find out that the average level is too low (say, -25dB), you would know that you need some higher numbers, just like in our above example. You do that by turning up some or all of the audio. In Audacity, you can do this using the “Amplify” control. It might take some trial and error. And even if you get your average in between -23dB and -18dB, you might then run into the problem of having a peak value that is too loud somewhere, which leads us to…
Peaks Cannot Exceed -3dB
Let’s go back to our 5-number average calculation from above. Just for fun, we said the average of our 5 numbers needed to be between 7 and 9. And we adjusted numbers higher or lower until we got an average into the zone between 7-9. But what if I ALSO told you that none of the 5 numbers could be higher than 10? We would have passed the test for AVERAGE value. But we would fail on PEAK volume because one of the numbers (the 11) was louder than our maximum of 10.
What do we do then? Well it’s a bit more trial and error. You need to find the peaks in your audio that are louder than -3dB (between -3dB and 0dB), and turn THOSE down. If you were doing that manually, you’d go through the audio waveform and see where it got loud. The waveform would be quite close to the edge.
Then you could just select that section and lower the volume using the “Amplify” effect. Do this for every peak that is louder than -3dB, and you will pass the peaks test for ACX. However, by lowering volume in those areas, you will lower the overall average volume of the whole thing! It would be like making some of our 5 numbers smaller. So now what?
Run the ACX Check again and see if your average still passes. If it does, that’s terrific. Your average AND peak values now pass.
If the average volume is too low now though, you’ll need to raise the volume of all your audio. So highlight all your speaking parts and raise the level using the Amplify effect again. Just make sure you don’t raise it so high that something pokes above -3dB. See what I mean by trial and error?
Have a Maximum -60dB Noise Floor
Again, this is not as confusing as it sounds. All it means is that the quiet parts where you’re not talking (or breathing) – the spaces between the phrases – need to be really quiet. They don’t want a lot of background hiss, or computer fan noise, etc. And there obviously should not be any barking dogs, purring cats, lawn mowers, leaf blowers, etc.
The best way to do this is to make sure you have a quiet environment when you record. It doesn’t have to be dead-silent. But it does have to be quieter than -60dB.
For most of us recording at home, there will be SOME noise either from your mic (especially USB mics) or your computer or the A/C, etc. I highly recommend using noise reduction to deal with that. See our post New Noise Reduction Tool In Audacity for how to do this. There’s a video on that page too.
After running noise reduction, take a listen to your audio to make sure it still sounds good. If you overdo the amount of noise reduction you apply, or if the noise was too loud in relation to your voice, then your audio might sound weird afterward. If that happens, Undo the noise reduction and run it again, lowering the number in the Noise Reduction amount box in Audacity. This probably won’t be an issue as long as the noise was low enough to start with.
Putting it All Together
There is a free plugin for Audacity that you can use to check and see if your audio passes all the tests. It’s called ACX Check. You can find it here. Instructions for installing Audacity plugins are here.
Regardless of all these requirements, I highly recommend you not let them affect your performance while recording. If you think too much about things like that, it will be hard to focus on your performance. So just do a level check before you start, to make sure your audio is loud enough but is not too loud (goes beyond the edges). Then just concentrate on your performance until you are done. Then AFTER you’re done recording, use the above advice to make sure your audio meets ACX requirements.
I’ll put together more stuff in the coming days here to help give you some details on how to do some of this stuff. But hopefully this post will help you to at least understand all the ACX stuff a little better.
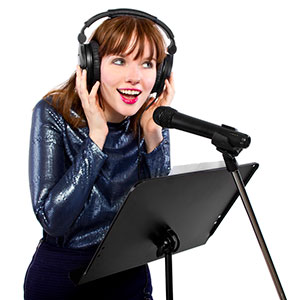 Voice over recording equipment is more powerful and more affordable than ever before in 2017. Unlike the needs for musicians, voice over actors need very little in order to produce professional sounding results from their
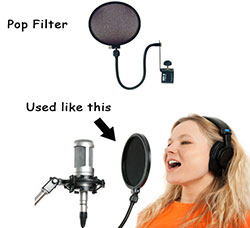
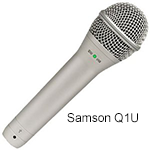
 It’s easy to create a voice recording studio in a bedroom at home in 2019. Using a computer and just a couple other small bits of gear, you can easily record professional sounding voice overs at home.
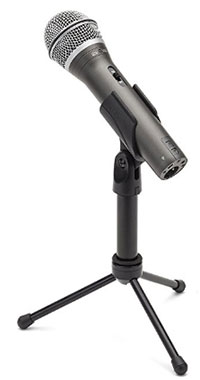
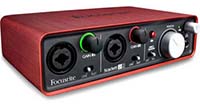

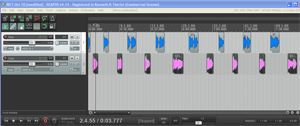 If you have ever been asked to record and edit a conversation between two people, say, for a voice over job, then you are probably aware of the logistical problems this can cause. The client usually has visions of just getting the two people together around a microphone and simply reading their parts at the appropriate time. Sure, that would be OK if you always had both people available at the same time, along with two great microphones, a large enough space for both people to occupy at the same time, etc. But these conditions are not always available to us.
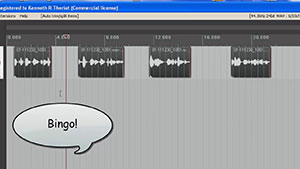 By the way, we’ll be using the excellent audio recording software called
 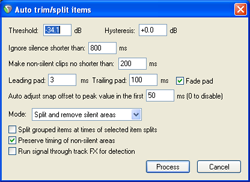 The next bit of time-saving automation was the Auto Trim/Split function. What this does is allow you to slice one continuous audio file into several separate audio items in a track based on when there is silence and when there is speaking going on. This was huge! I had been slicing (using the “S” keyboard shortcut) just before and just after each phrase, and then dragging the edges of the resulting clipped audio item in to get rid of the silence. That was 4 different operations (2 slices and 2 drags) for every phrase! Multiply that by dozens of phrases for each voice and you have a LOT of work. But with Auto Trim/Split, you select the entire long audio item in the track and hit one keyboard shortcut (you can set your own – mine is “ctrl+~”) and boom! Every phrase becomes its own item, perfectly trimmed on either side. See the picture at the top of the article where this has been done to each voice). That one discovery saved me about 20 minutes per voice!
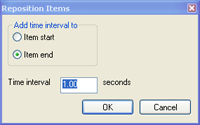 The other thing that was taking a long time was spacing each voice, alternating boy-girl-boy-girl, with exactly 3 seconds between each phrase. As I mentioned earlier I was doing this manually until I discovered the Reposition Items tool in Reaper. [Update: Reposition Selected Items (as it is now called) is not part of the native Reaper set of tools. You need the free extension set – SWS extensions – by just going here: