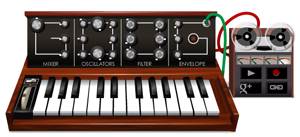
 If you’ve seen Google today (May 23rd, 2012) you’ll have noticed that it is a keyboard with wires and some buttons. What you may not know is that this is a doodle of a Moog synthesizer, which was one of the first electronic musical instruments. Robert Moog is widely considered to be the inventor of the synthesizer, which is the foundation for the virtual instruments of today. You can read about Moog (pronounced like the magazine “Vogue”) at the link from Google’s doodle here.
You can play Google’s doodle version of the synthesizer with your computer keyboard not only by clicking on the piano-type keys on the screen, but also by adjusting a whole slew of synthesizer parameters. Just lick and drag on any of the knobs and you can change the sounds, volumes, mix, etc. So that’s really cool right there.
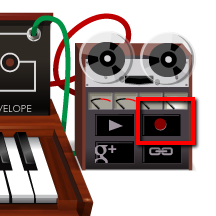 But how does this doodle relate to audio recording? Because it is a 4-track multi-track recorder, that’s why! ON the right of the synth (the thing with the keyboard and buttons) is an old-fashioned reel-to-reel tape recorder with 4 needle-type meters (one for each track). Just click on the 1st needle meter, click the red “record” button, and play you some notes on the synthesizer. Then hit “stop.” Then hit the “play” button and listen to your recording. Now click on the 2nd needle meter (arming it for recording), and record a 2nd part as you listen to the first thing you just recorded. When you listen to the playback this time you’ll hear BOTH of the parts you just recorded playing together. Change some of the sounds with the knobs and repeat the process for tracks 3 and 4, and voila! You’ve created a 4-track recording. You “over-dubbed” the 2nd, 3rd and 4th tracks.
This is a pretty incredible doodle, not only showing you some music and recording history, but also teaching you some core recording concepts such as multi-track recording and over-dubbing. And of course there is just the fact that it’s just plain fun to play with. I suspect lot of people will be spending a huge amount of time on a Google search page doing little search and lots of playing today.
Go check it out if you haven’t seen it yet: https://www.google.com/
virtual instruments
Audio Fanzine Picks The Top 10 Products of Musikmesse 2012
 Musikmesse is a huge fair/expo/trade-show focusing on all things to do with music, from creating it to recording or performing it. This year’s Musikmesse was held in Frankfurt, Germany and just wrapped. The folks at Audio Fanzine (an awesome site for folks with a home recording studio) had boots on the ground for the festivities and have compiled a list of the top 10 products on exhibit this year.
Among the winners on this list are:
Alesis IO Mix – This is my favorite of their picks; a piece of hardware you insert your iPad into, turning it into a 4-track portable studio with mic inputs, mixer, and everything. This thing is unbelievable. I want one NOW. Unfortunately, it isn’t available to the public yet. but be sure to check back here often because I will let you know when you can get one for yourself.
The other products on their list are:
- Rotodrum
- Seelake AudioStation
- Rupert Neve 5059 Satellite
- Steinberg Nuendo Live
- Clavia Nord Electro 4D
- Zynaptiq Unveil
- Jupiter 50
- Bogner Pedals
- Pioneer RMX 1000
Check out the details about htese cool products here: http://en.audiofanzine.com/audio-music-gear/editorial/articles/best-of-musikmesse-2012.html
Digital Performer 8 Will Work on Windows
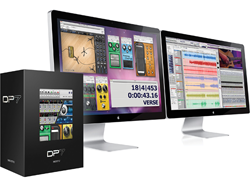 Mark of the Unicorn (MOTU) Digital Performer, one of the top audio recording workstation software programs in the industry, has traditionally only been available for the Mac. But the next incarnation, Digital Performer 8, will be available for Windows also, both 32 and 64-bit versions. This is fabulous news for PC owners who have wanted to get in on the MOTU magic.
DP 8 was announced at the NAMM trade show (the National Association of Music Merchants) in Januar, 2012. The release date was said to be “Spring.” Well the blue bonnets are in full bloom here in Texas and as of today (March 21st), it is not available to the general public yet. Sigh. Well, it’s available now! Click Here to find out more or buy your own copy!
Features
There are tons of new features in DP8, including a new thing called Punch Guard, which records 4 seconds of audio both before and after you hit the record button. This is designed to make you punch-ins fit in without cutting off any of the audio either of the already-recorded stuff, or of the thing you’re punching in.
In addition, there are 15 new plug-ins including guitar amp models, pedals, multi-band EQ, a kick-drum enhancer, and lots more. And of course, it still has the awesome editing, notation, and music-for-film tools that have set DP apart from other DAWs.
Keep your channel tuned to this space for updates on when Digital Performer 8 will be available. DP8 is here now, and for $499 it can be yours. Click Here to get it. If you already have an earlier version, look for special upgrade pricing.
Yay for multi-platform audio recording software!
Ken
Guitar Recordings For That Thing You Do Cover – Line 6 POD Farm
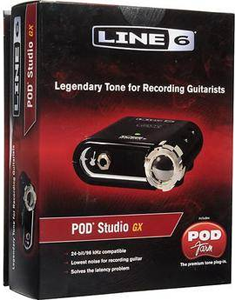 After putting up the audio and then the video for our cover recording of That Thing You Do, which are in the post Cover of “That Thing You Do” – Record a Rock Song on Your Computer, I have been asked numerous times about how I recorded the guitar parts. Did I use amps? If so, what amps did I use, and how did I mic them? The answer to whether or not I used an amp is “nope.” At least I didn’t use a physical guitar amplifier. It was all virtual amps from s software program called Pod Farm by Line 6. I used the hardware/software combination called the POD Studio GX.
All you do is hook up the little interface box like the one on the box to the left, to your computer via USB. Then you install the POD Farm software that comes with it, and you have access to a large variety of different guitar and bass amplifier models.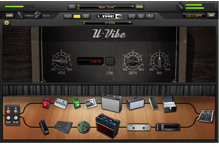 See the picture on the right for an example. When you select an amplifier model, POD Farm loads a picture of that amplifier, along with the controls for it and a stomp box effects chain into the screen. Line 6 describes the selection as containing and arsenal of vintage and modern amps, cabs, studio-standard effects, classic stompboxes and preamps.
So the way I used POD Farm to record the cover of That Thing You Do was to plug my guitar (a Carvin DC200) into the POD Studio interface box, and then launch POD Farm. In order to get that jangly beatle-esque sound, I selected the 1967 Class A-30 Top Boost as my amplifier, and a 2×12 1967 Class A-30 as the cab model.
 So how did I know to choose that amp and cab combination? The most common way to do it is to just experiment with all the different choices of guitar sounds you have available to you in POD Farm. But beware this method. If you’re anything like me you’ll spend all kinds of time playing with all the different sounds, and before you know it, you’ve blown 2 hours with a silly grin on your face. At least that is how my wife described my experience.
But ultimately I found the right tone by going to another Line 6 site called GuitarPort On-line, or GPO for short. This site, www.guitarport.com is pretty awesome. Not only do they have hundreds of lessons and guitar tabs for tons of popular songs, they also have performances for these songs using POD Farm tones, and links to download the exact tones used in their recordings right onto your computer where you can load them up in POD Farm. One little caveat here is that in order to listen to the performances and download the tones, you’ll need a version of POD Farm’s predecessor, called GearBox, which is free for download here: http://line6.com/software/. Just select “Gearbox” from the “all software” drop-down menu. NOTE: The link to download Gearbox directly from the GuitarPort site is not working as of Feb 6th, 2012. You definitely have to get it from the Line 6 link above.
Anyway, on the GuitarPort site, I found that they had a lesson/recording of All My Lovin’ by the Beatles. So I downloaded the tone for that with GearBox and then loaded up in POD Farm. Presto! Instant jangly 60s guitar sound. Very cool indeed.
Since I was recording in Reaper software, I set the audio device to the POD Studio interface, loaded up my All My Lovin’ tone pushed the “record” button, and simply played the guitar. I did that for tree guitar tracks in Reaper, one for the guitar on the left, one for the guitar on the right (the one that plays the little run-riff on the first parts of the verses), and one for the lead guitar.
Next I did the same basic (no pun intended) thing with the bass guitar. I plugged my Samick bass into the POD Studio interface, dialed up the Brit Pop 101 bass sound in POD Farm and did the same thing as with the guitars to create a bass track.
So that is how the guitars and bass were recorded for the That Thing You Do cover. I guarantee that if you are a guitar player, you will truly dig the Line 6 POD Farm, which now allows you to use any ASIO interface. That means you don’t have to have a Line 6 interface anymore to use the software, though they still recommend that you do. Plus, the interface boxes all come with POD Farm already bundled for you convenience.
So get yourself some POD Farm, but be warned that it can be habit-forming.
Cheers!
Ken
Cover of "That Thing You Do" – Record a Rock Song on Your Computer
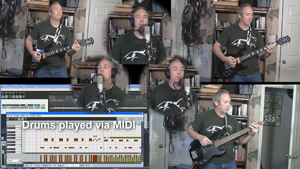 I just recorded a cover of the song, That Thing You Do, (written by Adam Schlesinger). And I recorded it from scratch on my computer-based home recording studio right here in a spare bedroom. The band consisted of me, me, me, me, me and me:-P. The reason I did it, besides just loving the song and always wanting to, was to demonstrate what kind of thing can be done in a very modest home recording studio.
Before I talk about how I did it and what equipment I used, take a listen to how it came out!
I intend to follow up with a more complete step-by-step how-to, along with a video tutorial later this week. But here are the basics.
Sound Sources
- Voices – All me (a twisted version of narcissism?). I double-tracked the lead vocal to get that Beatlesque sound. I also sang the two harmony parts and double-tracked each of them. So there are 6 voice tracks in all.
- Guitars – Carvin DC200, 1985 model. I used this same guitar for both guitar parts. If I had vintage Rickenbackers I would have used those, but you work with what you’ve got.
- Bass – A Samick LB-11 4-string bass guitar I bought used in 1995.
- Drums – All sampled drum sounds (meaning “I don’t have a drum kit”) from an acoustic kit in the virtual instrument software package called StormDrum, by EastWest.
How Was It Recorded?
I used Reaper software to record it all. I started with the drum track. I created a MIDI track and loaded StormDrum onto it as a virtual instrument. Then I listened very carefully to the original recording of the song from the movie soundtrack. That allowed me to build the drum part hit-by-hit using the MIDI editor in Reaper.
Next, I recorded the bass track by plugging my Samick into a Line 6 POD Studio GX, which is a little box you can plug electric guitars and basses into. The POD then attaches to your computer via USB, and you use the Line 6 software to choose amps and effects to get the right sound.
Then I recorded the electric guitar parts the same way as the bass. I recorded 2 parts/tracks, one panned to the left and played as the “rhythm guitar” part. The other guitar was panned to the right and played with the little riff happening during the verses.
And Finally…
Last but not least, I recorded the lead vocal. As I mentioned, I sang it once on one track, and then recorded it again (listening to the 1st in the headphones) on a second track to get that double-tracked sound. I did the same thing with the low harmony part and panned it to the left, and the high harmony part, panned to the right. All vocals were recorded with the Rode NT2-A microphone hooked up to the computer via a USB audio interface – the Focusrite Scarlett 2i2 interface box.
You can get started with a bundle I created for B&H Audio called The Home Recording Musician’s Starter Kit. CLICK HERE for more details on that.
Then I mixed and panned everything to make sure the sounds could all be heard and rendered (mixed down) the result into one audio file, which is what you heard above.
Check back here in a few days and you should find a bit more detail and a video.
Now go forth and record your own pop or rock songs!
Cheers,
Ken
