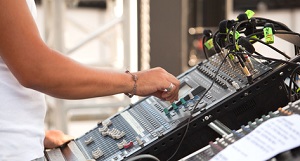
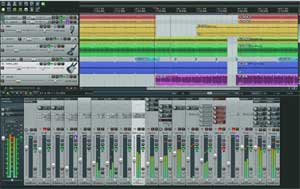
When doing multi-track music recording, you obviously must mix all the instruments and voices together at the end so that everything is heard and plays well together. The challenge in mixing is to make sure many different sounds are audible in the right context and in the correct space – both left-to-right as well as front-to-back. One common rule-of-thumb is “never mix with headphones.” More specifically, it means you should not mix with ONLY headphones. You get a much more accurate picture (odd word to use for audio, right?) of what’s going on if you can hear the mix through loudspeakers (monitors), so the sound is coming through the air before it hits your ears.
However, if your space – typically a converted bedroom when we are talking about home recording studios – is less than ideal, mixing with loudspeakers creates its own problems. Reflections off the walls, ceiling, floor, etc. bounce around and create inaccuracies in what you ultimately hear (constructive and destructive wave interference are the culprits, in case you remember your wave mechanics from school;)). So there are times when it is advisable to do your mixing with both headphones and with loudspeakers.
Björgvin Benediktsson has some tips for this in his post over at Audio Issues. Check them out here: http://www.audio-issues.com/music-mixing/mixing-with-headphones-use-this-one-trick-for-better-translation/#axzz2ceYlFcI2
multi-track recording
Auxiliary Sends For Effects
 I wrote about this topic once before in the post – Using Auxiliary Sends For Effects In Pro Tools. That article references a video from Wink Sound showing you how to use auxiliary sends in Pro Tools to process effects on a bass guitar track – as opposed to simply adding (instantiating is the word usually used here, meaning creating an “instance” of an effect) each effect directly onto the bass track.
Well, I wanted to add some things to what I said in that article. First, I stated that the main reason for using an auxiliary send was to save processing power on your computer. Though this is still a major benefit if you have multiple tracks all dipping their buckets (my metaphor) into the same effects (say, reverb) trough (a metaphor for the auxiliary track with the effect on it). However, that is not the only benefit of using an auxiliary send/track for processing some effects.
As shown in the example in the video, the main benefit is the extra control you have by processing the effect independently of the dry (meaning with no effects) audio from the bass track. In the video, Mike creates a new track – the auxiliary track – and puts a chorus effect on it. Then he uses something called a “send,” on the bass track, which basically just taps/siphons/splits off the audio signal so you can send it somewhere else, while the main bass audio continues to the master output as normal. The “send” is routed to the auxiliary track to be treated by the chorus effect.
So far, there isn’t much of an advantage to doing this as opposed to just sticking (instantiating) the chorus effect on the bass track, other than from an organization standpoint where you have both a dry and a wet signal to work with. But then Mike talks about adding an EQ to the aux track (which already has a chorus effect on it) in order to filter the chorus so that the chorus only happens in a certain frequency range. You wouldn’t be able to do that if you just slapped both the EQ and the chorus effects onto the bass track.
So to sum up ((ha! a little send/bus/aux pun for you:)), using a “send” from an audio track to process effects has multiple advantages. It allows you to create a common effect track that you can send multiple tracks in order to share the same effect (BTW, you use a “bus,” as explained in the video, to accept multiple track sends for summing. Tracks, like an auxiliary track, cannot usually accept inputs from more than one source. So you set that single source as the bus). And it also allows you the flexibility to process effects differently than you could if they were all just plugged into (instantiated) the audio track.
Below is that video I keep talking about. It uses Pro Tools, but the steps are the same in any digital audio workstation (DAW). However, things can get more flexible, and consequently more complex, in computer mixers like you have in DAWs. For example, in Reaper, tracks can also act as busses! That means tracks CAN accept multiple sends from other tracks. So you can set up a track as an effects bus, putting the effects on that track and sort of combining the aux and bus into one. So you wouldn’t have to route the send from and audio track first to a bus, and then to the aux track. Yeah, I know. That’s a bit confusing, even to me, to read it. I’ll write an article just on sends busses and auxiliary tracks to help it make sense.
Anyway, here is the video. I promise this time:).
Cheers!
Creating Recordings With More Space and Depth
 One major goal of most audio recording projects is to create a natural sounding product for the listener – in much the same way that video seems to look better to us, less “flat,” when it has more depth and dimension. Note how popular it is to see movies in 3D. But even without 3D movie effects and glasses, film makers started using focus and blur, light and shadow, forced perspective, etc. to help create a more realistic space for the viewer. You can do similar things in audio.
One way this can be done, especially when recording music (since there are usually many sound sources), is to provide the listener with cues that give the audio some space – in multiple dimensions – as they are used to hearing it in real life.
Left-to-right
Most listening devices are stereo or better (surround, for example) these days. So you should take advantage of that. Multi-track recording software (DAWs) allow you to “pan” each track to the left or right by as much as you want. So you can spread things out from left to right to make them sound to the listener like the instruments are spread out as they would be in real life.
Sometimes you might want to widen a single sound. For example, a piano almost always sounds best when it is recorded in stereo. The instrument is large and wide in real life and people typically expect to hear it that way on a recording too. But what if you only have a mono recording of a piano? How can you widen it? Well, you can use a technique that plays a trick on the listener’s brain – called the Haas Effect. You can read more detail about this in our post The Haas Effect, but basically you can make a copy of a mono track, delay it slightly in time, and then pan both versions apart.
Of course certain things may be recorded in stereo – either with two mics or a stereo mic – and others in mono. Then you space things out across the horizontal spectrum to give them a more natural feel.
Front-to-back
Another thing people are used to is natural reverberation. You may not notice it in real life, when speaking to someone. But if somehow the voice of the person your were talking to were to suddenly lose all room reverberation (which is what happens when the sound bounces off the walls, ceilings, and everything around it), it would sound very odd. So in your recordings, in order to make something sound more natural (assuming that’s what you want – which you may not. For example, some kinds of voice-overs intentionally sound a bit unnatural – deep and in-your-face like it’s coming from inside your brain), it helps to add some front-to-back space using reverb effects. For example, if a voice or other instrument sounds too “up-front,” you can give the illusion of pushing it back and further away by adding some reverb.
Another way to make things sound further away is by turning them down. In real life, things that are farther away have less volume than the same sound up close. This is one of the most basic things you do when mixing sounds together.
Bottom-to-top
This idea may be more applicable to making a music mix sound more full, rather than more natural. But it does help to fill out a sound pallet for a listener. Try to provide sound that covers the frequency spectrum from low/deep sounds like bass guitar, kick drum, tympani, bass fiddle, etc. all the way to high sounds like cymbals, high-hats, tambourines, piccolos, guitars capo’d way up, etc. The middle frequencies can be filled with voices, guitars, pianos, violins, violas, etc.
The way we use this in our music recordings is to listen to a mix and decide if there is a hole somewhere, or if we are missing highs or lows. For example, we were working on a song that had a guitar with no capo, a bass, a bodhran hand drum and a male voice with male harmony. It was decidedly “low-heavy.” That told us we needed to add some higher frequency stuff to help balance it out. So we added a guitar with a capo on the 5th and/or 7th fret, a female harmony, and a tambourine. We might also have added a mandolin, flute, high fiddle, etc. Doing that really helped to provide a full and rich sound that was balanced.
So to sum up, you can really improve your audio recordings by adding more depth and dimension using several pretty common recording techniques.
Hope that gives you some tips to make your audio sound awesome!
The Top 18 Best DAWs – Digital Audio Workstations Or Multi-Track Recording Software

Audiofanzine just listed the top 18 digital audio workstations (DAWs), otherwise known by the names audio/MIDI sequencers, multi-track recording software, etc. This is always an interesting thing. Not only do people love “top” lists, but I like to see whether the software I use s my primary DAW, Reaper, is on the list. It is:). Why wouldn’t it be?
But it’s also cool to check out what else is on the list. Who knows? You may see something you’ve not heard of before and want to try it.
I don’t know why they chose 18 as their “top” number. Why not top 10? My guess is that there are too many good programs out there that are just as good as many of the others.
One note about their list is that they focused only on music production programs, as opposed to the more expensive broadcast-focused ones like Nuendo (1,700 bucks), Sequoia (2, 980 bucks), and Pyramix (2,962 bucks).
Reaper is number 11 on their list, interestingly right after Pro Tools at number 10. I say that’s interesting because Pro Tools is widely regarded to be the industry standard. But lists like this are subjective for sure. They (Audiofanzine) even admit this right up front. Maybe that’s why they chose Sony Acid as number 1. I’m thinking it’s possible the list may not even be in rank order. Maybe they just randomly through up the top 18 in any order.
Anyway, here is the page with the list and descriptions of each program: http://en.audiofanzine.com/plugin-sequencer/editorial/articles/the-best-daws.html
As I said, sequencers/DAWs are pretty personal. But it may be worth trying a few to see which ones you like best.
Video Tutorial – FL Studio Appegiator
There used to be a nice simple 4-channel digital drum machine program, released in 1998, called Fruity Loops. It allowed you to create sequenced drum and rhythm patterns, doing cool things like matching tempos of drum loops that you imported to the program. Well, a lot of things have changed in those 15 years, and one of them is that Fruity Loops has morphed into a pretty feature-packed full digital audio workstation (DAW) called FL Studio, used a lot by electronic musicians and DJs.
Below is a video by David Crandall showing you how to use the arpeggiator tool in FL Studio: