Here is great video – another one from WinkSound – about organizing all your tracks in preparation for mixdown. Remember, mixing down your tracks is one of three major steps/jobs in a recording project. Recording/tracking is the first step, then comes mixing, and finally there is mastering. See our post here: Recording Engineer, Mix Engineer and Mastering Engineer – Oh My for a reminder of that.
Anyway, when you have a lot of tracks to mix down, usually in a music project (not so much with a voice-over project usually), you need to organize things a bit before you dive into the mixing job. In this video, Michael White shows you how to do just that. This works for any multi-track recording software, Reaper included.
mixing
Fix It In The Mix? That's The Road To Hell
If you ever hear yourself uttering these words – Meh, I’ll just fix it in the mix – as you record something, I want you to stop what you’re doing and ask someone to kick you in the butt. I know, I know – everyone does it. And there are some things that simply cannot be made “right” until they are playing with the other tracks. But what you’re really saying is I know I messed up just now. I can fix it later.
This reminds me of a metaphor from when I used to teach and consult in the quality management field. American quality toast was to burn the toast, and then scrape off the black stuff. This was in comparison to Japanese quality toast, which was to fix the toaster to prevent the problem occurring in the first place. In almost every quality-cost situation, it is better (in terms of less time and money spent) to catch a problem and fix it as soon as humanly possible in the feedback look – with the ideal being to prevent errors and waste altogether. Audio recording is no different. Try to get all your tones recorded and sounding as good as possible BEFORE you start to mix your project.
Here is a little post calling this “the secret weapon of mixing,” written by Joe Gilder. Heed this advice and you shall be happier in your home recording studio.
Read Joe’s post here: http://www.prosoundweb.com/article/in_the_studio_a_secret_weapon_for_full_mixes/
What is a Bus in Audio Recording?
 There is a term in audio recording that is a bit confusing (go figure) to a lot of folks who are not immersed in in the audio or electronics world. Oh, who am I kidding? There are scads of those terms. That is part of the why Home Brew Audio exists – to translate the techno-lingo into the common speech:). But the term I refer to today is “bus”, also sometimes spelled “buss” or mixer bus, though that just confuses the issue even more. But I digress (Really? Me? but that never happens;)).
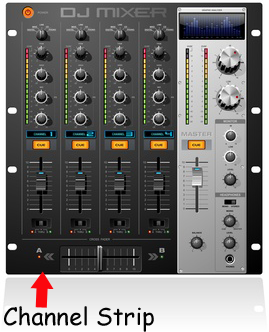
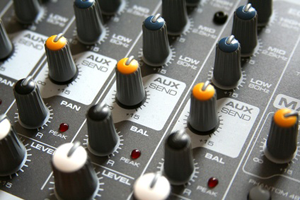
 Anyway, the term, as so many are, is a left-over from the analog days when physical mixers were necessary in audio recording (hint: they are no longer necessary in computer recording). A buss is an output channel on a mixer that has collected all the audio from any channel that is sent to it. For example, If you have a 16-channel mixer, there will be a channel strip for each of those 16 channels. The “master” channel is actually a buss, because it takes the output of all the channels on the mixer and outputs them to your speakers or headphones, etc. All channel strips on mixers are usually sent there by default. But you can also choose other busses to send these channels to. For example, there is usually an auxiliary (often abbreviated as just “aux”) buss knob on each channel strip which lets you send the audio on that channel to the (you guessed it) the auxiliary buss on the mixer. Then the aux buss will output all channels sent to it, and only those channels.
Regardless of how many busses are present on a mixer, there will always be a master-level control somewhere on the board. For example, there will be a “master” strip for the master buss, and there will also be a master Aux section (often not a strip, but a section at the top of the mixing board) with an aux output and input and level control.
 There are other types of busses and even other names for the ones I described. For example, sometimes the aux buss is called the effects buss. But at the end of the day, the only thing you need to know is that a buss combines signals from several other places on a mixing board. We use the same concept on non-physical computer mixers nowadays, which are almost always designed to mirror the way a physical mixer works, though we have a lot more flexibility to create our own virtual busses to create groups, submixes, and any combination of inputs and outputs.
OK Slow Down – What’s a Submix?
You caught me! I just casually used a term like everyone in the world knew what it meant. Mea culpa! I promise to come up with a suitable punishment for myself. But first – the submix thing.
OK, let’s say you have recorded a song with a guitar, a bass, a lead vocal, and 6 harmony tracks (I like to have each harmony part sung twice; so 3 harmony parts will need 6 tracks. I know! Awesome huh?). Then let’s say that I want reverb on all 6 of those vocal harmony tracks. I could go to each track separately, and set up a harmony effect on each one. Well THAT’S tedious! Doing the same thing 6 times. Wouldn’t it be cool if I could just set up the harmony effect once, and have all the harmony tracks share it? Hint: the answer is “yes!” And that’s exactly what you can do with a buss! Just create a buss track, set up a harmony plugin effect on it, and then route the harmony tracks through that buss, and they all share like good little harmonies. And…and (this is the best part) you can control how loud all 6 harmonies are with one volume control! The one on the buss track where they are sharing a reverb (note to the techies – you would want to disable the direct sends from each harmony track to the Master buss first).
What Good Is A Submix?
So now, if you’re listening to the test mix with your wife, and she says (as she always does) “the harmonies are too loud in the mix,” you can nudge them down with one slider/knob instead of trying to adjust the volume on all 6 tracks? One track to rule them all! Now isn’t that useful? It is.
Hopefully this information will allow you to put another seemingly baffling audio term into your vocabulary.
Some Advice on Mixing – Where to Start
Here is an article about mixing, typically a topic more associated with music recording than voice over recording, but a fundamental topic in audio recording if you’re doing music.
However, understanding how to mix and generally play around in multitrack recording software can still be important for certain kinds of voice over jobs. For instance, I do a monthly e-learning voice over job that that has lots of phrases alternating between male and female voices (yeah, me and my wife:), with 3 seconds between them. I use the holy heck out of my mixing/multi-track recording skills to make this workflow fast and easy. For example, I put all the lady parts on one track and all the guy parts on another. Then I split the phrases on each track and color-code them (yes, blue for boys and pink for girls:)). Then I space them out with like 7 seconds between them. Then I off-set one track so I can just select all the parts on one track and drag them up to the top track so that all the parts are on one track. The colors help me make sure it’s boy-girl-boy-girl, etc. Then I simply select all the parts and tell the track I want them spaced exactly 3 seconds apart. Try doing THAT in a plain old editor:).
Anyway, check this article out, even though it’s mostly to do with music. You might learn something applicable to both music and voice over recording.
See the article here:
http://theproaudiofiles.com/mixing-where-do-i-start
Cheers!
Ken
Multitrack Recording Software: How Not to Record Already-Recorded Tracks
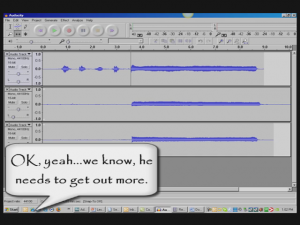
 Multitrack recording software allows you to add tracks to previously-recorded tracks. This is mainly used in music recording where, say, you are a singer and want to record yourself singing harmony with yourself. You’d sing the melody first (usually) on one track. Then you’d open a second track and sing a harmony along with the melody on track 1, which requires you to be able to hear the playback from track one while you record track two. This also applies to adding other instruments to previously-recorded tracks, like adding a lead guitar part to a song, etc.
One thing you need to be sure of when doing multitrack recording is that your speakers need to be turned down or off when you record along with previously recorded tracks (unless you have someone else at the controls and the recording is happening in another room where the speakers can’t be heard). This may sound obvious but it is very easy to forget. If those speakers are audible when you’re recording a harmony or lead guitar track, the audio from those tracks will get recorded right along with the new track.
For example, if you recorded an acoustic guitar part on track 1, then wanted to add a vocal on track 2, your goal is to have each track contain ONLY those two things so that when you’re done, if you listen ONLY to track 2 (muting track 1) you would ONLY hear the vocal, not the guitar. This allows you to mix tracks, adjusting volumes relative to other tracks. However, if the speakers (playing the guitar part) were audible when you were singing that vocal part, track 2 would now have BOTH the vocal AND the guitar (picked up from the speaker) on it when played back by itself. That means that when both tracks are turned up, the guitar would be coming through twice, once from its original track (1), and once from track 2 where it was recorded along with your voice. You don’t want this!
So make absolutely certain your speakers are muted, turned off, unplugged or otherwise made inaudible when adding tracks to your song. Monitor previously recorded tracks with headphones when recording new tracks.