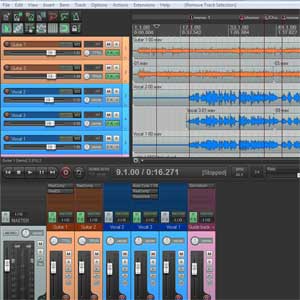
One of the many great things you can do when mixing with software, as opposed to the old-school way when you had to use and actual physical mixing board (shock, horror!) is the ability to easily drag, move and color-code tracks around for easy organizing.
In the below video from WinkSound, Michael White shows you how to quickly color code tracks and groups of tracks in Pro Tools. He demonstrates by giving the percussion/drum tracks one basic color scheme, the guitars a different color, and so on.
Of course you can do this in Reaper as well. Simply select a track by right-clicking in the track control panel of a track (or a group of tracks) and selecting Custom track colors in the drop-down menu. Then just pick a color from the palette. This will change the color of the track item and the track title/name, but not the track panel background. To also color the track panel background, go to Options, Preferences, Appearance. Then put a check mark into both Set track label background to custom track colors and Tint track panel backgrounds.
Below is the WinkSound video on color coding tracks in Pro Tools:
 Once you’ve mixed enough songs, you start to develop automatic habits that can be real time-savers. For example, You might always arrange the tracks so that the guitars are on tracks 1 and 2, the bass on track 3 and the lead vocal always on track 4, etc. You might then also have automatic habits like immediately reaching for certain effects
  A very common technique when recording drums is to close-mike – put microphones very close to at least the kick, snare, hi-hat and toms – and also have a room mic or a pair of room mics to capture the sound of the overall drum kit. The room mics are usually several feet away from the drum kit. Then you mix the room mics in along with all the drum mics.
 I just finished reading an article that talks about the hallmarks of an amateur mixing job. Bobby Owsinski lists seven things that a lot of beginning or amateur mix engineers commonly do (or don’t do) in their mixes that prevents them from sounding truly professional.