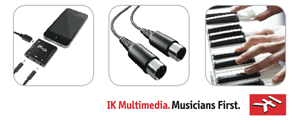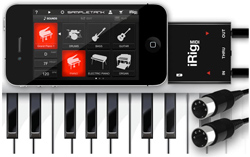
IK multimedia has added yet another cool product that can turn you iPHone, iPod Touch or iPad into a professional audio recording tool. This time it’s the iRig MIDI interface ($69.99), which allows you to connect a MIDI keyboard (or other MIDI device like drum machines, guitar and floor controllers, etc.) to your iOS device. For my review I used my iPhone 4. The iRig MIDI works with iPhone 4S, iPhone 4, iPhone 3GS, iPod Touch 3rd and 4th generations, and both iPad versions. The primary use for this thing, at least from a home recording perspective, is as a virtual instrument. You can use it with several different instrument apps for the iPhone/iPad, but IK Multimedia’s own SampleTank app was designed specifically to work in connection with it. The standard, computer-based SampleTank virtual instrument program costs close to $200. But with the iRig MIDI you can start using it free by downloading the SampleTankFreeapp onto your device. SampleTankFree comes with 8 sounds (2 drum kits, 1 electric piano, 2 bass guitars, 1 guitar, 1 keyboard synth, and 1 oboe). If you download the full SampleTank app for $19.99, you get 72 instruments.
Connecting Everything
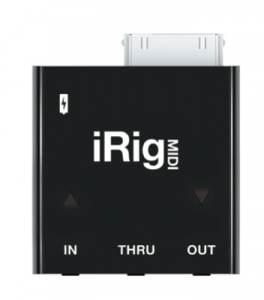
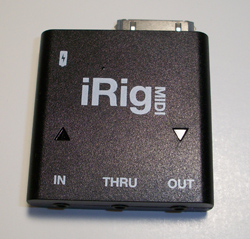 The main hardware is called ultra-compact on the IK Multimedia website. It is a square plastic housing measuring 1.75 inches by 1.75 inches with a standard male iPod/iPhone connector, a power input, and 3 midi ports (IN, THRU and OUT). Make sure you have ample space to connect everything. My home recording work space is pretty small by design, and my MIDI keyboard (Korg microKontrol) takes up most of the room. My mouse, mouse pad, monitor stand and desktop microphone take up most of the remaining space. This became a logistical problem when trying to hook up the iRig MIDI.
The main problem I had was with the power plug for the tiny unit. You can charge it up with the included micro USB cable, but I had just opened the box, so I needed to have it plugged in to use it, which was a problem because the cable is only 15 inches long. In the end I had to bring a laptop computer into the studio and grab a TV tray to set next to my keyboard in order for the cable to reach AND to keep my iPhone in front of me. You can avoid this if you charge the little device up before hand though.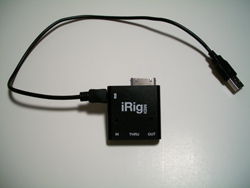
The other main connections remaining were the MIDI cable and headphones, which you technically don’t need, but to really appreciate the awesome sounds in SampleTank you should use them. Alternatively you can connect them directly into your audio mixing setup if you have one. Anyway, I used one of the two provided MIDI cables (standard 5-pin MIDI connector on one end and tiny RTS (ring/tip/sleeve) pins on the other). Here’s where I ran into another glitch, which is not a slam against the product, but was something I didn’t know until I spent a bunch of time doing trial-and-error. My Korg keyboard has both USB and standard 5-pin MIDI cable connections. The USB connector also can power the keyboard. So I had packed a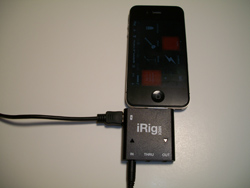 way my power cable. No problem I thought, I’ll simply plug the iRig MIDI cable into the Korg’s MIDI OUT jack and we’ll be in business. Not so. The iRig MIDI has a triangular light above both the MIDI IN and MIDI OUT ports to indicate when data is being went or received. With my Korg connected to the iRIG MIDI IN port, the light above that port should have been blinking red. I even went and got the the power cable for my Korg and hooked it up. Still no blinking red light. Next, I moved the switch on the back of the Korg. Still nothing. It wasn’t until I physically disconnected the USB cable on my Korg keyboard that the light started to blink. It would have been helpful to know this in advance, though it is not unreasonable for IK Multimedia not to have specs on every conceivable MIDI keyboard out there.
Now I was ready to rock and roll.
Playing The SampleTank Free Instruments
Now it was time to play. The free SampleTank app comes with 8 instruments as I listed above. However, you can listen to ALL of the sounds play loop patterns, even the ones you don’t technically “have.” In the “Sounds” window you can tell which sounds you have because it will appear in white, plus it will have the word FREE next to it (which are yours if you just have the Sampl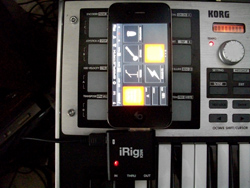 eTankFree app). Well, yours truly did figure this out for about an hour. I couldn’t figure out why I couldn’t play the sounds with my Korg keyboard, especially since I could hear the sounds using the Play button in the Sounds screen. After much confused frustration I noticed that the sounds I didn’t technically own were grayed out. Normally when something is grayed out on a computer screen, it means it cannot be selected or used in any way, which as I mentioned, was not the case with the SampleTank app. The grayed-out instrument sounds could both be selected AND heard if only to audition. Hence my confusion. When I finally selected one of the FREE sounds, voila! I was able to play the sounds with my Korg keyboard.
Now that I finally had crested the learning curve for getting started, things were very cool. I played around with the acoustic guitar for awhile. Take a listen to some of what I recorded here:
[jwplayer config=”Custom Audio Player-250″ mediaid=”8659″]
This is only one of the instruments, obviously. The built-in recorder allows you to overdub and do 4-track recording, with a different instrument in each track (“part), like bass, drums, guitar, and piano.
You can record your performances and then export them as stereo AAC audio files, either via e-mail or the iTunes File Sharing app.
This
 One of the coolest things about computer-based home recording studios is the wide-open world of virtual instruments. And of all the different kinds of instruments we can play via
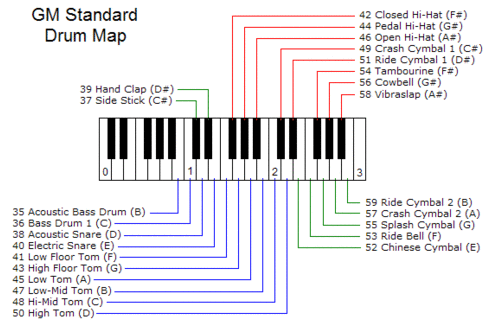
 I’ll be doing the review on this next week (completed – see the review here: