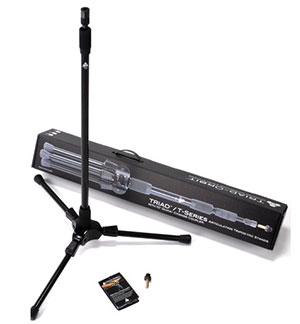
 I am having one of those “I-have-got-to-get-me-one-of-these” moments right now. I just found out about a new microphone stand that solves a lot of problems I really need solving. I know, what in the way of “innovative” can be brought to the lowly mic stand? the answer is the Triad-Orbit modular mic stand system. The Triad-Orbit has interchangeable parts that allow you to – are you ready for this? – snap on/off a shock-mount or microphone in like 3 seconds! I can’t tell you how much time I’ve in my life changing microphones. Studio mics tend to have their own clips, and/or their own shock-mounts. Usually, to move my primary microphone (Rode NT2-A) from its normal position on my desk boom to a mic stand in the middle of the room, I have to remove the heavy mic from the shock-mount. Then I have to unscrew the shock-mount from the desk boom. Next, I screw the shock-mount onto the new stand. And finally, I screw the mic back into its mount. The entire operation takes 3-to-5 minutes. With the Triad-Orbit system, I could uncouple the mount with the mic in it from the desk boom and clip it onto the new stand in about 5 seconds. And that is only 1 of the cool things the Triad-Orbit system can do. Each Triad stand uses the standard 3-leg set-up, but those legs have 4 ratcheting positions. That means you can change the angle of each leg. If floor space is an issue, this allows you to shrink the stand’s footprint. And since each leg can be adjusted independently, the ratcheting ability allows you to angle the stand into unusual positions.
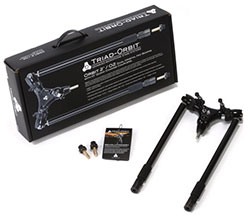
There are several other advantages to the Triad-Orbit system, including different attachments like the Dual-Arm boom, which allows you to do stereo mic set-ups with just one stand, get multiple mics into multiple positions – like drums – with just one stand, etc. And then there’s the iOrbit 1, which is an orbital iPad holder. So you can put a mic and an iPad on the same stand with the Triad-Orbit mic stand system. For more details, CLICK HERE.
microphones
The New Zoom H5 Handy Recorder Finally Available
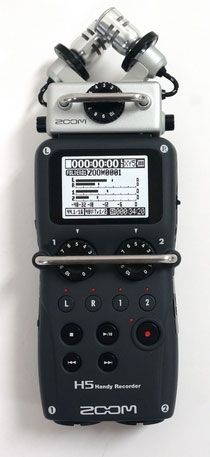 The long-awaited Zoom H5 Handy Recorder (the smaller, more affordable version of the H6) is finally here!
The Zoom H-series of hand-held digital recording devices are incredible – allowing you to record pro quality audio with an all-in-one unit (mics, power, preamps, conversion, storage and even some editing!) that you can hold in your hand (hence…..the term….hand-held:-P).
Anyway, the Zoom H5 Handy Recorder was recently announced, boasting all the essential features of the much more expensive H6, but smaller and more affordable. However, though the tantalizing description has been out there for a bit, you couldn’t actually get your hands on one. Now you can get your own if you CLICK HERE.
So what is the H5? Well, let’s start with one of its predecessors, the Zoom H4n. It was incredible for any number of on-the-go recording applications, and it became the “holy grail” for videographers and film-makers (especially the ones using DSLRs) because it allows you to record fantastic audio while doing location shoots, something very difficult to do. Also, you could use the H4n as an audio interface for your computer because it had two XLR (standard 3-pin) mic inputs. It was fabulous for any number of mobile recording purposes.
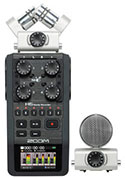
Zoom then improved on the H4n, which was already recognized as a world-class “next gen” portable audio recorder, by coming out with the H6, which is mind-blowing. It fixed all the things that were a bit bothersome about the H4n, like sometimes not providing enough gain, noisy level buttons, etc. Plus there are tons of new features with the H6 – the most amazing of which is the modular/interchangeable mic system that allows you to switch out the standard X-Y stereo mic on top with an array of other mic modules, including a shotgun, mid-side (MS), and dual XLR/TRS. They also added improved preamps, a color screen, and a number of other bells and whistles. And for all of this awesomeness, the price of the H6 ($399.99) is just about double that of the H4n.
Enter The H5
The H5 scales back on some of the features on the H6 – things like the color screen, number of inputs, etc. But the H5 retains all the essentials. For example, it has the same audio recording quality, modular mic system compatible with all the H6 Mic Modules, physical transport controls, etc. as the H6. It’s also quite a bit smaller, making it more convenient. And the best news of all? The price! The H5 is only $269.99, 130 bucks less than its big sibling. That makes it much more accessible for hobbyists (or anyone else on a tough budget), while continuing to provide professional level quality.
So now that they are in stock at B&H, CLICK HERE to get yours:).
Cheers!
Ken
What Do Those Switches On My Microphone Mean?
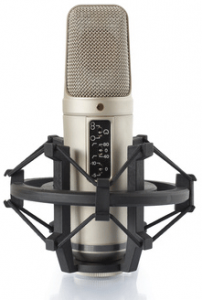 A reader recently asked about the switches he had on his microphone. He referred to one switch that selected between a straight horizontal line (he said he’d read it was called a “high-pass filter”) and a bent/broken white line, and another that provides an alternative between a 0db or -10db setting. I must admit that I remember having the same question when I first saw these switches on a mic.
Here is my reply to him:
As for the switches on the mics, one of them is called a “roll-off” switch. That’s the one that looks like a broken line. You’re right that it is a high-pass filter (lets the higher frequencies “pass,” but turns the volume down on the low frequencies). It reduces the low-end frequencies that get picked up by the mic. I use this if I’m getting too many p-pops in my vocals, or if there is too much bass in whatever I’m recording. But as a default, I’d leave it flat. The threshold frequency (the point where the line bends) is usually written on the mic, but not on the Oktava, if it’s like mine (see the picture on the right), which is the Oktava MK-319. You would have to look that up in the mic’s documentation. I just looked up the specs on line (www.oktava-online.com/mk319.htm) and it did not say. Usually it’s set to either 80 Hz (“hertz,” or “cycles-per-second”) or 40 Hz. My Rode NT2-A (picture at top left) has both of those. So what this does is pick up all frequencies as normal, except the ones starting where the line bends (was to the left end of the frequency spectrum, which is the low or bass end), typically at 40 or 80 Hz. From that point, all the frequencies to the left (the frequencies lower than that) are turned down. According to the Oktava site, this high-pass filter reduces bass frequencies “directly at the input of the microphone amplifier.”
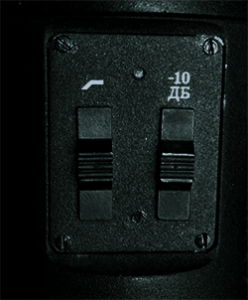
The 0dB or -10dB switch reduces the output of the mic when engaged. See the pic on the right of my Oktava and note the cyrillic characters for “d” and “b.” This is because the mic is Russian.
Anyway, so leaving it at 0dB is the default and causes no reduction in output. Engaging the -10 dB switch will reduce the output of the mic (basically turn it down) by 10 decibels. I never use this unless, for some reason, the mic’s output is too much for whatever it’s plugged into (some sort of audio interface or a mixer). But if you do need to reduce the level of the mic’s output, you can use that switch.
I hope that helps!
Cheers,
Ken
Improve The Quality Of The Audio You Record At Home – Tip 4
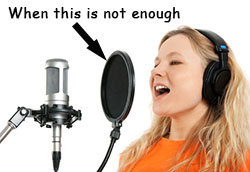 We’ve been doing a series of articles and videos showing you how to produce better sounding audio even in (especially in) bad-sounding rooms, such as the converted bedrooms that so many of us use as home recording studio spaces. You can find the first post in the series is here, if you have not seen everything in order yet. Today marks the fourth week and fourth tip to help you sound more professional. This one is applicable primarily to vocal recordings – for voice-over or for singing. It’s time to tame the dreaded p-pop!
http://homebrewaudio.wistia.com/medias/z567xm8hkn?embedType=seo&videoWidth=640
Whenever we record words with a “P” or “B” in them, we’re creating a sound that linguists call a “plosive.” But when recording into a very sensitive microphone such as a large diaphragm condenser (LDC), which is probably the most common type of vocal recording mic, these plosives tend to create an unpleasant burst of low-frequency noise sounding like a small explosion. Sensitive microphones don’t like sudden blasts of air, so the result is an excessively loud plosive often called a “p-pop.”
Can’t I Just Use A Pop Filter?
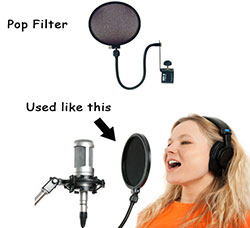 It’s common practice to use a pop filter when using an LDC mic. You place them between your mouth and the mic to help tame the p-pops. But some still get into the recording. And if you are recording in a poor sounding room, our first tip – getting your mouth 3 to 4 inches from the mic (unlike the girl in the picture on the right) will instantly improve your sound. However, even with a pop filter in place, getting that close to the mic will increase the problem of p-pops.
So though you can use a pop filter to help minimize those misbehaving plosives, you have to make peace with the fact that some will end up in the recording.
So what do you do now? You edit. You can fix p-pops using audio software after they have already been recorded. I tend to use Reaper for all my recording needs. However, though you CAN use Reaper to fix p-pops in an audio file, it is pretty time-consuming and cumbersome, as you’ll see in the video above. This is definitely a job for an audio editor, such as Audacity, Adobe Audition, Sony Sound Forge, etc.
In the video, you’ll see how much faster and easier it is to use an editor. I demonstrate how to do it in Audacity, which is free. So hey, once again you get a tip that won’t require you to buy or build anything. that’s four for four!
Don’t Miss Out
Make sure you don’t miss any of the tips in this series. Put your email into the form below and get not only the rest of this series as it rolls out, but also the first 8 videos in our tutorial course “The Newbies Guide To Audio Recording Awesomeness 1: The Basics With Audacity.” This course shows you how to set up and start using your home recording studio for a budget of about five bucks (or less) in about 30 minutes.
We will not spam you with e-mails! We typically don’t send more than one message per week, and each of those will only be intended to help you make better audio recordings in your home studio.
Recording The Benedictine Sisters – Multiple Stereo Mic Set-Ups
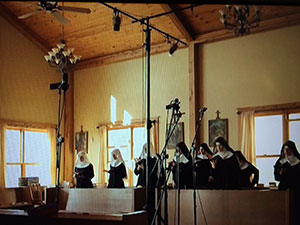 There is a chart-topping music group you may not have heard of – the Benedictine Sisters of Mary, Queen of Apostles. They have recently topped Billboard’s Classical Albums charts with two of their three albums.
Why do I mention this? Well, we were watching CBS Sunday Morning on Easter Sunday, and they did a story about the Sisters. One scene showed a recording session with lots and lots of microphones. Of course I immediately exclaimed “hit pause!” to my wife (who controls the DVR remote;)). There were so many mics in so many different positions that I really wanted to study what was going on.
What WAS Going On?
The first thing I thought I recognized was something called a Decca Tree. this is a type of stereo recording set-up developed in the 1950s at Decca Records. It’s a tall pole with a “T” shaped horizontal crossbars at the top which holds three microphones. It was used to best capture orchestras by using a spaced pair (left and right) of mics, combined with a third mic to pick up stuff going on in between. You can see crossbars of the Decca tree at the top of the picture up above. Incidentally, the microphones being used on the tree are Neumann TLM-102 large diaphragm condenser mics (or possibly the TLM-103, which have the same shape). I’re read about the Decca tree configuration before, but I’d never actually seen one. Then I saw what record label had produced and distributed the Sisters’ albums – yup, Decca. Duh.
But that wasn’t the only stereo recording configuration they had! A closer look reveals that there is at least other stereo mic set-up, two instances of the mid-side (m/s) set-up (one for each side, since the nuns were split into two sides of the room). In addition to those three stereo mic clusters (seven microphones so far), there are two spot microphones aimed into the group of nuns agains the far wall in the picture. They are placed high and look to be positioned to capture the room/ambient sound. The spot mics appear to be small-diaphragm condenser mics, such as the Shure SM81.
So with two mid-side groupings and one Decca tree, combined with two room mics, this small choir was recorded with nine microphones! And very high-quality microphones they were. It’s no wonder that the production quality of their last three CDs (they had recorded their own prior to Decca arriving at the door) were so high that they ended up selling so well that they ended up on the Billboard charts. DON’T get me wrong! It’s not ONLY the quality of the production that got them on the charts. A really well-recorded bunch of crappy singers would still be that – polished crap. But the Sisters sing like angels. They will tell you (literally – they did in the interview) that they aren’t great singers. But they practice 5 hours a day. Funny how much difference tons of practice combined with excellent recording technique (from the pro engineers working for Decca) and top-notch gear can make.