 Here is my suggestion for the best way to put a music recording studio together for $600. Someone whose been using his brother’s home studio found out Bro was moving out and taking his gear with him. He had a budget of $600 and planned to mainly record acoustic, electric and bass guitars, and various virtual instruments like piano and other synths. This means he needed a decent mic and interface for the acoustic guitar and vocals, multitrack and editing audio software with midi capability. Here is how I answered his question:
Hi Dave,
This is a great time to have to build you own set-up. I’m guessing that if your brother’s studio cost him thousands upon thousands of clams, he started building that up at least 7-10 years ago, am I right? Things are quite a bit more affordable now.
If you have a budget of 600 dollars, my recommendation would be this:
– Mic – Audio Technica AT 2035 – $149
– Interface – Focusrite Scarlett 2i2 – $149.99
– Software – Ableton Live Lite 8 Software – $0 since it comes bundled with the Scarlett. I would also throw in Reaper here, which you can also use for free as long as you’re evaluating it. Then you can buy it for $60 until you start making $20K per year with it.
– Guitar/Bass Interface – Line 6 POD Studio UX2 USB Computer Recording Interface: $195
For $494 you have a pro setup that will RAWK.
Later you’ll want to add more and different mics, more virtual instruments and effects, etc. And you’ll want to get some decent monitors as soon as the budget allows. But for now, kickin’ studio for under $600.00.
Hope that helps!
Cheers,
Ken Theriot
microphones
Audio Quality for Videos
Why does it seem like the audio quality for videos, especially internet video, is crappy even when the audio looks great? Every day video capability is improving, pictures are getting sharper, technology is getting faster and almost everything is high definition or three dimensional. When recording your own videos, it turns out that it is pretty hard to get your audio recording to the same quality as your video. What is up with that? To achieve fantastic audio to accompany your fantastic video, you may well need to follow a few more instructions and go through a few more stages. It isn’t hard, but it seems like a whole lot of folks are just living with crappy audio even when the video looks great.
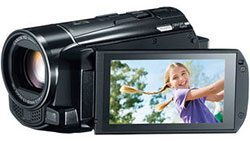
Your camcorder may have cost you a fortune and be top of the range but its built-in microphone probably isn’t. These microphones are generally very cheap, and the distance from the speaker or sound emitter (unless the camera is 6 inches from the narrator’s face!) means too much echo and reverberation are mixed in with the desired sound by the time it reaches the camera’s audio recorder. To achieve on-the-spot quality audio, invest in an external microphone. To achieve quality audio the microphone needs to be near to the speaker or sound emitter. The optimum distance for recording great audio is around 12-18 inches, and this can really only be achieved by using an external mic jack. This option is great for video where it is OK for the microphone to be seen or you will be recording up close. If you don’t want the mic to be seen in the video, you can use a kind of mic called a shotgun mic, which is capable of picking up good, noise-free audio from a few feet away, usually just outside the picture. This is what they do in the movies. Or you can actually use a small-diaphragm condenser mic or even a USB mic (if you have a computer). I explain how to do this – and you can hear an audio comparison of audio from the camera and from the external mic – in a video I put on the post How To Get Good Audio On Your Videos.
Picking the right camera up-front is the best solution here. It is a good idea to contact your camera supplier to make sure you get one with an external mic jack, especially if you are serious about your film making. It actually isn’t as common as it should be. I had to investigate about 10 different camcorders before I came up with one that met both my video needs AND had an external mic input. that camcorder was a Canon Vixia HF M500 Full HD Camcorder.
If you are recording a theatrical or cinematic video, you could use a small lapel-based microphone which would be barely visible to the viewer or you could use a completely different method. The other potential method involves using state of the art video editing software. Reputable programs include Sony Vegas Pro and Adobe Premiere Pro. With these programs you can record your audio and video files separately. This is especially handy if you don’t have a shotgun mic, or your camera does not have an external mic jack. You can record the dialogue along with the video, then align the audio track to the video track in the software. That allows you to cut, splice, move, etc. the audio and video together simultaneously. Then you can add background music, sound effects, etc. to the edited video as additional audio tracks to really make things sound professional.
Technology is developing at an alarming speed. Every day there is a better camcorder or more advanced program on the market and to keep up with the trends in video and audio technology, you need to be aiming for the top in BOTH instances. Putting cheap-sounding audio onto a slick looking video pretty much tanks your goal of trying to create a professional end-product.
Microphone For iPhone, iPad and iPod Touch
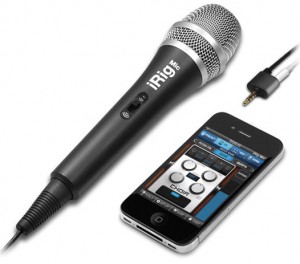 Hey home recording ninjas! Need to do any recording whilst out and about? How’s this for the ultimate portable recording rig? The IK Multimedia iRig Mic that plugs straight into an iPhone, iPad, or iPod Touch.
The iRig gives you excellent audio quality and comes with a vocal effects app and the recording app to use with your device. I am reviewing one of these babies as we speak and will publish that in a few days, but early results are: “wow.” I can’t say much more than that.
You can have your own portable recording studio for $54.99! I’m actually…just…almost speechless. This is such an incredible bit of tech. I’ll summarize. Maybe it will sink in better.
This is a good quality microphone for $56 that plugs directly into your iPhone, iPad, or iPod Touch. And the software (actually an “app”) is free! An entire multi track studio for $56, without your even having to have a computer! What?!
Check back on Tuesday, June 21st for my complete review of this little baby. I did the review, complete with audio examples, here: https://www.homebrewaudio.com/review-of-ik-multimedias-irig-microphone-for-iphone-ipad-and-ipod-touch/
Find out more and get your own iRig here: The IK Multimedia iRig Mic.
Enjoy!
Ken
Pro Audio Tools: How Much Do They Cost?
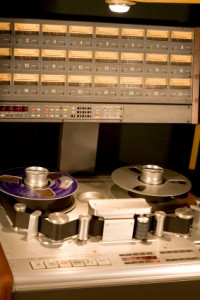 When someone says “pro audio tools” what they really mean is equipment that is used at a professional level to create and/or produce top-notch audio recordings. That prefix pro conjures up images of high-end recording gear such as microphones costing thousands of dollars, gleaming mic preamplifiers and other outboard devices seen in big commercial recording studios. I would like to humbly challenge that automatic assumption and attempt to separate the word professional with the term expensive.
It is true that for most of the past several decades, the best audio recording quality was only realistically obtained through the use of expensive equipment. There were several reasons for this, but mostly it was down to the fact that in order to reproduce a sound anywhere near accurately, you had to use big, fast magnetic tape. By big, I mean wide; like one or two inches wide. And by fast I mean spinning on a machine much faster than consumer reel-to-reel tape machines could usually handle, like 30 inches per second. Cassette machines only got to a max of 3-3/4 inches per second. This was necessary because it took lots of tape particles to be magnetized and aligned to sound really good; or to sound a lot like the original (the word “fidelity” was used a lot for this). So first, you had to have a wider stripe than consumer tapes had, and then you had to have it hurtling past the head on the tape recorder to maximize how many tape particles could be realigned per second.
Tape recorders that could record multiple tracks (4-, 8-, 16-, 24-, or 32-track) at once, recording fast on wide tape were expensive. Mostly only commercial studios owned them. In addition to the recorder and the tape, you needed a mixing board, microphones, amplifiers, and effect racks for things like equalization, compression, reverb, etc. By the time you tot the price for even a modest studio using that kind of gear, you’re easily talking many thousands of dollars, not to mention the space you needed to put the stuff down.
But now we live in the 21st century, where we can use our ubiquitous computers to be both tape machine AND tape. Digital audio makes it so we can reproduce audio to a very high fidelity quickly, inexpensively, and without having to buy much more than you could fit in your hand. Let that be the reason you separate the concept of professional from the idea of money. Today, if you already have a computer with an internet connection, you can put together a home recording studio capable of recording and producing professional quality sound for as little as $50, which is about the price of a decent USB microphone, such as the Samson Q1. With just that microphone, and a copy of the free audio software called Audacity, you’ll be on your way. Then as you decide you need more capability or even higher quality, you can upgrade your home studio a bit at a time.
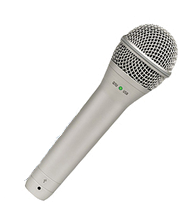
Check out the many articles and tutorials on home recording at www.HomeBrewAudio.com, where we show you how to let your need drive your recording gear acquisition as you progress. That should save you a boatload of money while getting you started out in audio recording quickly and easily. The term pro audio tools these days becomes more about knowledge and skill than about cost.
Give us a visit. We’ll see you around campus!
Ken
Voice Over Recording While Camping–The Zoom H2 Saves My Butt
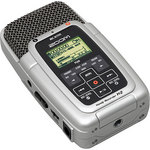 You’d think it would be a pretty good bet that I could take a week off without having to record any audio. After all, I’d had to actively submit auditions for all the voice over jobs I’d gotten at that point. So you might imagine my surprise when I got an e-mail on the 2nd day out (why was I checking e-mail? Brand new iPhone…but that’s a different story:)) I received an offer for a voice over job I hadn’t even auditioned for. And they couldn’t wait a week. It was take-it-or-leave-it. So I decided to give it a shot. Here is all the equipment I had with me.
If you’d like to get an idea of how the audio turned out, listen to the audio here:
[jwplayer config=”Custom Audio Player” mediaid=”3485″]
So now I know there is no reason to ever fear losing out on a recording gig when I’m on the go. All 3 required items fit very easily into a quite small hand bag or back pack.
Happy recording!
Ken
ps – By popular demand, here is an audio clip from the actual job – the final audio sent to the client.
[jwplayer config=”Custom Audio Player” mediaid=”11049″]