 As reluctant as I am to splash terminology onto the screen that might cause your brain to freeze or worse, cause you to lose consciousness altogether, I think this is something you really do want to know a bit (ha ha…audio humor) about. So let’s get it out of the way. Ready? Here goes. “Try your hardest to record with a 24 bit audio analog-to-digital (a-d) converter.” Still with me? OK. Now let’s explain some things.
I talk a lot about noise, going so far as to name it the number one enemy of good audio. There are lots of sources for noise, including screaming kids, lawn mowers, attention-starved cats (meaning it’s been more than 5 minutes since their last lap session), and the dreaded computer noise. But let’s assume for the moment that you have managed to tame those sources of noise and you have a nice quiet space for recording. Since our home recording studio uses a computer for recording, the sound that we want to record-let’s say your voice for this example-needs to be converted from being a sound in the real world (air particles moving around, basically) to being something a computer can understand, namely a digital sound (a bunch of ones and zeros). It’s like what the Master Control Program did to Kevin Flynn in Tron to convert (ha!) him from a person in the real world (flesh and blood and some other gooey and crunchy stuff) to being something a computer can deal with, namely a digital person.
Another kind of noise happens after audio is converted to digital. There will be a digital noise floor or a sort of hissing sound that

is a product of the conversion. You’ll hear this, as soft as it is, regardless of whether you actually record your voice or not, and even in a very quiet room.
On-board sound cards, the ones built right onto a motherboard, will convert audio from analog (Kevin Flynn) to digital (well, Kevin Flynn again, only with a goofy costume and gray-scale skin), but most of them have two problems. First, the components used to do the conversion are not great. Second, they usually only convert using what is called a 16-bit bit depth. Yikes! What the heck does that mean? Never mind that. I’ll write another article on just that very soon. All you need to know at this point is that recording when the bit depth is only 16 bits means that the difference between the quietest sound (which would be that noise floor I mentioned) and sound that is too loud is quite narrow.
One of the worst sounds in the world is audio that is all buzzy and distorted because it was too loud for the electronics. It really is unpleasant. If you’re trying to record your voice, and things keep distorting, it means you’re voice is too loud at certain points. If you have a meter, you’ll see it go into the red on those parts. So what’s the alternative? You could try talking or singing quieter or backing away from the mic on the loud parts. That will work, provided you work really hard at it. The problem then is that if you back too far away from the mic, you’ll let too much room sound in. I’m assuming you’re recording in a home studio which means that the room sound is almost certain to be bad…lots of echo and reverb usually. The other main problem is that the really quiet passages will have to be “turned up” after you’re done recording, in order to be heard. And when you do that, you also turn up the noise.
Yeah yeah, I hear those of you saying you could just put a compressor (see my article Should You Use Compression In Audio Recording? to get a better idea what compression is) in between the mic and the converter. Yes, you could do that. But in general it is not a great idea to compress your audio before it’s recorded because you won’t be able to change it afterward. Plus, you’d still have a pretty audible noise floor if you record with a bit depth of 16. So what’s better?
Recording with 24-bit conversion is better that’s what! Why? Will the voice sound better? Meh, probably not so much. But the reason why 24-bit recording is better is that the noise floor is much, much lower. So the narrow range between noise floor and too loud you had with 16-bit recording is expanded hugely. You will be able to speak both very quietly and quite loudly without nearly as much worry about distorting. Also, if you want to increase the volume on the quiet parts of the recording in your audio editor afterward, the increase in digital noise won’t be anywhere near as audible. With 24 bit recording, you should end up with less noise and fewer incidents of distortion due to clipping when you were very loud.
So now comes the practical question. How do you get 24 bit conversion? Well, you are not likely to get it with a typical on-board
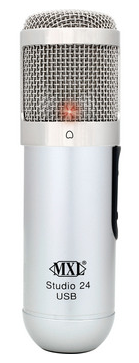
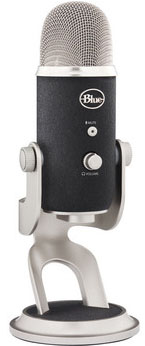
sound card. But several USB mics have 24-bit converters built in. Yeah, USB mics just plug directly into a USB port. Cool huh? Some examples are: the MXL Studio 24 or the Blue Yeti Pro (note: NOT the regular Blue Yeti, which is only 16-bit).

Another really cool way to record at 24 bits without having a USB mic or audio interface is a cool little device called the MicPort Pro – Compact USB Microphone Preamp. You can just plug your microphone into one side the MicPort, and then plug the MicPort into a USB port on your computer.
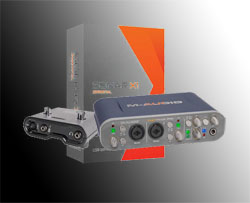
And last, but most definitely not least, is to get an audio interface box. Most of them offer 24-bit recording these days. Some examples are: The M-Audio Fast Track or the EMU 0404.
Of course there are tons of other choices out there for all of these pieces of equipment to help you

get recording at 24 bits, which I highly recommend you do if at all humanly possible. Your workflow will improve and the resulting audio will be better, mainly because there is less noise.
Let your quest for 24 bit audio recording start here!
microphones
Microphone Tips For Recording
Here are a bunch (31 according to the article title:)) of tips for using microphones to record. There is something useful in this article for anyone who is doing home recording, whether that be for voice over jobs or music recording.
Enjoy!
Ken
Here is the article: http://theproaudiofiles.com/microphone-tips-from-recording-hacks
Home Recording Equipment Recommendations

 Since there are so many different home recording equipment products out there, from software to computer interfaces to microphones and effects gear, it is often helpful to have someone narrow things down a bit for you. (Note: Reaper should be added for recording software. But since they do their own pricing, you can only get it at their site – http://www.reaper.fm/)
In partnership with B&H Photo-Video-Audio, we have put together two starter bundles. B&H graciously added these to their catalog according to my exact specifications. They are the Home Recording Starter Kit and the Musician’s Home Recording Starter Kit. What’s awesome about these is the price for the bundle is a LOT less than if you were to buy each item individually.
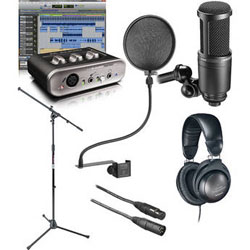 The Home Recording Starter Bundle ($247.50)
- M-Audio Fast TrackUSBInterface with Pro Tools SE Software
- Pearstone 3-Pin XLR Male to 3-Pin XLR Female Audio Cable (10′)
- On-Stage MS7701B Euro-BoomMicStand
- Audio-TechnicaAT2020-CondenserMicrophone
- Audio-Technica ATH-M20 – Closed-BackHeadphone
- Pearstone PFN Nylon Round Pop Filter with Gooseneck (6.6″)
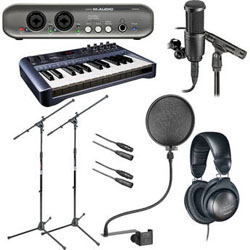 The Home Recording Musician’s Starter Bundle ($414.95)
- M-Audio MobilePre Mk II – USB Audio Interface
- Audio-Technica AT2041SP CardioidCondenserStudio MicrophonePackage
- 2 x Pearstone 3-Pin XLR Male to 3-Pin XLR Female Audio Cable (10′)
- 2 x On-Stage MS7701B Euro-BoomMicStand
- Audio-Technica ATH-M20 – Closed-BackHeadphone
- Pearstone PFN Nylon Round Pop Filter with Gooseneck (6.6″)
- M-Audio Oxygen 25 -USBMIDIController
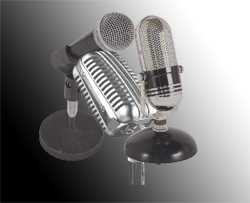
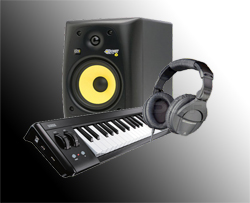
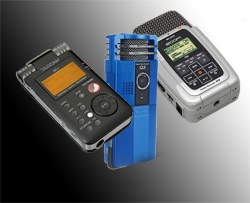
Below are some dedicated category pages with our home recording equipment recommendations.
Just click on any of the pictures to be taken to a catalog for those items:
 |
 |
 |
 |
Purchasing or not, go ahead and put your e-mail address in the box below and get the first several video tutorials free of charge. Plus you’ll get all the latest information we think will be valuable to you in your recording efforts (no spam, in other words:)).
Recording On The Road…Again
Voice over jobs and my road trips must somehow be cosmically linked. We only go on two or three trips per year, and for all three of them this year (I’m writing from a hotel room as we speak), I have had to record and deliver a voiceover job. I guess I should go on more trips?
Anyway, like last time I was able to accomplish this with my handy dandy Zoom H2 field recorder. I received the e-mail on my iphone, recorded the script on the H2, transferred the audio to my netbook computer via SD card (which the H2 uses to record onto), edited the audio with Audacity, exported it as an mp3, and e-mailed it back to my client.
Check out the awesome little H2 here:
Best "Home Recording Answer" on Yahoo! Answers
HBA Yields “Best Home Recording Answer” on Yahoo! Answers – that’s what we like to see!
Here is what appeared (again:)) today on Yahoo! Answers regarding home recording questions: