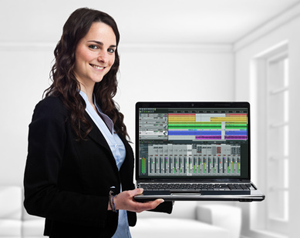
The term voice recording software, especially in the context of recording voice overs, is actually sort of a misleading term. That’s because pretty much any software that is designed for recording on a computer is going to be just as capable of recording the human voice as any other audio. So the real question, becomes something more like “what else other than voice recording will I need to do with a particular audio recording program?”
Let’s take an example. Many folks use a free recording program called Audacity, which is pretty darned amazing for a piece of free-ware. If all you ever really want to do is record your voice to do introductions for your own programs, videos or podcasts, Audacity is likely to be the only audio software you’ll ever need. It has the ability to record at high resolution, do basic edits and produce professional sounding audio.
If, on the other hand, you also want to record music, especially involving multiple tracks or in-depth and intuitive editing, Audacity probably isn’t your best choice. Once you get beyond the basic “push-record/stop/play” functions, Audacity loses out on simplicity and capability. It becomes worth your time and money at that point to use two programs, one designed for recording and mixing, and the other designed for editing and finishing/producing.
It may seem counter-intuitive, but think of it this way. It is ultimately better for your workflow, not only physically but mentally as well, if you can compartmentalize discrete tasks, especially when the software being
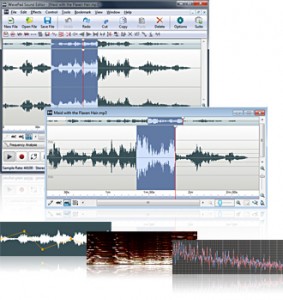
used is specifically designed for that purpose. The more focused the reason for a program, the faster and more intuitive it tends to be for users. In my case, I use a program called Reaper (by Cockos), for recording and mixing, then I use another program called Adobe Audition for editing and final production. This workflow is so natural to me that even if I need to record a quick voice over job, I open Reaper to do the recording, then I double-click on the audio item on the track to automatically open my editing program, Audition. I can then quickly reduce ambient noise, fix p-pops, even out and optimize volume, and save as any format I want.
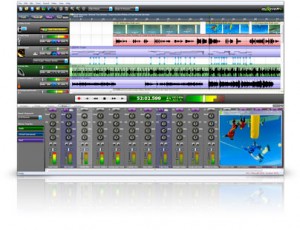
Now obviously these are not the only two programs out there you can use for this kind of work-flow. You could use Reaper + Audacity, for example. There are also some really affordable, intuitive and powerful new-comers, such as Mixcraft 8 for recording and mixing. And if you need more capability or better workflow than Audacity can provide, a really good (and much more affordable than Audition) alternative is WavePad Sound Editor.
So basically it comes down to this. Any recording program is going to be at least as good at recording voice as it is at recording anything else, so don’t worry about looking for voice recording software so much as something more generic, like audio recording software. At that point, you just have to know what capabilities you’ll need. Extremely basic voice over jobs, like for your YouTube videos or podcasts, can be handled by something like Audacity. But if you want to ad any capability beyond that, the best choice is to divide and conquer with two programs working together, one for recording and mixing, and the other for editing and final production.

mastering
Your Ears Are Lying to You – Why Your Song Sounds Great in Your Room, But Not in Your Car
Why should you care? Well, if you’re a musician, or voice actor, a recording engineer, or just recording audio for podcasts and videos, this knowledge is crucial. Here’s why.
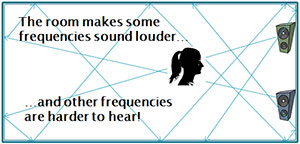
Our ears still lie to us EVEN when the sound IS in that 20-20KHz range, the bastards. Some sounds seem louder to us than others even when they are at the same volume, like a baby’s cry (around 3 KHz – this will really blow your mind – or maybe you’ll just find it boring). Rooms, those big boxy things we normally spend a lot of time in, change how a sound….well….sounds. If sound were like light, your typical bedroom would be kinda like a house of mirrors; but you wouldn’t be able to SEE the mirrors! Put a little candle in just the right place in that room, and it gets reflected by so many mirrors that is seems like a search light. But if you move that same candle to a different spot, you might not be able to see it at all. You also should know that just about every room in the world has a different mirror set-up.
Now imagine that someone asked you use that first room to create a very specific color and intensity of light bulb. Maybe they want it for something kinky, I don’t know. But their specs say it needs to be “a soft red, and very subdued.” Now remember that we can’t see the mirrors. We set to work adjusting the controls on our bulb-maker until we get one that puts out a nice, soft red light with just the right amount of “subdued.” You confidently take your light to the client, who puts it into a socket in his room, and suddenly it’s really bright, and now a kind of fire-engine red! What happened to the bulb? It looked great in your room. Nothing happened to the bulb. It is as it was when you made it. But the mirrors in the client’s room (the ones you can’t see) are different from the ones in yours, and they cause the light to be reflected differently, making it APPEAR different. Which one is right? Neither! Hah, you’re starting to get angry at me now, aren’t you? But it’s true, and it’s just like audio. Until you can find a room with no mirrors, or at least with the biggest ones removed or shifted to eliminate the worst of the reflection problems, you literally CAN’T know what the bulb’s light really looks like.
How does this translate to audio?
Well, if my room tends to amplify bass frequencies, my ears would tell me that there was too much bass in a song when there really wasn’t! So I might respond by turning the bass down on the equalizer (EQ) too much before I burn the song to CD. In that room, it sounds fine because the bass is being artificially boosted by the room itself. But as soon as I take it my buddy’s room, which is larger, or my car (which in the case of home recording may ALSO be larger:)), I might find there is no bass left at all in the recording!
The only real way to deal with all of this ear-lying nonsense is to know a little something about HOW they lie, which means you gotta get familiar with EQ and all that stuff about Hertz and crying babies. That way, you’ll at least know how to get a much more accurate picture of the truth, and your sound will sound good in ALL rooms, not just yours. If you are of a mind to dive deeper into the world of EQ and frequencies, a great place to start would be our article What is Equalization, Usually Called EQ?
Cover Recording of My Eyes From Dr. Horrible
One really excellent way to learn to record music is to study what the pros are doing. By breaking down a popular song and analyzing the parts and how everything fits together, you can learn an amazing amount about music production and recording. If you can then manage to re-create the song from scratch, you get double or triple the benefit of that learning. If you can make it sound very close to the original, you know you’ve really cracked the code (well, for that type of song at least).
In order to demonstrate this concept, we used a song from Joss Whedon’s Dr. Horrible’s Sing-Along Blog. The song is called My Eyes (sometimes referred to as “On The Rise”), Music by Jed Whedon; Lyrics by Maurissa Tancharoen, Jed Whedon, and Joss Whedon.
Here is our cover version:
[jwplayer config=”Custom Audio Player” mediaid=”11848″]
Here is how we did it:
1. What Instruments Were Used?
This song was a bit of challenge in that there were a lot of different instruments used in the original recording, such as classical guitars, bass, percussion, full drum kit, English horn, string section, piano, harp, and of course, vocals.
2. Try to Use The Same Instruments
This is where virtual instruments come in very handy. If I had a bunch of classical musicians in my hip pocket, I would have used them. But since I don’t, I did the next best thing. I used virtual instruments controlled via MIDI. I’m also not adept at playing every instrument, so using MIDI and a keyboard to play the notes of virtual instruments was a giant help.
The nylon-string classical guitars at the beginning I COULD have played, though the part is quite intricate and fast, so I would have sworn a lot and done dozens of takes. Instead, I used a modeled virtual guitar sound from my favorite virtual instrument, Omnisphere. The string section also came from Omnisphere. For the piano I used a free plugin called 4Front Piano. For percussion I played a hand drum with a brush on one track and a virtual frame drum from a drum program called StormDrum. The English horn came from a program called Garritan Personal Orchestra. The drum kit also came from StormDrum. I played a real bass guitar, and of course the vocals were real.
3. Recording Everything
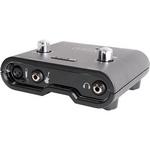
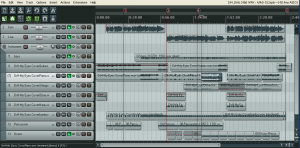
I used Reaper recording software on my computer. The bass was recorded plugged into a USB interface called a Line 6 Gear Box (which models electric bass and guitar amps…very nifty!). I also used a Rode NT2-A microphone plugged into a usb audio interface called the M-Audio Fast Track Pro for the vocals.
I recorded the guitar parts with a keyboard (using a virtual guitar here, remember?), creating a MIDI track in Reaper. I then edited the notes in the midi track for proper timing and getting rid of wrong notes, etc. I then copied that MIDI part and put it onto a second track, using the MIDI tools to “humanize” the note timing. This difference allowed me to pan each MIDI part (I also used a slightly different guitar patch for the second track) left and right for stereo guitars.
Next I played the piano parts a few bars at a time, since I’m not really a piano player. Listening to the original recording, I picked out the notes and chords and basically “drew” them onto the MIDI grid until it sounded right. I did the same thing with the percussion, drums, strings and English horn. Then I played the bass part the “normal way”:). After that, I sand my part and my wife, Lisa, sang her part on her track. when the thing was all recorded, we had 12 tracks of audio all playing together.
4. Mix It Down
After editing certain tracks (getting p-pops out of the vocal tracks, adjusting volume dynamics and EQ, etc, I adjusted the individual volume controls for each track until everything sounded nice together, then I mixed it all down (called rendering in Reaper) to a single stereo file. I then opened that stereo file in Adobe Audition for basic mastering. In Audition I trimmed the extra gits off the beginning and end of the file, and ensured it started and ended in total silence. Then I used some compression to even out and optimize loudness for the final polishing.
That’s it, in a nutshell. The result is in the audio file above. Click here if you haven’t already heard it.
All this was done on my computer in my house, in a regular bedroom that is not treated or sound-proofed in any way. If you’d like to learn how to do this type of thing also, check out all the free articles and videos at Home Brew Audio, as well as our video tutorial courses, recording guide e-book and just all-in-all your home recording one-stop shop.
Good luck and don’t hesitate to ask any questions about this article right here in the comments.
Cheers,
Ken
Cool Ear-Training App For iPhone
Quiztones – http://quiztones.net/ has released an awesome iPhone app to help train your ears to recognize different audio frequencies.
Making Your Audio Loud – The Use and Abuse of Compression
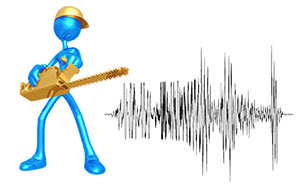
Making sure your audio can be heard easily and clearly is important. One of the best audio editing tools available to us is called compression. With a compressor, we can even out the volume of certain tracks in our recordings, or even the entire mix. One primary reason for this is to prevent the listener from having to turn up the volume to hear the soft parts, but then also having to turn the volume down to keep from getting their ears blasted out during the loudest bits.
This loudness leveling has another…ahem…benefit. Since it turns down the loudest bits without turning down the perceived average loudness of the entire song (or any audio content, like voice-overs, podcasts, etc.), some blank space is left between the former loudest bit and 0dB, the loudest possible level, before distorting. “Well…” say the producers, “we can’t have any blank space on the final track. That would mean the song isn’t as loud as it could be.” So now the entire song’s average loudness can be increased by raising ALL the levels until the loudest one is just barely below 0 dB.
Here is an interesting article about “the loudness wars,” as they are sometimes called, and how the search for ever-louder mixes can crush the life out of the music.
The original article is here: http://www.prosoundweb.com/article/the_loudness_wars_a_graphic_look_at_hypercompression/
Cheers,
Ken