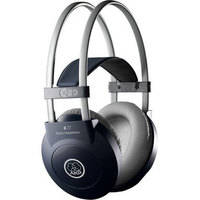
The AKG K 77 Circumaural Closed-Back Stereo Headphones are the kind of cans (the word all the cool kids use to mean “headphones”) that you can wear for hours without any discomfort. That word “circumnaural” means that the cups fit around your ears, so that they don’t get smashed against the side of your head. Your ears stay nice and “un-smooshed” with the leatherette padding resting against your noggin.
OK, so they’re comfy. What else is good about these headphones?
Well, the copy from AKG is that they provide professional quality sound for an affordable price – $49. That is a pretty good price, considering that the fancy cans a lot of folks are grabbing these days are in the $200 price range. But those (the expensive ones) are not typically used for recording and monitoring purposes. They are typically designed to compliment the audio (which you don’t want when monitoring recordings – you want to hear things “warts-and-all”), and most of them these days have iPhone and iPod controls on them, as well as noise-cancelling. These are things you don’t need in the studio.
They also boast a wide frequency range, accurate bass, single-sided cord, and 3.5 mm plug along with a 1/4-inch adapter for maximum compatibility with a wide range of gear.
These are an excellent choice for your home recording studio.
headphones
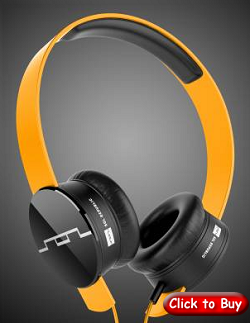
Headphones Michael Phelps Wore At 2012 Olympics – SOL REPUBLIC Tracks
As part of my effort to point out audio stuff in pop culture, I wanted to write about those really cool headphones that American swimmer, Michael Phelps, was sporting prior to each of his events at the 2012 Olympics. They were colorful and sleek – very stylish. They were the SOL REPUBLIC Tracks.
The headbands are colorful, yes, but they are also twisty and bendy, nearly indestructible, and interchangeable. The last one is pretty unique. You can switch them out with others of different color, depending on what you feel like in the moment.
The headphones themselves, the actual “audio” part, are also awesome, boasting extremely high quality sound and comfort.
One other cool thing is the “mic + remote control” feature. There is a detachable microphone and remote control you can use to operate your iPod as well as answer and hang up calls.
Athletes frequently wear headphones like these because it helps them focus as they isolate themselves with noise reduction and great audio quality for music. American Diver, Troy Dumais for example, wears the Bose QuietComfort 35 Acoustic Noise Cancelling Headphones. American Olympic swimmer, Anthony Ervin and diver, Kristian Ipsen, and Chinese swimmer Sun Yang wore Beats Isolation headphones/
Update: Since Michael Phelps seemed to be changing our his bands for every swim, we were ticking off all the different colors. But on one of the latest headphone appearances was a logo for something we couldn’t quite make out at first. Then we paused the TV (gotta love DVRs) and got up real close to see that the logo was for dance music producer/DJ (he doesn’t actually like being called a “DJ,” apparently) Deadmau5. Not sure if the bands came already branded, or if Phelps put a Deadmau5 sticker on the band, but it does point out another cool thing about these headphones – you can easily put writing and/or artwork on the bands to further express your personality.
How To Build A Home Recording Studio: Part 5 – Accessories
This is part 5 in our How to Build a Home Recording Studio series that shows you how to set up a computer-based studio capable of recording pro-quality audio. In part 4, we talked about audio recording and editing software.
Today, let’s talk about the accessories – things like mic stands, headphones, pop filters, etc. These are the supporting actors in most cases – the things that make it easy for us to use the microphones, interfaces and software that make up the leading roles in our studio.
An argument could be made for monitor speakers being more of a lead actor, especially for music recording and mixing. But since we are starting out with more of an all-around basic studio that many of us will use only for voice-over type work, the speakers get second billing.
Mic Stands
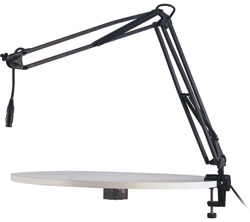
Since I’m recommending a large diaphragm condenser type mic, you’ll need a mic stand of some sort. For non-talking-head voice-over stuff, I highly recommend a scissor stand such as the AKG Table Mounted Scissor Stand. You can clip it to a table or desk, and rotate, push or pull the mic away as you need it. I use one of these and find it incredibly handy, especially for voice-over work. The mic is always right there when I need it and I can just push it up and out of the way when I’m not using it. These run between $70 and $170 and come with the mic cable built in, which is also really convenient.
If you use the hand-held type of mic, a standard desk top stand, such as the Atlas Sound Stand, will only run from $15-$30 bucks or so.
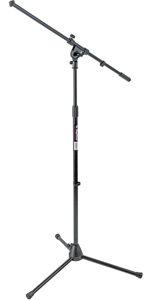
For music or voice-over use, another great and versatile choice is a boom stand like the On-Stage MS7701B Euro-Boom. You can move these around and put them anywhere, and the boom functionality allows you to place the mic at any angle or height you want.
Shock Mounts
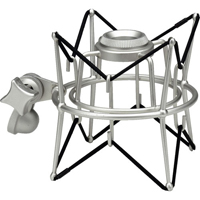
Large diaphragm condenser (LDC) mics are very sensitive to any bumps or vibrations coming through a mic stand. That is why it is almost mandatory to use a shock mount, which holds the mic suspended in a spider-web-looking thing made up of elastic bands. Most LDCs have specific shock mounts designed for them by the mic manufacturer, and some even come with one, like the Audio-Technica AT2020 and AT2035 microphones. But you can also get a universal shock mount such as the MXL-USM001 Universal Basket-Style Shock Mount that will work with any LDC you have.
Cables
If you’re using a non-USB mic and not using a desk boom stand (which come with the cable built in), you’ll need a mic cable, which usually cost about $25. These cables have the 3-pin XLR connectors. Of course if you are using a USB mic, you’ll use a USB cable. Be sure to use the one that came with the mic if you can, as these are designed for audio. Not all USB cables are up to that task.
Headphones
You can get away with using mp3-player-type ear buds if you need to, or if you’re going to stick to the headsets, that’s fine too. But having headphones allows you to hear the audio much more clearly and are very useful if you do any Skype chats or other types of on-line meetings where you need listen as well as speak into your mic. Otherwise the speakers will also be picked up by the mic and cause feedback and other unpleasantness.
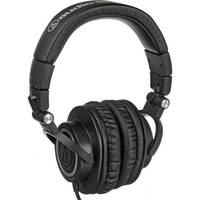
Of course, if you’re doing any multi-track recording (usually with music studios), headphones are necessary. I use both the Sennheiser HD 280 and the Audio-Technica ATH-M50 and recommend either or both.
Speakers – Again, if you already have speakers hooked up to your computer (most people do), you can get away with using those for now. When you can afford it though, a good upgrade would be to invest in a pair of monitor speakers such as the KRK Rokit G3 Active Monitors. The 6″ version will run about $200 per speaker.
Pop Filter
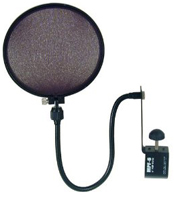
If you are recording your voice, you NEED a pop filter/screen to reduce the p-pops that are inevitable in human speech. Large diaphragm condenser mics are extremely sensitive to the little blasts of air that hit them when we say the letter “P” (or other plosive sounds). The result in the recorded audio is little low-frequency splat type of sound. A pop filter set up between your lips and the mic will reduce or even eliminate p-pops. One good example is the Auray Pop Filter. They cost about $23.
Mixer
You don’t need one. Yeah, I know. The popular image of recording studios of show big mixing boards with lots of impressive knobs and sliders. But for a computer based home recording studio, you do all your mixing in the computer. Trying to route things through a mixer can really confuse things. Notice that neither of our home studio configurations include a mixer. The quality of mic preamps on a typical mixer are usually not good for recording.
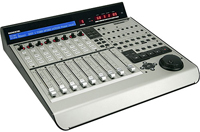
One exception to what I’m saying about mixers in home studios is the MIDI control surface unit. These units are designed to give you physical control over your software mixer. Folks doing mainly voice-over work would probably not need one. Musicians who prefer using their hands to move sliders and knobs rather than a mouse are typically the ones who like to use control surfaces. One example is the Mackie Control Universal Pro – Expandable Control Surface
That’s pretty much it for basic accessories! Let’s review the basic home recording studio set-up options configurations.
– Configuration 1 (a mic plugged directly into a computer) – For pro quality audio you’ll need a USB mic on a stand with a pop filter plugged into a normal computer running, say, Reaper software. Total cost would be about $159.
– Configuration 2 (XLR mic plugged into an interface plugged into a computer) – The basic pro-capable option would be a Large Diaphragm Condenser mic (non USB) on stand (I think full-sized boom stands are much more versatile than a simple desk stand) with a pop filter, plugged into an interface which is plugged into a normal computer running Reaper software. The total cost for that would be about $340 – IF you buy them separately. However…
Home Studio Bundle Deals
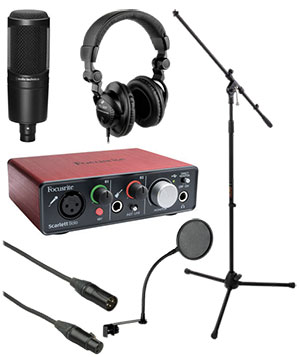
We were able to get a bundle deal with B&H Photo-Video-Audio called The Home Recording Starter Kit, which gives you everything you need in one product for a much lower price – $229.95. It would cost $288.91 if you bought each item separately. Click here if you’d like to see the details of that package and/or purchase it.
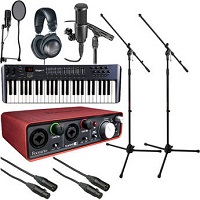
For musicians, we tweaked the bundle to include a MIDI keyboard, a 2-mic-input interface, and added a small diaphragm condenser mic so you could record an acoustic guitar or other instrument as well as your voice. That bundle, the Home Recording Musicians Starter Kit is $429.99 (would cost $529.79 if you bought each item individually, so you save about a hundred bucks there). Click here if you’d like to see the details of that package and/or purchase it.
Now What?
So now that you know how to put your studio together, you’ll want to know how to actually do the recording, right? That’s what Home Brew Audio is all about!
We’ve got tutorials, articles, tips and resources to help you on your recording journey. Also, we have a video tutorial series called The Newbies Guide To Audio Recording Awesomeness. The first course that takes you step-by-step, even if you’ve never done any recording before, through creating your first recordings and teaching you the basics of audio recording even if you have no budget for gear. It uses the free Audacity software and a pc mic you probably already have (or you could buy for around $5). The second course, The Newbies Guide To Audio Recording Awesomeness 2: Pro Recording With Reaper, shows you how to the same basics from part 1 when using Reaper software, plus introduce you to even more powerful and awesome recording tricks and techniques.
Below is a video explaining parts 3-5 of How to Build A Home Recording Studio:
You can watch this video on You Tube here: How To build A Home Recording Studio – Part 2
Now that you know how to put together an affordable but professional home recording studio, AND you have a place to learn how to use it, you can start recording awesome voice-overs, songs, video narrations, audio books, etc. Have fun
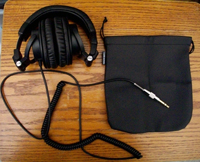
Review of the Audio-Technica ATH-M50 Headphones
I have been using a new pair of headphones – the Audio-Technica ATH-M50 – and saying bad words, because they are revealing details (not the good kind) of my recordings about which I have been blissfully unaware. This is a GOOD thing. The ideal for any kind of monitoring in your home recording studio is accuracy. The more flaws you can detect in your audio, the more you can tweak and fix that audio. As a result, your finished product will be that much better.
The Audio-Technica ATH-M50 is designed for professional monitoring and mixing. This means that they aren’t designed to make your audio sound good by boosting certain frequencies, as you’d expect from consumer headphones for your iPod, for example. They are designed to tell you the truth, warts and all, about your audio; and as I mentioned above, this they do extremely well.
But despite the fact that they are designed for reference monitoring, they still do sound fantastic listening to well-recorded music. They are even quite popular among the audiophile crowd.
The Basics
These “cans” (as they call them in the biz) are of the closed-back design, making them perfect not only for critical listening, but also for artists to wear when recording. The closed back keeps the music or click-track from leaking into the mic. They will also provide isolation from extraneous sounds (cars, cats, lawnmowers, etc) while you concentrate on the audio.
They are also circumaural, which means the padding goes around your ears instead of smashing them against your head. This lets you wear them comfortably for long periods of time. Additionally, this model has the spiral coiled cable rather than the straight cable. I prefer the coiled variety because I’m less afraid of clotheslining myself. But if you prefer the straight cable, the ATH-M50 offers those as well. Be sure you know which one you order though, when buying, so you don’t get the wrong kind. Both varieties are single-sided, meaning that the cable only comes out of one ear cup rather than both. This makes them less apt to tangle around things.
Other Specs
- Large 45mm neodymium drivers
- 15Hz – 28Khz frequency response
- 3.5mm mini plug with 1/4-inch threaded adapter
- Swiveling ear cups that can rotate out 180 degrees – useful if you only want to listen with one ear
- Collapsible for convenient stuffing into the carrying bag that comes with them
The listed dynamic range for these phones is HUGE, especially considering that the range of human hearing is considered to only be 20Hz to 20KHz. This is one reason why they sound so freaking awesome though.
The Real World
Enough with the numbers – how did they perform in the real world? Well there is no question that these are serious headphones, designed for professional use. The sound, as I may have already mentioned, is awesome. That’s going to be the main factor with headphones. Since I, like anyone whose home studio is in a converted rectangular bedroom, have an imperfect listening space, having high quality headphones that can give me accurate sonic information is crucial. And the $159 cost for these headphones is certainly less expensive than paying someone to come out and install acoustic treatment in my studio, followed by purchasing top-of-the-line loudspeakers, many thousands of dollars in all.
My only quibble is that these headphones weren’t as comfortable as my old ones, the Sennheiser HD-280 Pro, which are also closed-back, circumnaural cans. They seemed a bit tight on my big noggin. A bit of looking around on the web about this, though, showed that this is common for some people when the phones are new. But everyone says that they stretch and loosen after wearing them for awhile, like a new pair of shoes. So I don’t expect this to be a problem for me.
In summary – if you are looking for a pair of really good, professional headphones that will take your recordings to the next level, and you want to do that for under $200, then these headphones are perfect.
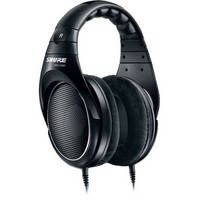
The New Shure Open-Back Headphones
Shure, the company known primarily for their excellent microphones, made a pretty big splash in 2010 when they released some studio headphones (the SRH440 and SRH840). But these were closed-back headphones, which are a type needed by folks when recording in the studio, mainly so that the sound coming into their headphones doesn’t get picked up by the mics, as happens with open-back cans. The closed-back kind can also help isolate the listener from outside noise. But the open-back design has a big advantage in that it allows sound to move around in the air and allows the driver to move with less restriction, creating a better and usually more accurate playback.
The new Shure SRH 1440 is the open-back kind. They are also “circumaural,” which means that they go on over and around your ears as opposed to the kind that sort of smash your ears into the side of your head. This makes them much more comfortable. Anyone who has spent a few hours with the other kind on their noggins can attest to how sore your ears can get. And pain is just not conducive to long hours in the studio. Bottom line – these things are really comfy.
So what makes these so special?
They are deadly accurate, which means you can hear everything, even if it isn’t something that should be heard. This is a good thing for headphones in the studio. You don’t want to be lulled into a false sense of security by headphones that make audio sound better than it really is because the first time you hear your mixes somewhere else, like in the car, or on a CD player, it might sound really awful. What you need is the truth. And accurate headphones like the SRH1440 can give you that.
The reason this is such a big deal, especially now, is that so many of us record and mix in less-than-ideal rooms, usually spare bedrooms. We do the best we can to mix our audio accurately but poor listening rooms will always impart something to the sound that makes us react by cutting or boosting the wrong frequencies, or panning incorrectly. It might then sound good in that room, but as soon as that room is no longer imparting it’s two cents to the sound, like when we play it on a friend’s stereo, we usually find the mix doesn’t sound good anymore. The mix is not “portable.”
Then there is the age-old advice that we should never mix exclusively with headphones because they lie to us, or they lie MORE than the monitor speakers in our bad rooms. The logic behind that is that it is more natural to hear audio through the air.
So if we take it as given that we don’t have ideal spaces to listen critically, and loudspeakers, even though they play through the air, will still be too affected by room dynamics, we are really only left with headphones as the next best choice. And because the SRH1440 headphones are so accurate and allow the sound to move in the air due to their open-back design, we can go a long way toward overcoming bad rooms and maybe bad speakers to create great mixes by using headphones like these.
The SRH1440s cost $399, which may sound like a lot, but consider this. A decent pair of monitor speakers will start out at about $400 or $500 per speaker. And then you still probably have a bad listening room to put them in. So compared to $800-$1,000 to get better mixes, the cost of these headphones is an excellent investment in your audio.
Happy mixing!