 I’ve talked about compression quite a lot because it is an excellent, useful, and very powerful tool in your audio recording arsenal. But like anything powerful, you can also use too much.
For a review of what compression is, see these Home Brew Audio Articles:
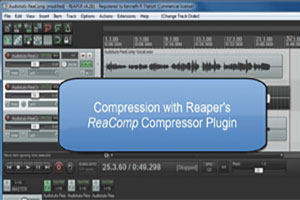
Vocal Compression Using Reaper’s ReaComp Effect Plugin
Improve Or Ruin Your Audio With an Effect Called Compression, and
Should You Use Compression In Audio Recording?
Those will give you the basics of what compression is. The last one has a white-board video of me explaining the concept.
You can see all the articles on the site that mention compression by going to our “Compression” tag page here: https://www.homebrewaudio.com/tag/compression/
Important! Only use compression (or any audio effect, for that matter( if you know WHY you’re using, and can tell whether it did what you wanted after you apply it. You’d be surprised how many people use compression “because they think they should,” and not with any particular objective in mind. OK, moving on…
Like with most tools, you don’t always want to compress every sound source in your recording. The main job of a compressor is to even out audio levels or loudness. So if you have something that has some loud parts and some really quiet parts, it probably could benefit from some compression so that the person listening to it doesn’t have to turn it up when it’s too quiet, and then turn it down again when it’s too loud. Compression does that for you. That’s its job.
The human voice is pretty dynamic, meaning we express ourselves with our voices with a large variety of loud and very soft sounds. So a pretty good rule of thumb is that a lead vocal in a song will almost always benefit from at least some compression. Acoustic guitar can also be quite variable in volume and is also usually a good candidate for compression. Likewise with drums (especially the audio from drum overhead mics, which capture the entire kit).
But other things may rarely need compression. I’d say that electronic keyboards and their software synthesizer cousins are rarely in need of much, if any compression. Electric guitar often does not NEED compression, per se. But there are other results – sort of like side-effects – that you can use compression for, like adding punch or sustain to enhance the way something sounds. Electric guitar is often the recipient of such treatment. For example, if you are familiar with the electric guitar sound of the group, Boston, you have heard super-compressed electric guitar.
At the end of the day, though, you need to be the judge of what should be compressed and what shouldn’t when it comes to your mixes. Oh yeah, I forgot to mention final mixes. Those almost always benefit from some compression as well. Anyway, as I was saying, you should use your own ears and judgement on using compression.
And when you DO use it, be careful! Too much compression (using extreme settings) can cause unpleasant artifacts (a fancy way of saying unwanted sounds) like unnatural “pumping” where the audio attack and release cause the audio to sound even more uneven than before (ironically). Another thing that is common with vocal over-compression is excess sibilance, where all the “S’s” started sounding way too hot. So avoid hissing and pumping vocals by using compression responsibly;).
If you have any other examples of when and when not to use compression, please leave a comment below. We’d love to hear from you.
Cheers!
Ken
compressor
An Interesting Vocal Compression Tip
WinkSound put out a video that offers an unusual tip for using compression on a vocal in a mix. It refers to some common compressor controls the I go over in my recent post on how to use Reaper’s built-in compressor plugin called ReaComp. See that article here: Vocal Compression Using Reaper’s ReaComp Effect Plugin. In this WinkSound video tip, conventional settings are pretty much thrown out in that it is recommended to turn both the attack and release controls all the way to the fastest possible settings. In combination with those settings, in order to not completely destroy the vocal with over-compression, a quite high threshold is used (about -10db) and a subtle compression ratio.
But things are usually made more clear by watching. So below is the video of which I speak:
Vocal Compression Using Reaper's ReaComp Effect Plugin
 I just had my first audio recording tutorial video published by AudioTuts+. The video shows you how to compress a vocal track using the compressor plugin effect, ReaComp, that comes with Reaper audio recording software. If you’d like a refresher on what the compression effect is for, see our article: What Does Compression Mean In Audio Recording?
In this video, I show you how to place ReaComp on a vocal track in Reaper (my dulcet tones doing a bit of singing). Then I walk you through the settings screen and explain the main controls and meters so you can see how the voice is affected by them. Then I show you how to set the starting levels for the threshold, ratio, and attack/release settings. You can then both see and hear how compression affects the vocal track.
https://homebrewaudio.wistia.com/medias/r479d81v6c?embedType=async&videoWidth=700
The tutorial video was published here: http://audio.tutsplus.com/tutorials/production/quick-tip-how-to-use-reapers-reacomp-compressor-plugin/. I encourage you to check out the AudioTuts+ site because it has a lot of resources on audio recording that you will find very useful. But if you just want to watch the video, check it out below. Enjoy!
Using Multi-Band Compression
We have a few articles about the use of an effect called compression in audio recording. See our first one here: Should You Use Compression In Audio Recording? Well usually the compression settings (like threshold and ratio) are applied to the entire frequency spectrum of an audio item. But sometimes it might be useful to apply different settings to different frequencies. For example, you might want to really squash the low frequencies (say, a “band” of frequencies between 60 and 200 Hz), but have a faster release on them, while at the same time, applying subtle compression to the middle group (band) of frequencies. That is called multi-band compression.
Our article on multi-band (or more often, multiband) compression explains in more detail. But we like to offer different points of view and perspectives.
Here is an article from Audio Geek Zine that shows you how to use multi-band compression, along with audio examples of drums and guitar recordings. check it out here: http://audiogeekzine.com/2012/09/how-to-use-multiband-compression/
Studio Compression: When, Why To Use Slow & Fast Attack Times
Home Recording Equipment: The Compressor.
Ratio and attack settings are the most important settings to learn about using a compressor. The attack setting tells the compressor how quickly it should compress the signals once it crosses the threshold. Whereas the ratio tells the compressor how much to compress once it crosses the threshold. The attack setting gives us idea about the time setting whereas the ratio gives us idea about the quantity to compress. You can brush up on compression and what these controls mean with our recent post – Vocal Compression Using Reaper’s ReaComp Effect Plugin
Read the full article here:
Studio Compression: When, Why To Use Slow & Fast Attack Times