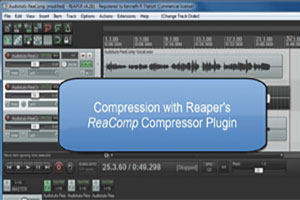
Lead vocal tracks almost always benefit from at least some compression. See my tutorial on using Reaper’s ReaComp compressor plugin to see a video of how to apply compression to a vocal track here: Vocal Compression Using Reaper’s ReaComp Effect Plugin. In that tutorial I applied mild compression and I only did it once. That’s pretty much the norm. But you can use more compression if the vocal track is very weak, tentative, and/or particularly uneven (volume-wise).
But how do you avoid the nasty side effects of over-compression, which include things like hyped sibilance, pumping or just very flat-sounding audio? One way is to use something called serial compression. What that means is that you apply subtle compression to the vocal track, but you do it multiple times. That way you can get the desired effect of more-than-usual compression without ass the side-effects.
Bjorgvin talks about what that is and how to use it in his article here:
http://www.audio-issues.com/music-mixing/vocal-compression/
compression
Using EQ To Fix A Room Mic Problem In A Drum Mix
 A very common technique when recording drums is to close-mike – put microphones very close to at least the kick, snare, hi-hat and toms – and also have a room mic or a pair of room mics to capture the sound of the overall drum kit. The room mics are usually several feet away from the drum kit. Then you mix the room mics in along with all the drum mics.
Another common thing to do is put a lot of compression on the room mic, which makes the entire drum mix sound, for lack of a better term, huge. But sometimes using a ton of compression, such as using a ratio of 20:1, on a drum room mic can over-accentuate the sound of the cymbals. Having your drum mix sound like it’s swimming in cymbals pretty much ruins the sound you were going for with the room mic. But you can fix that by using an equalizer (EQ) effect to basically filter out the main frequencies where the cymbals live.
Graham Cochrane shows you how to do that in this very informative video:
Vocal Compression Using Reaper's ReaComp Effect Plugin
 I just had my first audio recording tutorial video published by AudioTuts+. The video shows you how to compress a vocal track using the compressor plugin effect, ReaComp, that comes with Reaper audio recording software. If you’d like a refresher on what the compression effect is for, see our article: What Does Compression Mean In Audio Recording?
In this video, I show you how to place ReaComp on a vocal track in Reaper (my dulcet tones doing a bit of singing). Then I walk you through the settings screen and explain the main controls and meters so you can see how the voice is affected by them. Then I show you how to set the starting levels for the threshold, ratio, and attack/release settings. You can then both see and hear how compression affects the vocal track.
https://homebrewaudio.wistia.com/medias/r479d81v6c?embedType=async&videoWidth=700
The tutorial video was published here: http://audio.tutsplus.com/tutorials/production/quick-tip-how-to-use-reapers-reacomp-compressor-plugin/. I encourage you to check out the AudioTuts+ site because it has a lot of resources on audio recording that you will find very useful. But if you just want to watch the video, check it out below. Enjoy!
Tips On How To Use Multiband Compression
Multiband compression is a tool that gives you more control over what gets compressed when you’re, well, using a compressor (see our article What is Multiband Compression for more details). Usually the action of the compressor is universal in terms of the frequencies affected. You give the effect some parameters so that it knows where to kick in (that’s the threshold of signal level that triggers the action), and then you tell it how much to reduce the signal level (turn it down) for each decibel (that’s called the ratio – 1:1 means nothing gets turned down). Then the compression gets applied to any and every frequency that happens to cross the threshold.
But with multiband compression, you can apply different settings for different frequencies.
Here is an article that will show you some ways you can use multiband compression.
http://www.prosoundweb.com/article/in_the_studio_how_to_use_multiband_compression_includes_audio/
Parallel Compression Tips For Drums
Here is a video showing some tips on how to do a kind of compression when you have drums in your music mix. These tips show something called parallel compression, and it uses Pro Tools. But as is usual with technique videos and articles, you can do this with most any DAW (digital audio workstation) software.
Here is the video: