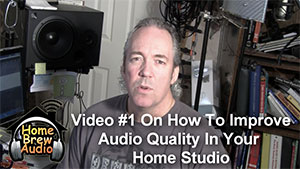
 One of the biggest challenges we face as people who record audio at home is that we don’t have ideal recording spaces. A vast majority of us, Yours Truly included, set up our home recording studios in a spare bedroom. More often than not, these rooms are almost perfectly designed to provide us with the WORST possible acoustic spaces in which to record. These rooms impart way too much echo-y, reverb-y (and not in a good way) crud to whatever you try to record. The problem is especially bad when recording voices for podcasts, video narration, voice-overs, etc. because there isn’t any music to cover up that “room sound” like there is when recording songs.
http://homebrewaudio.wistia.com/medias/8q52ozaez3?embedType=seo&videoWidth=640
In addition to to being poor recording spaces, converted bedrooms are also terrible at reproducing accurate audio. If you are trying to mix music listening through loudspeakers (recommended) in a bad room, you’re likely to THINK the music needs more bass, so you boost it with EQ. You may also hear too much of several other frequencies – maybe the high harmony part sounds too loud in the mix, etc. You mix until things sound good and then render it to a stereo file that sounds HORRIBLE on your iPod or in the car. There’s way too much bass and the high harmony is gone. Happened? Bad room happened. Audio waves crashed into each other, either amplifying or reducing certain frequencies.
One Thing At A Time
If you are good at building and installing things like extra walls in your studio, or wealthy enough to pay someone to do that, you can improve the acoustic properties of your room for both recording AND mixing. But as with most problems, it’s usually best to take it a step at a time. Let’s leave the mixing issue for later and deal with making things better in the recording realm first.
With that in mind, this post and video starts a series that will give you tips you can use to improve the quality of the audio you record. Each week for the next several, I will provide you with a technique or two that you can implement immediately – without having to build or buy anything. Free and easy. It doesn’t get much better than that!
Tip Number 1
This first technique has a huge impact on recording quality, and it’s something you can do right now without, as I said, having to buy or build anything. And you won’t believe how simple it is. Ready? Just move closer to the mic! See for yourself – and more importantly – HEAR for yourself how much difference it can make in the video above.
Don’t Miss Out
Make sure you don’t miss any of the tips in this series. Put your email into the form below and get not only the rest of this series as it rolls out, but also the first 8 videos in our tutorial course “The Newbies Guide To Audio Recording Awesomeness 1: The Basics With Audacity.” This course shows you how to set up and start using your home recording studio for a budget of about five bucks (or less) in about 30 minutes.
See part 2 here.
We will not spam you with e-mails! We typically don’t send more than one message per week, and each of those will only be intended to help you make better audio recordings in your home studio.