I was working on a long voiceover recording job last week. After it was all recorded, I began the long process of editing it for the client. That involved not only optimizing the volume and minimizing the noise, but also creating 27 separate files. Things were progressing nicely, but then I heard an odd sound behind the voice at one point. You can probably guess by the title of the post what that sound was. Sigh.
Keep in mind that most voiceover jobs do not involve multitrack recording. That is to say, there is only one single track of audio being recorded. So if you hear a bird’s hoot AND your voice together on the recording, you can’t just “delete” the bird sound. In multitrack recording – such as you would use for most music recording – you purposely put different sounds on their own tracks so you can adjust the volume of each sound until it all mixes together nicely. THEN you render (mix down) the result to a single file. But I did not have the luxury of simply turning down the bird hoot. How in the world do I get rid of it?
OK, sure. I could just re-record that part when the bird is NOT outside my window. But that smacks of effort. I like to do things the easy way if I can. Yes, you may substitute the word “lazy” into that last sentence:-P. Anyway, there are some audio editing tools that you can use to reduce (or even eliminate) one type of sound, while leaving the desired audio alone. One of the best of these tools is EQ (short for “equalization”).
If the undesired audio has a much different frequency than the desired audio, then EQ can help filter out what you don’t want to hear. Sadly, this is not always the case. Sometimes, in order to remove one sound, you end up removing some or most of the sound you want to keep. But in this case, I was in luck.
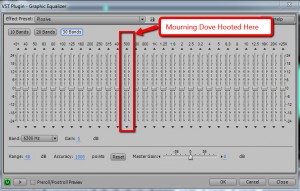
One other piece of good fortune was that a small amount of the dove noise was sounding during a section when the voice was not talking. It wasn’t enough to sample into a noise-reduction effect (unfortunately – because that is another good way to filter out the bad while leaving the good). So I highlighted the small bit of audio that had ONLY the mourning dove hoot in it. Then I opened the Graphic Equalizer tool in Adobe Audition (I still use version 3, but Audition is also part of Adobe CC – Adobe Audition CC [Digital Membership]). While listening to the hooting on a loop, I just started dragging down sliders (each slider is set to a specific frequency). If it didn’t silence the bird, I reset the sliders and tried the next one. It only took me about 10 seconds to locate the right frequency, which happened to be 500 Hz.
Awesome. Now that I knew that this particular mourning dove hooted at 500 Hz, I went back to the audio with both the voice AND the bird hooting in it, and highlighted that section. Then I just opened the Graphic Equalizer and started moving the slider at 500 Hz down, which turns down the volume at just that frequency. Now voices also produce sound at 500 Hz, so it I turned things down too much, the voice would also be affected. But in this case, by the time I moved the slider down enough to get rid of the dove, the voice still sounded fine. It probably helped that it was a female voice.
And the bird was gone! the entire process took about 60 seconds, which is a lot less time than it would have taken me to re-record the voice.
So the next time you have a bird outside your window threatening to ruin your recording session, remember this method. It might save you time and money. Of course, you could always build you own vocal isolation booth to record in. But that’s another topic altogether.
Voice Over Recording
The Trouble With Recording With Omnidirectional Mics In A Small Room
[I’m re-posting this article from January, since it has a lot of relevance to the recent series we’ve been running on controlling room sound.]
A reader asked me this week if I could shed any light on why his recordings weren’t sounding very good. He was using two very good microphones to record an organ, which he described as a large classic “church” type organ. He was using a pair of omnidirectional microphones and had tried various positions around the room, including the “spaced pair” configuration common when using “omnis.”
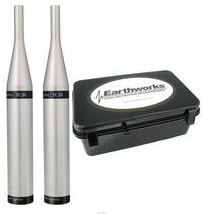
We had a few back-and-forth exchanges, concluding that even though the mics he was using, a pair of Earthworks SROs, (now redesignated the Earthworks TC20) are very fine microphones, they will pick up a lot of room noise, being omnidirectional. So if the room is small and has the same issues as most home recording studios, namely that there are lots of room echoes and generally bad acoustics, the resulting recording won’t sound very good. By the way, the acronym “SRO” stood for “Sound Reinforcement Omni.”
The Recommended Solution
Below is the full exchange.
Hi Ken,
I am trying to record organ music but the resulting sound is quite dry and seems “flat”. The organ is a large classic “church” type organ. I am using Earthworks SRO match mics (bought them because they were supposed to give an essentially flat response), and have done a lot of experimenting with placement in the room with negligible improvement. Also using Apogee Duet (the Firewire model) and their Maestro software on a MacBook Pro. Any suggestions would be appreciated. I am quite willing to change any of the equipment if that is important. Have enjoyed learning from your website.
Warmly,
John
Hi John,
So you’re using a pair of Earthworks omnis? You said you’d done experimenting with placement, so I assume you’ve tried the standard stereo positions. I think the recommended thing with omnidirectional mics is to have them in a spaced-pair configuration (http://goo.gl/YCFzwj). If you’ve tried that and it still does not sound good, it is likely to be the room the organ is in. Omni mics will sound terrible in a room with a lot of “room sound,” like a small room in your house (though it doesn’t sound like a church organ would fit in your home – not sure how big it is). If that is the case (bad room), I would try using a pair of large diaphragm condenser mics (LDC) in cardioid mode (most default to this) instead, just as a test to see if it gives you any better of a result. You might also try just a pair of dynamics like the Shure SM-57 or Shure SM-58.
Another question would be something that sounds simple, but a lot of people get wrong. In your recording software, are you recording each mic to its own track? In other words, there should be two tracks of audio when you’re done recording, one for each mic. Even that isn’t enough, though. You then have to pan the tracks “hard left and right,” meaning that track 1 needs to go 100% to the left and track 2 needs to be panned 100% to the right (or vice versa). It’s one of those things that isn’t always so obvious.
I hope that helps!
Ken
Hi Ken,
Thank you for the quick reply. I did try the spaced-pair configuration along with others with not much difference. I think you are right about the room size. It is a large church organ but it is in my home – a room about 18’ x 22’ so there is a lot of organ for the small room. I could always sell the Earthworks pair if the large diaphragm works better. I notice you like the AT2035 in one of your reviews. Is there another that you would prefer for such big sound in a small room. Do you feel I need two mikes in this situation or would one do it since there is not a lot of stereo effect in the smaller space.
Also (don’t want to bug you too much or take too much of your time), I would have not trouble moving to the Reaper 4 software if you think it would be helpful. Not quite sure why, however, in your video demo of Reaper you switch to Audacity to do the editing. Can you not do the same in Reaper 4?
Thanks a lot,
John
Hi John,
I have been asked the question about why I go to a separate editor in that video a lot. I actually put commentary on the You Tube video that says it isn’t strictly necessary – just something I have done for years. But in my Reaper course, I show you how to do everything right in Reaper.
As for the organ, I thought it might be the case that a poor room sound was causing the problem. Home recording studios almost all have that problem, ans it’s made much worse by the use of omni-directional mics. So using cardioid mics will help quite a lot, and the closer you get them to the organ, the better (less room noise). This is because the cardioid pattern picks up audio best from in front of it and rejects sound from behind it, something omnis don’t do (hence the name).
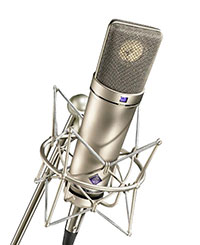
As for the types of LDCs – yeah, the AT2035 would be great, though there are a lot of choices (I use a Rode NT2-A as my main vocal mic, but it’s more expensive). The AT2020 might work well too for much less money than the AT2035. What mic will work best for you all boils down to your space and your instrument (including voice). Plus budget is a factor for most. If I had the budget, I’d have a matched pair of Neumann U87s :).
About the stereo thing, you may be right. It depends on how the sound comes out of the organ in that room. If, by the time it reaches the mics, it’s just a wall of very loud sound, then stereo imaging will be difficult. But again, only trying it will show you. One trick you can try is to record with just one mic onto one track. Then copy the audio on that track and paste it into a 2nd track. Then offset the 2nd audio item by 30 milliseconds or so (experiment) and pan both tracks hard left and right. You create “fake stereo” this way. It can be very effective. Also, this is demonstrated in the Reaper course:).
I am not familiar with the software you mentioned – Maestro, but I always recommend Reaper since it so fabulous.
Hope that helps.
Ken
Improve The Quality Of The Audio You Record At Home – Tip 6: Acoustic Treatment
We’ve been doing a series of posts over the last 5 weeks – giving you tips on how to improve the quality of the audio you record in your home studio. The first of the series is here: Improve The Quality Of The Audio You Record At Home – Tip 1.
The first 4 tips were all about technique – ways to immediately improve your audio without having to buy or build anything. A huge majority of people recording in home studios using converted bedrooms and don’t use any acoustic treatment in their rooms. I’ve recorded this way for over 10 years. The problem with doing it this way is that the rooms in our houses have notoriously bad acoustics – making your audio sound reverb-y and echo-y.
So the first 4 tips in this series showed you how to reduce that bad room sound in your recordings immediately, without having to buy or build anything. Then last week, week 5, we talked about microphones – how no matter what mic you currently use, you can almost certainly improve your audio by upgrading to a different mic without having to spend a lot of money – in fact most can do this for $100 or less.
The Best For Last
In this week’s tip I will share something that has completely changed my life (yeah, sounds dramatic but it’s true). II put acoustic foam on my walls that just about totally eliminates that bad, echo-y room sound!
NOTE: This final tip – though it is super helpful in a home studio – is not strictly necessary to get professional sounding audio. I recorded everything for my voice-over and music careers in this same studio with only tips 1-through-5 for several years. But if you CAN afford to do it, make it happen ASAP.
There are several types of acoustic foam that you can use to treat your room with. Auralex is probably the most popular manufacturer, and they have several packages to choose from. I went with a less popular (but a bit more expensive) brand called “Acoustic Fields.”
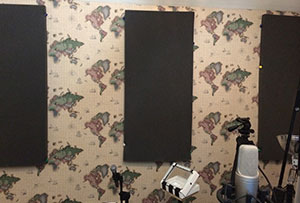
Regardless of the brand you choose, You’ll want to cover up a pretty fair percentage of the walls in your recording room. Look at the picture at the top of the page to get an idea of how much foam I have on my walls. I put foam starting at about my waist level and going up to the top of the wall.
Overall, I’d say about 20 to 25 percent of the walls have foam on them. You can probably get by with less than that if you place them on the wall opposite where you face when you record, and also on the wall behind your normal recording position.
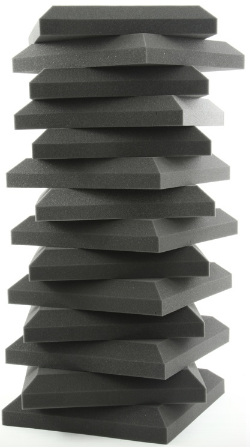
I recommend starting with about one pack of 14 of the Auralex 1-foot square panels. then if you need more, you can add panels until those echoes are tamed.
Once some of this foam is on your walls, it absorbs the bad room reflections without sucking the life out of the sound of your voice, as is the case so often with other room treatments.
Our Tests With The Foam
Before putting any foam up on the walls in my converted bedroom studio, we wanted to do some before and after tests to make sure it would truly make a difference. So my wife (Lisa, fellow voice-over artist and singer) and I did a series of male and female vocal recordings – spoken, shouted and sung – with no foam on the walls.
Anyway – the tests. After recording samples with no acoustic treatment on the walls, we basically covered the walls with foam, leaving no more than a couple of inches between panels. Then we recorded the same samples. We – were – blown away! There wasn’t even a hint of room sound after the foam went up.
Next, we removed every other panel to find out how much treatment was enough. It is possible to overdo it. Well, it sounded great with no hint of room sound at all. Removing every other panel opened up the sound slightly as well —- “letting the audio breathe a little” is probably the best way to put it.
Below is a bit of the before and after audio. The samples were recorded 18 inches from the microphone to maximize the effects. The shouted phrases were also chosen to send a quick loud vocal through the room. This song for the singing sample was chosen for the same reason, AND the fact that it’s in the public domain. Also, the before and after samples have been normalized to be the same volume to eliminate loudness as a factor. Though the difference is clear listening on your speakers, to hear how truly dramatic the difference is, try listening with headphones;).
Before
Male “Before”
Female “Before”
After – WITH The Foam On The Walls
Male “After”
Female “After”
Close Voice Over Samples
The above audio was used for putting the foam through a tough test of absorbing the worst reflections the room could generate – recorded 18 inches away from the microphone. As we know from Tip #1 in this series, recording far away from a microphone in a room with poor acoustics gives you a LOT of room sound. So if we have no treatment on the walls, we need to get very close to the mic. Most people aren’t going to record from 18 inches away, so the above is maybe not your typical use.
So we recorded fairly close to the microphone (about 6 or 7 inches away) using the foam, and the “omnidirectional setting” on the mic (which we couldn’t use pre-foam due to how much extra room sound that pattern picks up) to demonstrate how good the foam allows our voices to sound now.
Male Voiceover With Omni Setting and Foam on Walls
Female Voiceover With Omni Setting and Foam on Walls
More Testing
After we conducted the above tests, we removed all the foam panels and decided to test the foam against another product, which purports to remove poor room acoustics in vocal recording. It fully encompasses a microphone with acoustic foam – you stick you microphone inside of it. Our goal was to play each sample in headphones, and NOT tell the person listening which sample was being played. In other words, it was a blind test.
We both chose the wall treatment foam as by far the best. In fact, not only did the other product not even eliminate the bad room sound despite completely encompassing the microphone. It actually made our voices sound worse – all muffled and unnatural.
The audio recorded with acoustic foam on the walls, on the other hand, sounded fantastic; no room sound and it actually made our voices sound better than usual. What was really happening was not that the foam “imparted” anything extra to the recordings, but rather it absorbed the undesirable room echoes and what remained was ONLY what should be there – our natural voices – with nuances and polish like we’d never heard.
Life Changing? Really?
So how did this “change my life?” Well, for one thing it will cut my production time by more than half of what it was. Without the foam, in order to reduce the amount of room sound in your recording, you have to get very close to the microphone (that was tip #1 in our series). But that results in a lot of p-pops, which have to be edited out (that was tip #5) after the fact. At least half of my vocal recording production time was devoted to editing out the p-pops! But now I don’t have to get close to the mic, so there are no p-pops.
Just that alone would have been awesome. But more than that, our voices sound better than ever. And we don’t have to fight our room anymore. We don’t have to set up bulky baffles or stuff the mic into anything. We don’t have to go into the closet. We get to use the room! Also, I can now use the omnidirectional and figure-8 settings on my microphone, which is pretty much impossible in a bad-sounding room because those settings make room sound even worse. This means we can record small vocal groups (try fitting THEM into a closet!), podcasts with multiple people using a single mic, and a lot of other things that were simply impossible in a bad-sounding room if you wanted the audio to sound professional.
So the final tip in the series is “try the new acoustic foam from Acoustic Fields.” It will basically make it unnecessary to employ any of the usual counter-measures to fight the room sound in home studios, making it easier and faster to produce great-sounding voice recordings.
Here is how to get started
Like I said, there are several brands of acoustic absorption foam. But one of the most popular and easily available is Auralex. Below (on the left) is a package of their 1-foot square panels to get you started:
Yes, there is a cost involved here – an investment really. Consider this. Even the most expensive microphones will sound bad if used in a room with bad acoustics without applying tips 1-5. Two very popular vocal mics are the Neumann TLM-103 and the Sennheiser MKH 416 shotgun mic. These cost $1,100 and $1,000 respectively. If you are serious about a career in voice overs, I recommend treating your room BEFORE you purchase that expensive microphone. You might find that a much less expensive microphone is all you need, once your room is not adding echo-y, reverb-y ickiness to your voice.
Join Us For More Home Recording Awesomeness
Att Home Brew Audio, we are trying bring professional audio recording into reach for regular, non-engineer and “techy” folks. To get you started producing professional sounding audio from your house, see the picture below to get access to the first 6 lessons in our tutorial course “The Newbies Guide To Audio Recording Awesomeness.” In this course, you will learn how to set up and start using your home recording studio for a budget of about five bucks (or less) in about 30 minutes.
Improve The Quality Of The Audio You Record At Home – Tip 5
This is week 5 in our series of videos and posts giving you tips for improving the quality of the audio you record in your home studio. All the tips so far (if you’ve missed them, you can start with week one here: Improve The Quality Of The Audio You Record At Home – Tip 1) have shown you quick, easy ways to improve your audio without having to to buy or build anything. But they also had something else in common. They all work to make your audio sound more professional no matter what kind of microphone you are using – cheap or expensive.
[genesis_club_wistia_video id=”tsb715yr8g” pt=”75″]
The Microphone Is Not The Most Important Thing
It was quite intentional to NOT make “buying an expensive microphone” the first tip in a series about how to record better audio. Usually, it’s the the first thing people think they need to do in order to record more professional audio. But that simply is not the case. I think it belongs at about number 5 or 6 on the list. If you’ve been trying out all the tips in this series, you’ll know first-hand how to massively improve your audio using the exact same mic you started with, no matter how cheap or expensive it is. Technique — how you use your gear — is by far the most important element.
Better Audio With A Better Mic
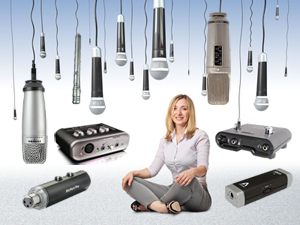
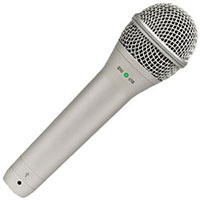
Even though I don’t think it’s the most important thing, it doesn’t mean you can’t improve your audio quality by using a different/better microphone. And this week’s tip is that no matter what mic you currently have, you can probably upgrade to the next level for much less money than you thought. For example, if you change from using a $5 computer mic to a $25 USB headset, it’s going to sound better. Cost of upgrade – $20. If you start with the USB headset and switch to using a $49 USB handheld mic like the Samson Q2U, the quality will skyrocket dramatically. Then moving from that to a $65 large-diaphragm USB mic like the Samson C01U, the quality jumps again. Make the switch to an audio interface with a standard large-diaphragm condenser microphone for a couple hundred dollars and the quality goes up again, and so on.
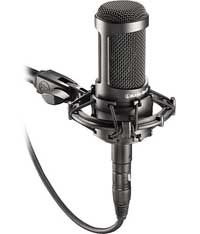
Generally speaking, for vocals – a large-diaphragm condenser mic like this Audio-Technica AT2035 – will work best for vocals. HOWEVER, there are two other types of microphone that sound terrific on vocals. Believe it or not, shotgun mics – typically used for video (such as the Sennheiser MKH416), sound great as close-up vocal mics. And though you would typically stay away from cheap dynamic microphones for vocal recording, certain TYPES of dynamics – called broadcast dynamics – can sound fantastic – such as the Electro-Voice RE 20 or the Shure SM7. In fact, since those mics are dynamic mics AND they have a cardioid pickup pattern, you get a double-dose of audio quality improvement. The cardioid pattern helps reject noise from most parts of a room, AND the fact that a dynamic mic is less sensitive to ambient noise overall, you get a lot less noise (air conditioning hum, computer drives spinning, etc) than with a large diaphragm condenser.
There are too many mics to mention, and we can’t try them all. So here is my advice if you do not already have a really good microphone. If you are not currently using one, try a large USB mic like the Samson C01U. The next step to improving even more – when you are ready to invest a few hundred dollars – is to get yourself an audio interface such as this Focusrite Scarlett 2i2 or Scarlett Solo, which plug into your computer via USB. Then get a standard (meaning NOT USB) large-diaphragm condenser mic such as the Audio-Technica AT2035 and plug it into your interface. That kind of set-up — a large diaphragm condenser mic plugged into an audio interface device — is what even the highest-end professional studios use.
Over time, and as your budget allows, you’ll want to try different mics. Here’s what’s on my wish-list right now. I’m saving for a Sennheiser MKH 416 shotgun mic for voice-over work. And though I drool over the thought of having one, it will be some time before I’ll be able to afford – or at least convince my wife that we can afford – a Neumann U-87, which currently would set you back about $3,600. Well, maybe some day.
So this week’s tip is that regardless of what microphone you are currently using, you can almost certainly upgrade for a lot less money than you thought. I also told you what kind of mics usually work best for vocals, and I mentioned a few specific mics you can try out. Don’t forget to tune in next week for yet another tip for dramatically improving the quality of the audio you record in your home studio. See you then!
Don’t Miss Out
Make sure you don’t miss any of the tips in this series. Put your email into the form below and get not only the rest of this series as it rolls out, but also the first 8 videos in our tutorial course “The Newbies Guide To Audio Recording Awesomeness 1: The Basics With Audacity.” This course shows you how to set up and start using your home recording studio for a budget of about five bucks (or less) in about 30 minutes.
We will not spam you with e-mails! We typically don’t send more than one message per week, and each of those will only be intended to help you make better audio recordings in your home studio.
Improve The Quality Of The Audio You Record At Home – Tip 4
We’ve been doing a series of articles and videos showing you how to produce better sounding audio even in (especially in) bad-sounding rooms, such as the converted bedrooms that so many of us use as home recording studio spaces. You can find the first post in the series is here, if you have not seen everything in order yet. Today marks the fourth week and fourth tip to help you sound more professional. This one is applicable primarily to vocal recordings – for voice-over or for singing. It’s time to tame the dreaded p-pop!
http://homebrewaudio.wistia.com/medias/z567xm8hkn?embedType=seo&videoWidth=640
Whenever we record words with a “P” or “B” in them, we’re creating a sound that linguists call a “plosive.” But when recording into a very sensitive microphone such as a large diaphragm condenser (LDC), which is probably the most common type of vocal recording mic, these plosives tend to create an unpleasant burst of low-frequency noise sounding like a small explosion. Sensitive microphones don’t like sudden blasts of air, so the result is an excessively loud plosive often called a “p-pop.”
Can’t I Just Use A Pop Filter?
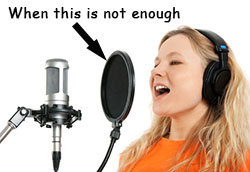
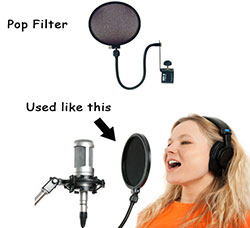
It’s common practice to use a pop filter when using an LDC mic. You place them between your mouth and the mic to help tame the p-pops. But some still get into the recording. And if you are recording in a poor sounding room, our first tip – getting your mouth 3 to 4 inches from the mic (unlike the girl in the picture on the right) will instantly improve your sound. However, even with a pop filter in place, getting that close to the mic will increase the problem of p-pops.
So though you can use a pop filter to help minimize those misbehaving plosives, you have to make peace with the fact that some will end up in the recording.
So what do you do now? You edit. You can fix p-pops using audio software after they have already been recorded. I tend to use Reaper for all my recording needs. However, though you CAN use Reaper to fix p-pops in an audio file, it is pretty time-consuming and cumbersome, as you’ll see in the video above. This is definitely a job for an audio editor, such as Audacity, Adobe Audition, Sony Sound Forge, etc.
In the video, you’ll see how much faster and easier it is to use an editor. I demonstrate how to do it in Audacity, which is free. So hey, once again you get a tip that won’t require you to buy or build anything. that’s four for four!
Don’t Miss Out
Make sure you don’t miss any of the tips in this series. Put your email into the form below and get not only the rest of this series as it rolls out, but also the first 8 videos in our tutorial course “The Newbies Guide To Audio Recording Awesomeness 1: The Basics With Audacity.” This course shows you how to set up and start using your home recording studio for a budget of about five bucks (or less) in about 30 minutes.
We will not spam you with e-mails! We typically don’t send more than one message per week, and each of those will only be intended to help you make better audio recordings in your home studio.