 Sometimes, when you’re recording a song, you’re looking for an open and spare sound on purpose. But other times, you may want the sound to be more “filled-in” – wider or thicker – if what you want is a thin or empty sound. One excellent way to do this is to add a “pad,” which is a sound that is sustained and held out over a long period of time (my definition), such as a string section or organ. Often, it is possible to add a pad to your mix and allow it make an almost unconscious impact on the listener, who will sense a larger or thicker sound without knowing why.
I usually use a virtual instrument to add pads to my mixes. Lately, my plug-in of choice has been Omnisphere, by Spectrasonics, which has hundreds of preset sounds, as well as the ability to alter or create your own sounds. I load an Omnisphere instrument on its own track in Reaper, then play the instrument with an external MIDI keyboard.
Below is a video by Joe Gilder showing you some other ways to thicken up your mix, either with a plug-in/virtual instrument like I usually do, or with a real organ.
Recording Tips and Techniques
The Home Studio Gear You Need – And Nothing More
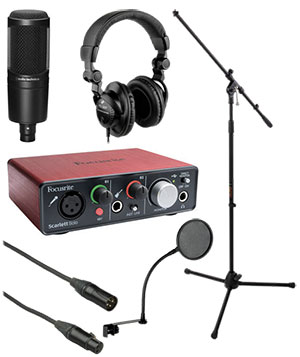
One of our core beliefs at Home Brew Audio is that you should never spend money on gear that you don’t need. It sounds logical, but the truth is that most folks who decide to start a home recording studio go out to their local gear dealer and wholeheartedly listen to the salespeople who suggest buying thousands of dollars of gear right off the bat. This leads to a bunch of problems, such as perpetuating the myth that it is expensive to get into home recording; saddling customers gear with software and equipment they not only don’t need, but often don’t know how to use; and ultimately leading to unsatisfactory recordings, even after dropping thousands of dollars.
So we say “let your need drive your gear purchases.” We help folks understand what gear they need to get started – see our series “How To Build A Home Recording Studio.” After that, you can incrementally add to your studio, spending small chunks at a time, AS YOU NEED TO. Heck, some folks – those doing primarily voice-over or video narration recording, for instance – won’t ever need to go beyond the basic setup.
Our aim in 2015 is to show people how inexpensive and easy it is to record and produce professional audio at home. So I was really pleased to find a post on the Disc Makers blog (by Graham Cochrane at The Recording Revolution) giving this same advice. Check out “Equipment You Need For A Home Studio Setup.”
And good luck with all your recording in 2015!
Ken
Learn Home Recording Fast Using My Learning Curve
 Hey Everyone! I just wanted let you know about Home Brew Audio. It’s a website I wish had been around 15 years ago! Why? So I wouldn’t have had to spend so many years learning to do recording at home through the painfully slow-paced “trial-and-error” method. That learning process actually started closer to….oh let’s just say “many more than 15 years” ago;). I’m gonna post some of the gruesome details about THAT in another article…but the point is this: learning home recording by yourself when you have little-to-no cash can take decades!
Yeah, I know. I just gave away my coy little secret….basically it all started when I was a kid (which is why I don’t mind saying it was 30 YEARS AGO!). That way I don’t seem so old when I say “back then.” ANYWAY, yes…you heard right….decades! My cohorts and I have been through the frustration, the false-starts, the 2:00 am “pulling-out-of-the-hair-by-the-roots” sessions because we couldn’t figure out what was wrong, spending months just assuming our poor-sounding audio was caused by cheap equipment (it wasn’t!) when in reality it boiled down to forgetting to turn off the “noise-reduction” button on my car stereo! And just generally 30 years of learning curve.
Why is this good news for you? Because you get to use OUR learning curve! We had nobody to teach or guide us. We had no Home Brew Audio! If we HAD, that 30-year learning curve would have been condensed to something more like 1 or 2 years. It could have been much less even than that, but we had other “supposedly important” things to worry about, like school, and then working a day job. Oh and the partying (of course). Hey, we were musicians, which is why we wanted to learn to record audio in the first place. But you get the idea.
Home Brew Audio is an idea we came up with to share our knowledge with folks who don’t have the time to spend years “figuring it out” on their own, or sitting around in a recording studio. So we have assembled step-by-step tutorial videos that will show you how to create great sounding audio recordings on your computer. Also, we will be your one-stop-shop. Once you learn your new “mad recording skills,” you can get “royalty-free” music clips, loops, sound effects, etc. through us as well.
There is something for everyone! If you have no idea at all about audio, the The Newbies Guide To Audio Recording Awesomeness 1: The Basics With Audacity takes you by the hand and shows you how to create a professional audio production in less than one hour! If you’re a starving artist (or a college student, or otherwise unable to drop $1,000 just to get started), there’s something for you too…the “Starting on a Budget of $0.00” videos! (if you have a computer and an internet connection). For you old…I mean experienced recording engineers, there are some greate vids here for you too. And of course , we’re always listening for other great ideas on what help you need might need creating audio for you blog or for your websites, music productions, audio-books, podcasts, etc. Just let us know!
Check out our hundreds of articles here. And when you are ready to get started with the courses, start from the beginning with The Newbies Guide To Audio Recording Awesomeness 1: The Basics With Audacity.
Be seeing you (or maybe “hearing you:)”) soon!
Ken
Some Tips On Setting Up Your Home Studio With Reaper
I received an email from a reader today asking me several questions about setting up a home studio. The reader wanted to know if these questions were covered in our course, The Newbies Guide To Audio Recording Awesomeness 2: Pro Recording With Reaper.
I decided to answer his questions in an email reply. That way he wouldn’t have to pay for the course :-). Plus, some of his questions were not specifically addressed in the course, so it was better just to address his questions one by one. Then I thought lots of other people might benefit from these answer, so I’m putting the entire Q&A in this post.
Here are the questions he asked:
I just purchased Reaper, and I have been messing around with it a bit. I have a couple questions, and I am wondering if your video series covers these:
- When I am recording vocals to a guitar track, do your videos explain how to split the headphones between the singer and the person working the program?
- Do your videos cover how to best record acoustic guitars?
- In addition to the speakers that came with the computer, I have two powered Roland studio speakers. Does your video tell how to add speakers to a system?
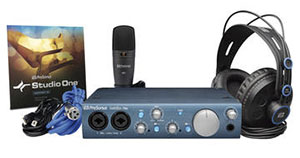
- I have a Presonus iTwo Studio, but when I plug the headphones into the jack on the iTwo, I get no sound at all. I have to plug into the speaker system via an RCA jack, and that doesn’t make a whole lot of sense.
Here is my response and my answers:
Let me take your questions one by one. They are pretty specific, but to answer the question regarding whether the current Reaper course shows these things, I’d have to say it does not cover them all. However, some of these have been addressed in articles I’ve written – and those are free :). Let’s see if I can at least get you pointed in the right direction:
1. When I am recording vocals to a guitar track, do your videos explain how to split the headphones between the singer and the person working the program?
I’m not sure I understand exactly what you’re asking here. The course DOES show you how to record vocals to a guitar track. The assumption is that you would be both the performer AND the person working the program, but if there are two folks involved, the process is very simple: just get a headphone splitter. I got one at Radio Shack for a couple of bucks. First, plug the single 1/4-inch pin on the splitter into your interface’s “headphone” jack. Then, plug one set of headphones into one of the two output jacks in the splitter and the other set into the other jack. Give one set to the person recording the vocal and the other set to the person working Reaper. This is how I ALWAYS do it when I’m recording another person.
2. Do your videos cover how to best record acoustic guitars?
Actually, they do. Here is one article on the site: Tips For Recording Acoustic Guitar. I give a few paragraphs on my tips, and then link to an article about recording acoustic guitars from another author. Personally, I use a small-diaphragm condenser (Shure SM-81, in my case) pointed at about the 12th fret about 8 inches from the neck. Here is an article I wrote about using that mic to record guitar: Acoustic Guitar Mic. There is more detail in the other articles.
3. In addition to the speakers that came with the computer, I have two powered Roland studio speakers. Does your video tell how to add speakers to a system?
I honestly don’t remember, but I don’t think so. In either case, here is what I do. I have a small mixer for listening only – NOT for recording – so my interface “outputs” go into this mixer. I also have the computer’s own speakers hooked up to the mixer as well, though that channel is usually all the way down/off. My speakers, which are powered speakers like yours, are connected directly to the output of my mixer (which is a Mackie 1202VLZ, BTW).
4. I have a Presonus iTwo Studio, but when I plug the headphones into the jack on the iTwo, I get no sound at all. I have to plug into the speaker system via an RCA jack, and that doesn’t make a whole lot of sense.
This is actually addressed in the course (though not specifically about the iTwo – I can’t cover all interface units out there :-P) – but something is clearly wrong with your setup. Assuming you use a Windows computer, go into Audio Devices (via Control Panel) and make sure Windows shows your iTwo as an available playback device. If it doesn’t, THAT is your problem. You need to install the drivers for it (probably came with a disc?). If you do see it as an available device, set it as the default device. Then go into Reaper preferences and choose Audio, then Devices. Make sure you select “ASIO” and your iTwo as the audio device. Once all that is done, make sure the little knob over the headphone jack on the iTwo is turned up. I know that sounds silly, but stuff like that happens to me all the time. If you do all of that, things should work.
I hope this helps!
Cheers,
Ken
Wireless Microphone For iPhone: How to Use Any Wireless Mic With Your Phone (Video)
 Looking for a wireless microphone for iPhone? Here is how to make any wireless mic work with an iPhone.
Recently, a friend asked me how he could use an external microphone on his iPhone to shoot video.
Why Would I Want To Use a Wireless Microphone With An iPhone?
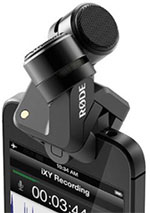
The basic reason for using an external/3rd-party mic is pretty easy, since any number of companies now have good mics available specifically for iPhone/iPad use (like the Zoom iQ6, the Rode iXY, and the Blue Mikey Digital, to name a few).
All those companies, however, assume you will be close to the mic, using it as a mobile field recorder or in the studio to record music.
Why Does The Mic Need To Be Close?
Shooting video when your subject is many feet away from the mic usually yields pretty poor audio. See my article, along with a video, which shows you how to solve this problem, here: How To Get Good Audio On Your Videos.
My friend wanted to do just that: use his iPhone to record video of himself from several feet away. And to make things just a little bit more difficult, he wanted to be able to move around. So he needed a wireless microphone for his iPhone.
How Do You Make That Happen?
Now, if he were using a regular video camera / camcorder, I would refer him to the advice in the above article.
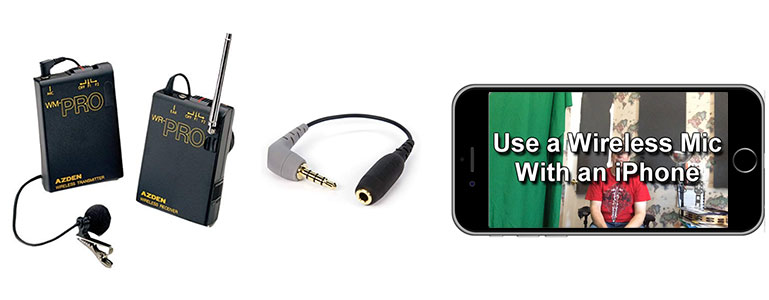
If it has an external mic jack, I would say to use that camcorder with a wireless lapel mic Azden WMS Pro).
If that camcorder does NOT have an external mic jack, I would say to simply record onto either a good handheld digital field recorder (like the Zoom H6) or directly into a computer through a decent audio interface (like a Focusrite Scarlett).
In all those scenarios, you’d want the microphone as close to your mouth as possible.
The Challenge For My Friend’s Video Needs
But he wasn’t using a camcorder, he was using an iPhone. At first, I thought it might be possible to plug the 1/8th-inch pin on my Azden wireless receiver directly into the iPhone’s dual headphone/mic jack – it certainly fits in there. But nope, that doesn’t work as a wireless microphone for iPhone, primarily because Apple built their jack to accept very specific types of plugs which carry just the right kind of signal.
So though it might fit in the hole, an external mic will not work like that with iPhones – it needs a little help.
The Solution For Using a Wireless Microphone for iPhone
That help comes in the form of a humble-looking little cable about 12 inches long. Technically it is a 4-pole male connector (they have 3 strips on the pin) on one end and a female adapter on the other. There are a few out there. The one I tested in the video below is the KVConnection KM iPhone Microphone Adapter. But that doesn’t appear to be available any longer. So here is one by Rode: Rode SC4 3 inches Microphone Cable.
This little puppy (which costs $14.28) converts a normal microphone plug into the type that an iPhone wants in order to recognize the mic – a 4-pole “TRRS” (tip-ring-ring-sleeve).
You simply insert your mic’s plug into the female end of the Rode adapter, and THEN plug the Rode’s 1/8th-inch pin into the iPhone jack, and “hey presto,” “Bob’s your uncle,” etc.
You can stand across the room with the Azden lapel mic stuck to your shirt and walk around to your heart’s content. The lapel mic will beam its wireless audio signal to the Azden receiver, which is plugged into the KM adapter.
Is There A Video Demonstrating This?
Why yes there is:). I didn’t have a special “wireless mic for iphone.” But I did have an Azden WMS wireless lavalier. In the video below, I compare the audio with video shot with my iPhone 5S, first using just the built-in mic, then with the audio that came through the wireless mic attached as described above.
If you have headphones, I recommend using them to get the full effect of how different the two audio samples sound.
[jwplayer mediaid=”18146″]
By the way, there are other products that allow you to plug external microphones into iDevices. One that is a fantastic all-in-one solution is the Samson Go Mic Mobile Smartphone Wireless Microphone.
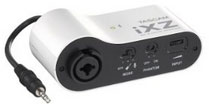
Another one that looks really useful is the Tascam iXZ Instrument/Mic, which you can plug XLR and 1/4-inch microphones – basically, most standard mic cables – into.
I’m glad my friend asked that question. Now I know how to plug a wireless mic into an iPhone, and so do you!
