 Selling your gear is easier now rather than during the pre-internet days. For whatever reason you want to sell it, this article suggested two prominent sites for selling which is Ebay and Craiglist.
To find out more about this, read the article by Audio Fanzine here http://en.audiofanzine.com/getting- started/editorial/articles/which-site-is-best-for-selling-gear.html
Recording Tips and Techniques
Acoustic Absorption Explained
Absorption is defined as is turning acoustical energy into heat energy. Absorption is measured in units called “sabins,” named after W.C. Sabine, the father of modern architectural acoustics.
You can read the full article from the blog by Audio Undone here http://audioundone.com/acoustical-absorption.
Terrible Voice-Overs On Great-Looking Videos!
 I’ve complained about this for years. But I’m actually surprised that it still happens in June of 2015! I went to two professional looking, beautiful websites from very well-known companies this morning. Both had videos on the front page. And both of those videos had horrendous sounding voice-overs! It was a small sample (to satisfy the statisticians) for me this morning – only 2 websites – but 100% of those sites had terrible sounding voice-overs.
Even with how crazy affordable it is to get really good recording gear in 2015, people still make bad recordings. It is NOT about the price of the gear. It’s about knowing just a little bit about how to best use it.
Take a listen
I didn’t want to specifically name the websites. But I was able to extract a few audio samples from each video to give you and idea how they sounded.
The absolute first thing that hit me on the very first word of the above audio was the buzzy distortion, a topic which I discuss below.
On the 2nd video (which was on the 2nd site), I extracted 3 short samples, which I put into one audio file here:
The 1st sample is the VERY beginning of the video. The music starts, and then before the voice even begins, there’s a loud “thump” sound, presumably a bump against the microphone while recording. On the 2nd sample, listen to the breath sound after the phrase “all of these” and before “easier…” Not only do the breaths throughout this video sound unnaturally loud (probably due to over-compression), the were frequently cut (in editing) in the wrong place – another topic I mention below. Finally, in the 3rd sample, it starts out with one of several p-pops (more on that below), which could have been pretty easily edited out. But the main problem with this 3rd sample is the noise right after he says “brands.” He inhales and you hear the sound of spit sucking in. Uggh!
So what made these voice-overs so bad?
OK. Fair question. What, specifically, made them “bad” in my assessment? I will give you specifics.
Distortion – When you record something at too high a level for whatever device is capturing the audio, you get something called “clipping.” The audio gets a bit “buzzy” sounding. This is so basic and so easy to avoid (you cannot usually fix this after it is recorded – another topic for another day) by simply paying attention to EITHER the sound of the audio, OR watching the meters of the recording program, which go red during distortion. You can ALSO look at the waveform for two more clues – if the tops of the waves look flat, then they got clipped at some point. Or if the waveform looks like it extends beyond the limits of the track, it is almost certainly clipped. The result in all these instances is that awful buzzy distorted audio sound.
Room Echo – The most common audible artifact of an amateur recording is room echo. Basically it sounds a bit like you recorded in the bathroom. It doesn’t sound professional at all. But there are easy ways to fix this without having to spend any money or build anything. Read about (and hear) these fixes in our article series – Improve The Quality Of The Audio You Record At Home.
Poor Editing of Breaths – It’s a common thing when editing audio to silence the spaces between spoken phrases. Sometimes you can even silence out the breaths and it will sound fine, especially when there is background music. Other times, though, for a more natural sounding narration, you may want the breaths to remain. But you still may have too much time between a few phrases that you want to shorten by deleting a small part of the recording between those phrases/sentences. When you do this, you have to be REALLY careful that you don’t cut in the middle of a breath! If you do, it sounds really unnatural – kind of like the narrator just inhaled golf ball or something:-P. If you must edit out the time between spoken phrases, try not to cut in the middle of a breath. And if you do, try to make it sound more natural by using a fade tool. I will write an article about this and provide audio examples in the next few days.
P-Pops – A very common hallmark of amateur audio is the “p-pop.” This is a blast of air cause by a “plosive” sound from the mouth when forming consonants like the letters P and B. Microphones don’t like blasts of air, and they tell you so by recording what sounds like a little explosion right after all the plosives. Most voice actors prevent p-pops by using a pop filter, which is that round thing you often see in front of the mic in pictures, on TV, etc. But even those don’t completely eliminate p-pops for some people (like me), whose plosives are made of stronger stuff. So some will get recorded. But that’s OK. They are easy to edit out, as I show you in my post – How to Fix a “P-Pop” in Your Audio With Sound Editing Software. This is so basic that there are videos showing you how to do it in our tutorial course, The Newbies Guide To Audio Recording Awesomeness.
Too Much Compression – In the 2nd video, it is pretty clear that too much of an effect called “compression” was applied. The primary goal of compression is the even out the levels so that basically, the quieter parts get turned up and the loudest parts get turned down. When used correctly, compression can make a voice sound closer and “punchier.” But when too much compression is used, your get familiar side effects like too much sibilance (when the S sounds are too loud and biting) and having things that SHOULD be quiet – like breaths – suddenly sound louder than the actual voice. You can learn more about compression in our post – Improve Or Ruin Your Audio With an Effect Called Compression.
Background Noise – All I can say about this is – “really?” You didn’t hear the huge thump at the VERY beginning of the voice-over (in video #2), or the slurping breath? Wow! Seriously – did nobody involved even listen to this voice recording before they put it on the home page of their beautiful website? Sigh. OK yes, when recording on a home studio, whe often have to deal with a door slamming rr the dog barking, or a leaf-blower, or that freakin’ bird right outside my window:-P. It can be tough (though definitely do-able) to edit noise out of a recording when the narrator is speaking. But editing out a sound in between spoken phrases is easy, easy, easy! Even the free program, Audacity, has a “silence” tool that literally silences whatever part of the waveform you have selected. You drag and click a button. It takes like 3 seconds! How do you put a voice-over with noises between the phrases on your otherwise professional looking site? I do NOT get it.
Like I said above, I am reluctant to list what companies were using these awful voice-overs. It wouldn’t be very nice. But it just goes to show that there is still a lot of opportunity for improvement in the voice-over world. And it has nothing to do with recording in a converted bedroom (our series linked above shows you why). Nor does it have anything to do with the cost of recording equipment. If you have the right knowledge (not even hard knowledge) you can get professional sounding results from VERY inexpensive gear.
How can I make sure MY audio doesn’t suck like that?
If you are interested in learning how you can record professional audio without buying expensive gear or going to a recording studio; and you’d like to learn it fast (not slogging through hours of technical training), we can help:-). Check out our Newbies Guide To Audio Recording Awesomeness courses. Help make the world safe for GOOD voice-overs! Check it out here – The Newbies Guide To Audio Recording Awesomeness.
Of course there are literally hundreds of articles on this site you can get any time, with a lot of tips on how to record better audio. See the sidebar on the right for article/post categories. Since this post was about voice-over recording, you may be interested in just the articles that focus on that here: Voice-Over Recording.
Editing Video In Reaper
 Did you know you could edit video in Reaper? Since Reaper is an audio recording program, you won’t be surprised that you can’t do a whole lot with video, but you CAN do some really impressive and important video editing.
Make Your Videos Sound Awesome
One really common mistake most folks make when producing their own talking head videos (where you have a person talking – NOT the band with David Byrne:-P) is that while the video may look great, the audio quality often sucks. See our article How To Get Good Audio On Your Videos for more on this. As I show in the video on that page, one great way to fix this is to record the audio separate from the video. For example, while your camcorder is recording the video of your noggin, you could have a microphone recording into a computer (or one of those hand-held digital audio recorders). Then after you’re done recording, just replace the camcorder’s crappy audio (this is almost guaranteed) with the “good” audio.
Well guess what? You can do THAT in Reaper. Import the video onto track one, start a new track, import the good video, line up the audio tracks, and turn down the audio on track one. Done! No need for a separate video program.
Edit Out The Video Flubs
Very few people can look into a video camera and record perfectly every time. You’re gonna mess up from time-to-time; or in my case, every 15 seconds or so:-P. Usually people fix this in a video editor. But you don’t need a video program if all you’re doing is snipping out the screw-ups!
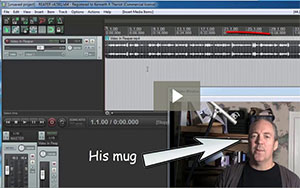
In Reaper, what you see on a “video” track is only the audio part of that video. You can open a video view window in Reaper to see the visual part of the video. But edits you make to the “audio” in the “video” track will also affect the video. What this means, for example, is that if you cut out a part of the audio file on track one (where we imported our video file), the corresponding video will also be cut out. You’ll see what I mean in the video below.
This is fabulous news because it means that one of THE most common jobs done with a separate video editing program – namely, cutting out the flubs – can be done in Reaper! In the video below, I purposely (yeah right) make a mistake and leave it in so I can demonstrate how to use Reaper to fix it. Of course the all important replacing of crappy audio with good audio is also shown below. Enjoy!

Reaper Audio Recording Demo Video Updated for 2015
 A few years ago – back when making videos was – umm – not our (and by “our,” we mean Ken’s) strong suit – we put a video up on YouTube showing you how to record audio with Reaper software. The video walks you through how to create:
- A voice-over recording with a background music track, and
- A music recording (a free virtual piano instrument plugin) with a vocal track
Well, as I alluded to above, that original video didn’t look so good. But it was really popular, with about 90,000 views! We still get comments every week telling us how much folks like it – even with the poor video quality. So we created a fresh and shiny, brand new video showing you how to do those same recordings. Not only does it use the latest version of both Reaper and Audacity, but it looks a heck of a lot better too! Also, it finally resolves the question a lot of folks had about why you might want to use an external editor in addition to Reaper. The answer: you probably don’t. But this new video shows you how to make basic edits BOTH ways – with an external editor (showing you how to set that up in Reaper), AND just using Reaper itself.
Below are the new videos. Yes, that’s videos plural because this time around, the tutorial was a bit longer, showing you how to do a few more cool things. So we split it into 2 parts.