I just posted an article about virtual drumming here: https://www.homebrewaudio.com/virtual-drumming-use-your-computer-to-drum-without-drums. One of the things I mentioned was virtual drumming’s benefit over real drumming when it comes to recording drums. If you’d like to get an idea of what it would take to record and actual real live drum kit, here is a good article on that topic: http://homerecording.about.com/od/recordingtutorials/ss/recordingdrums.htm Why re-invent the wheel? Plus, I’m busy recording fake drums;).
Recording Tips and Techniques
Virtual Drumming – Use Your Computer to Drum Without Drums
 One of the coolest things about computer-based home recording studios is the wide-open world of virtual instruments. And of all the different kinds of instruments we can play via MIDI on our computers, drums are probably the most used. And why not? You can have a drum track on your song without even touching a drum. Technically you don’t even have to know how to play drums (though I think it helps a LOT if you can) in order to have them in your recordings. And perhaps the biggest benefit for my wife – I don’t have to make all the racket in the house that a drum kit would create. This is also a plus if you live in an apartment and drums would generate neighbor complaints. One of the down-sides to all this is that it’s actually fun to play drums for real! But finding a place for the kit to live is hard if you don’t have a lot of space in your house. Plus, even though it’s a lot of fun to play drums, recording them is typically not easy.
In order to record live drums, not only do you have to have a kit (space issues), and a drummer good enough to be on your recording, you have to have a bunch of additional microphones. For example, the kick drum needs a certain kind of mic (like an AKG D 112, for example) that is very different from the snare drum (typically a Shure SM57 or two), which is very different from what you’d need for overheads (2 large diaphragm condensers like the Rode NT2-A). So by using virtual drums, you’re saving yourself a lot of money for mics if nothing else.
So what is virtual drumming anyway? Well, if you’re recording a song, you can load up a software plug-in/program (into your multi-track recording software like Reaper), which contains recorded samples of actual drums (usually – though there are synthesized drum programs as well), and have your computer play these drums via MIDI. It’s like having a drum machine inside your computer.
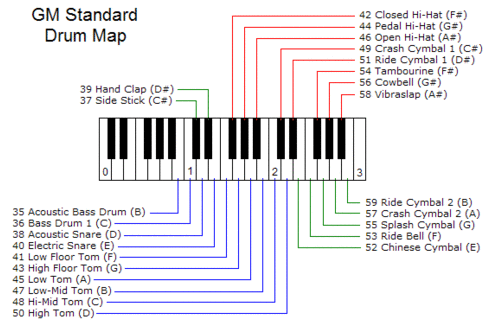
There are several different ways you can build a drum part. For those of us who are control junkies, you can do it like me. I like to build my tracks one measure at a time using my MIDI keyboard (I use a Korg controller). Drum programs (I like to use StormDrum by EastWest) will typically assign each drum in a kit to a specific key on a MIDI keyboard. See Figure 1. I will turn on the metronome in Reaper to keep me on the right tempo, and play, say, the kick (bass) drum part for a measure or two by simply playing the “C” key on my keyboard. Then I’ll do the same for the snare drum part, using the “D” and “E” keys (note: sampled drum programs typically deviate from the GM standard mapping by putting 2 different snare hits, left hand and right hand, on the “D” and “E” keys to allow your to play them like you had a drum stick in each hand. This allows for much more realistic sounding drums). I will repeat the above procedures for high-hat, toms and symbols until I have my song’s drum part composed for the entire song.
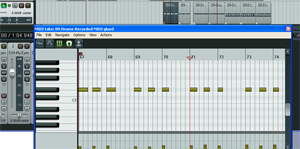
One of the greatest things about MIDI is that you’re not recording audio. You’re recording “on” and “off” messages (along with some additional information like how hard you hit the drum, volume, etc.), so it is super easy to correct the beats if you were a little ahead or behind or hit the wrong drum, when you played them on your keyboard. You just go into Reaper’s MIDI editor (See Figure 2) and drag a bar left or right (for timing) or up/down, which changes the note/drum being struck. By the way, I go into more detail on this in our first article on virtual drumming if you’d like to dig into this a bit more.
So that is one way to do virtual drumming, which is admittedly a bit time-consuming. Here’s another way to it that is definitely faster. There’s a program called Jamstix that has a sort of artificial intelligence. You load the program on a track in Reaper, open it up, and then select a type of drum kit. There are multiple genres, like R&B, Rock, Jazz and Latin), and several different kit-types within each genre. For example, the Rock genre contains such variations as Big Kit, Classic, Deep Loose, Deep Modern, Dry, Fat, Boom, etc. Once the kit is loaded, you can select a preset song like “12-Bar blues,” “808 Hip Hop,” “Metal,” etc. and voila! Just hit “play” in Reaper and the drums will start playing at whatever tempo you have set in Reaper currently. Jamstix use modules (Intro, Verse, Pre-Chorus, Chorus, Bridge, Middle-8, Drum Solo, Silence, Link, Breakdown, and Ending) to build songs. You can build your own songs (especially great for composing) or use the presets by selecting modules and putting them in whatever order you want. Of course you can also customize your songs in detail if you wish. Jamstix is awesome.
There are lots of methods in between loading up preset songs and building your own beat-by-beat. And there are lots of different programs you can use for this. Different drum programs will have different ways to do your virtual drumming.
Here are a few other quite popular drum programs that are known to work well with Reaper:
– Toontrack EZ-Drummer – Virtual Drum Module Plug-In
– Addictive Drums – Complete Drum Production Studio
– FXpansion BFD – Software Instrument for Acoustic Drums
(added on Nov 4th, 2012) – My new favorite drum program – Drum Experience
So there are some ways you can use virtual drumming to put drums onto your recordings without actually possessing a single actual, physical drum. With the quality of recorded drum samples available today, a large percentage of folks listening to your recordings won’t be able to tell that your “drums” aren’t real. This is a great time to have a home recording studio:).
Happy (virtual) drumming!
Why You Might Want a 24 Bit Audio A-D Converter
 As reluctant as I am to splash terminology onto the screen that might cause your brain to freeze or worse, cause you to lose consciousness altogether, I think this is something you really do want to know a bit (ha ha…audio humor) about. So let’s get it out of the way. Ready? Here goes. “Try your hardest to record with a 24 bit audio analog-to-digital (a-d) converter.” Still with me? OK. Now let’s explain some things.
I talk a lot about noise, going so far as to name it the number one enemy of good audio. There are lots of sources for noise, including screaming kids, lawn mowers, attention-starved cats (meaning it’s been more than 5 minutes since their last lap session), and the dreaded computer noise. But let’s assume for the moment that you have managed to tame those sources of noise and you have a nice quiet space for recording. Since our home recording studio uses a computer for recording, the sound that we want to record-let’s say your voice for this example-needs to be converted from being a sound in the real world (air particles moving around, basically) to being something a computer can understand, namely a digital sound (a bunch of ones and zeros). It’s like what the Master Control Program did to Kevin Flynn in Tron to convert (ha!) him from a person in the real world (flesh and blood and some other gooey and crunchy stuff) to being something a computer can deal with, namely a digital person.
Another kind of noise happens after audio is converted to digital. There will be a digital noise floor or a sort of hissing sound that

is a product of the conversion. You’ll hear this, as soft as it is, regardless of whether you actually record your voice or not, and even in a very quiet room.
On-board sound cards, the ones built right onto a motherboard, will convert audio from analog (Kevin Flynn) to digital (well, Kevin Flynn again, only with a goofy costume and gray-scale skin), but most of them have two problems. First, the components used to do the conversion are not great. Second, they usually only convert using what is called a 16-bit bit depth. Yikes! What the heck does that mean? Never mind that. I’ll write another article on just that very soon. All you need to know at this point is that recording when the bit depth is only 16 bits means that the difference between the quietest sound (which would be that noise floor I mentioned) and sound that is too loud is quite narrow.
One of the worst sounds in the world is audio that is all buzzy and distorted because it was too loud for the electronics. It really is unpleasant. If you’re trying to record your voice, and things keep distorting, it means you’re voice is too loud at certain points. If you have a meter, you’ll see it go into the red on those parts. So what’s the alternative? You could try talking or singing quieter or backing away from the mic on the loud parts. That will work, provided you work really hard at it. The problem then is that if you back too far away from the mic, you’ll let too much room sound in. I’m assuming you’re recording in a home studio which means that the room sound is almost certain to be bad…lots of echo and reverb usually. The other main problem is that the really quiet passages will have to be “turned up” after you’re done recording, in order to be heard. And when you do that, you also turn up the noise.
Yeah yeah, I hear those of you saying you could just put a compressor (see my article Should You Use Compression In Audio Recording? to get a better idea what compression is) in between the mic and the converter. Yes, you could do that. But in general it is not a great idea to compress your audio before it’s recorded because you won’t be able to change it afterward. Plus, you’d still have a pretty audible noise floor if you record with a bit depth of 16. So what’s better?
Recording with 24-bit conversion is better that’s what! Why? Will the voice sound better? Meh, probably not so much. But the reason why 24-bit recording is better is that the noise floor is much, much lower. So the narrow range between noise floor and too loud you had with 16-bit recording is expanded hugely. You will be able to speak both very quietly and quite loudly without nearly as much worry about distorting. Also, if you want to increase the volume on the quiet parts of the recording in your audio editor afterward, the increase in digital noise won’t be anywhere near as audible. With 24 bit recording, you should end up with less noise and fewer incidents of distortion due to clipping when you were very loud.
So now comes the practical question. How do you get 24 bit conversion? Well, you are not likely to get it with a typical on-board
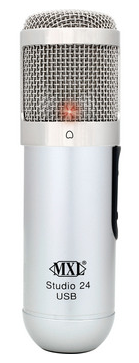
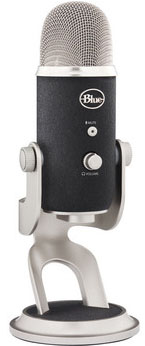
sound card. But several USB mics have 24-bit converters built in. Yeah, USB mics just plug directly into a USB port. Cool huh? Some examples are: the MXL Studio 24 or the Blue Yeti Pro (note: NOT the regular Blue Yeti, which is only 16-bit).

Another really cool way to record at 24 bits without having a USB mic or audio interface is a cool little device called the MicPort Pro – Compact USB Microphone Preamp. You can just plug your microphone into one side the MicPort, and then plug the MicPort into a USB port on your computer.
And last, but most definitely not least, is to get an audio interface box. Most of them offer 24-bit recording these days. Some examples are: The M-Audio Fast Track or the EMU 0404.
Of course there are tons of other choices out there for all of these pieces of equipment to help you

get recording at 24 bits, which I highly recommend you do if at all humanly possible. Your workflow will improve and the resulting audio will be better, mainly because there is less noise.
Let your quest for 24 bit audio recording start here!
Egg Cartons As Sound Treatment?
I remember as a kid going to a friend’s house, and his dad had converted their garage into a music studio of sorts. It was mostly a jam space for rock and roll. But the thing I recall most is that the walls were covered with egg cartons. They told me it was for sound-proofing. Who was I to question it. For years I thought you could do sound treatment with egg cartons. Luckily I never spent time or effort trying to acquire cartons and do this myself! I might have thought I could build a sound-proof closet-come-vocal booth for doing auditions and other recording for voice over jobs…or worse. I could have decided I needed to cover every square inch of a garage! Shudder.
Here’s an article discussing the efficacy of egg-carton sound-proofing: orignal article
Something to Consider With Digital Audio Recording
Here is a post that talks about one of the main mistakes made in digital audio recording, whether used for music or voice over jobs. I think this kind of mistake is mainly made by folks who have had experience in the analog (tape) recording realm and try to use some of the same techniques with digital. Those who start out with digital recording probably don’t have this issue as much.
Anyway, here is the article from Björgvin Benediktsson: http://www.audio-issues.com/recording-tips/the-1-mistake-with-digital-audio-recording/