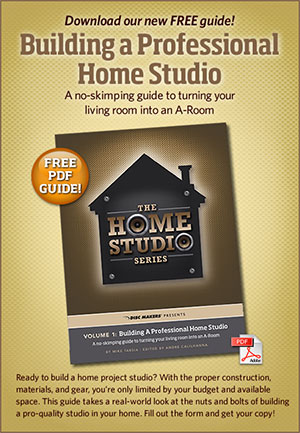
 Diskmakers, one of the biggest names in CD duplication and replication, have a cool free resource that may be of interest to folks who want to get their hands dirty and do some building for their home recording studio. Their new guide, building a Professional Home Studio, has instructions for things like isolation booths, sound-proofing, and the materials you need to construct and set these things up. For those who have the budget, time and skill (not to mention patience) to do something like this, the guide will be a great resource.
Check it out here:
http://www.discmakers.com
Recording Tips and Techniques
Cover of "That Thing You Do" – Record a Rock Song on Your Computer
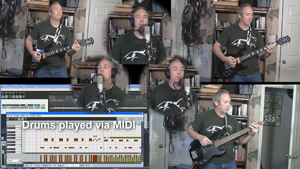 I just recorded a cover of the song, That Thing You Do, (written by Adam Schlesinger). And I recorded it from scratch on my computer-based home recording studio right here in a spare bedroom. The band consisted of me, me, me, me, me and me:-P. The reason I did it, besides just loving the song and always wanting to, was to demonstrate what kind of thing can be done in a very modest home recording studio.
Before I talk about how I did it and what equipment I used, take a listen to how it came out!
I intend to follow up with a more complete step-by-step how-to, along with a video tutorial later this week. But here are the basics.
Sound Sources
- Voices – All me (a twisted version of narcissism?). I double-tracked the lead vocal to get that Beatlesque sound. I also sang the two harmony parts and double-tracked each of them. So there are 6 voice tracks in all.
- Guitars – Carvin DC200, 1985 model. I used this same guitar for both guitar parts. If I had vintage Rickenbackers I would have used those, but you work with what you’ve got.
- Bass – A Samick LB-11 4-string bass guitar I bought used in 1995.
- Drums – All sampled drum sounds (meaning “I don’t have a drum kit”) from an acoustic kit in the virtual instrument software package called StormDrum, by EastWest.
How Was It Recorded?
I used Reaper software to record it all. I started with the drum track. I created a MIDI track and loaded StormDrum onto it as a virtual instrument. Then I listened very carefully to the original recording of the song from the movie soundtrack. That allowed me to build the drum part hit-by-hit using the MIDI editor in Reaper.
Next, I recorded the bass track by plugging my Samick into a Line 6 POD Studio GX, which is a little box you can plug electric guitars and basses into. The POD then attaches to your computer via USB, and you use the Line 6 software to choose amps and effects to get the right sound.
Then I recorded the electric guitar parts the same way as the bass. I recorded 2 parts/tracks, one panned to the left and played as the “rhythm guitar” part. The other guitar was panned to the right and played with the little riff happening during the verses.
And Finally…
Last but not least, I recorded the lead vocal. As I mentioned, I sang it once on one track, and then recorded it again (listening to the 1st in the headphones) on a second track to get that double-tracked sound. I did the same thing with the low harmony part and panned it to the left, and the high harmony part, panned to the right. All vocals were recorded with the Rode NT2-A microphone hooked up to the computer via a USB audio interface – the Focusrite Scarlett 2i2 interface box.
You can get started with a bundle I created for B&H Audio called The Home Recording Musician’s Starter Kit. CLICK HERE for more details on that.
Then I mixed and panned everything to make sure the sounds could all be heard and rendered (mixed down) the result into one audio file, which is what you heard above.
Check back here in a few days and you should find a bit more detail and a video.
Now go forth and record your own pop or rock songs!
Cheers,
Ken
EQ Tip: Cut Narrow But Boost Wide
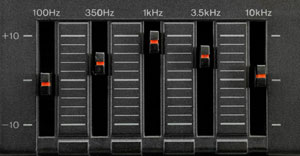 When using EQ to shape you sounds, there are all kinds of words-of-wisdom and rules-of-thumb from the gurus. Some say you should avoid boosting any frequency, but instead focus only on reducing (“cutting”) at target frequencies. Yet another tip is cut (reduce) narrow, boost wide. That means that when you reduce, use only narrow bandwidths but when you turn things up, us wide bandwidths.
Here is an article that discusses the merits of that last bit of EQ advice:
http://www.hometracked.com/2008/01/31/eq-cut-narrow-boost-wide/
Tips on Hand Percussion Recording
Here is a pretty cool article on recording hand percussion. By “hand percussion,” this article means things like tambourines and shakes. They talk about different types of mics you can use, different ways to use those mics, how far to get from the mic, etc. Adding these sounds to your music recordings can really give it them that certain extra something that turns an OK mix into a really good one.
They even have a video in the article to help demonstrate their tips.
Check it out here: http://www.prosoundweb.com/article/in_the_studio_hand_percussion_recording_tips_includes_video/?utm_source=feedburner&utm_medium=feed#When:16:10:49Z
How To Quickly and Accurately Cut, Copy or Paste Parts of a Song
 Whether you are recording your own music or working with a music file that already exists (usually a royalty free music clip for background music), there are many times when it is useful to cut, copy, and maybe paste sections of a song. Here are just a few of the more common reasons for needing to do that, just off the top of my head:
- Shorten or lengthen a song to make it fit a presentation, video or voice-over production
- Building a song by copying repetitive sections (entire bars or sets of bars) and pasting them
- Fixing a problem in a song you are recording (for me it’s usually guitar buzzing I use this for) by clipping the same chunk of music from another part of the song and replacing the problem section.
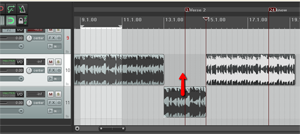
 When working with music files, it is important that any edits you make do not mess with the timing. Otherwise it will be jarring to the listener. If you want to slice up a song, say, to make it fit a video, you want it to sound seamless in terms of the beat of the song. One excellent tool for doing this is the snap tool. This is a pretty common tool for editing both audio and video. In the picture on the left is where to find the tool in Reaper.
Snap To
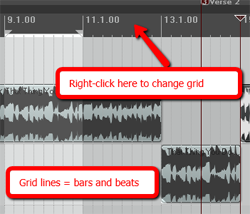 The idea of snapping is simple enough. It is a way to ensure the edges of an item can only be be moved and placed so that they align with a grid. In the case of audio, that grid is frequently bars and beats, though you can change the grid to be other things, like minutes and seconds, etc. For our purposes in this article, we want to make sure we use bars and beats. In Reaper (see picture on the left), simply right-mouse click in the band across the top of the screen to change the grid settings.
The next important thing is ensure the song is aligned with that grid. When you’re recording your own music, this is not an issue as long as you are recording to the metronome which you set in the song project settings. And I HIGHLY recommend that you do that if at all possible. It makes things much easier in the long run.
If you have imported a song already recorded, you will have to do a few things to get its beats on the grid of the audio software. You’ll have to do a little trial and error, first setting the correct time signature for the song, then using the metronome and experimenting with the beats-per-minute setting until the song matches. Ironically, you’ll want to make sure the snap tool is turned off while you do this, so you can freely drag the song on the track to line up the visible beats to the grid.
Fixing Example
Once the song is matched to the grid, you’re free to copy, cut and/or paste and have the result be musically correct. Let’s take an example of when you need to correct a mess-up in the middle of your song (like my guitar buzz).
1. Just go to another part of the song with the same guitar chord playing without a buzz, and select the beat or beats containing that section. Make absolutely certain that the snap tool is turned ON when you do this.
2. Next, you click in the selected section and right-mouse-click to open the drop-down menu and select “copy selected area of item.”
3. Now open a blank track underneath the song track (you can see this in action in the picture at the top left of the article). This isn’t strictly necessary, but I find it helps to line things up BEFORE pasting into the song, which can save you lots of time and headaches. Paste the bit you copied into the blank track right underneath the buzzing guitar part. You may have to drag it left or right to m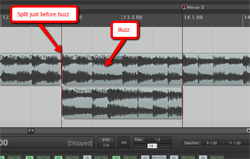 ake sure you line it up just right. Again, the snap tool needs to be ON at this point.
4. Next, click on the song at the beginning of the beat that has the guitar buzz and hit the “S” key on your keyboard to insert a split in the song file.
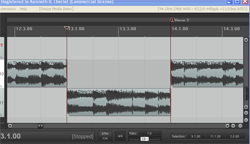 5. Now drag the left edge of the section with the guitar buzz in it to the right, creating a blank space where you will insert the part you are pasting. Things should now look like the picture to the left.
6. Now all you have to do is drag the pasted bit from the audio you pasted in the spare track up into the blank space. Having the snap tool on will ensure it doesn’t slip or slide to either side when doing this, which is a common problem when you don’t have snapping enabled.
7. The final step here is to make sure things sound smooth and seamless. Turn the snapping tool off (yes, OFF) and drag the edges of the new part you just pasted in a little left and right. Since cross-fading is turned on automatically in Reaper, this will allow the sounds to blend a little more smoothly. Otherwise the abrupt implanting of a different section might sound a bit jarring, creating clicks or pops at the borders. Cross-fading will help eliminate that problem.
And that’s it! It may sound a bit involved, but the entire process only takes about 30 seconds, which is usually a lot faster than having to play the part again.
Now you can use the same steps to remove parts from a song. Just select (with snapping turned ON) the part you want gone, hit the delete button on your keyboard and it’s gone. Now you can drag the part on the right back to join up with the song part on the left (closing the hole in the audio). Of course, if you had ripple-editing turned on, the part on the right would automatically be pulled to the left to join the two parts up.
If you want to make a song longer, just select a part of the song you want to repeat, usually a full measure, and paste it at the end of the song. Do this as many times as you need to in order to make the song as long as you need it to be.
Hopefully this simple tip of using the snap tool will help you cut, copy and paste bits of songs to your heart’s content.