 A very common technique when recording drums is to close-mike – put microphones very close to at least the kick, snare, hi-hat and toms – and also have a room mic or a pair of room mics to capture the sound of the overall drum kit. The room mics are usually several feet away from the drum kit. Then you mix the room mics in along with all the drum mics.
Another common thing to do is put a lot of compression on the room mic, which makes the entire drum mix sound, for lack of a better term, huge. But sometimes using a ton of compression, such as using a ratio of 20:1, on a drum room mic can over-accentuate the sound of the cymbals. Having your drum mix sound like it’s swimming in cymbals pretty much ruins the sound you were going for with the room mic. But you can fix that by using an equalizer (EQ) effect to basically filter out the main frequencies where the cymbals live.
Graham Cochrane shows you how to do that in this very informative video:
Recording Tips and Techniques
Vocal Compression Using Reaper's ReaComp Effect Plugin
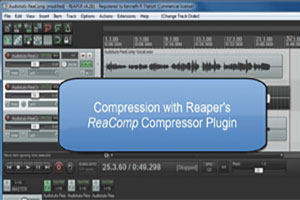
 I just had my first audio recording tutorial video published by AudioTuts+. The video shows you how to compress a vocal track using the compressor plugin effect, ReaComp, that comes with Reaper audio recording software. If you’d like a refresher on what the compression effect is for, see our article: What Does Compression Mean In Audio Recording?
In this video, I show you how to place ReaComp on a vocal track in Reaper (my dulcet tones doing a bit of singing). Then I walk you through the settings screen and explain the main controls and meters so you can see how the voice is affected by them. Then I show you how to set the starting levels for the threshold, ratio, and attack/release settings. You can then both see and hear how compression affects the vocal track.
https://homebrewaudio.wistia.com/medias/r479d81v6c?embedType=async&videoWidth=700
The tutorial video was published here: http://audio.tutsplus.com/tutorials/production/quick-tip-how-to-use-reapers-reacomp-compressor-plugin/. I encourage you to check out the AudioTuts+ site because it has a lot of resources on audio recording that you will find very useful. But if you just want to watch the video, check it out below. Enjoy!
Handy Export Options In Pro Tools 10
Here is a video from Avid, makers of Pro Tools, the highlights a few very convenient export tools. The first one is the ability to change the format, bit depth, and sample rate on the fly, before you actually export the mix. The second feature is also nifty for sharing sessions with others. The example in the video has several stem tracks (sub-mixes from the session such as flutes, guitars, voices, etc. If you want to share a session that includes only the stems (as opposed to every single track plus the stems), you don’t have to render the stem tracks and import them into a new session (the old way). All you have to do is select the stem tracks and you can save only the selected tracks as a new session, which will contain only those tracks. I love time-saving tools!
Check out the video below:
Newbies Guide To Audio Recording Awesomeness 2: Pro Recording With Reaper
 Our latest audio recording course is the Newbies Guide To Audio Recording Awesomeness 2: Pro Recording With Reaper, which is the second home recording course in our “Newbies Guide” series. The first course was designed for folks who have little or no budget for gear or software to start doing audio recording. Therefore, it makes use of the free recording program, Audacity, which you can download and start using immediately, and “any mic you happen to have,” including a $5.00 plastic computer mic.
The first course is NOT a prerequisite for the second one! It is simply designed for those with a bit more of a budget for software and gear. It makes use of Reaper recording software, which is decidedly professional audio recording software (technically called a digital audio workstation or DAW), and yet whose cost is amazingly low. In fact, The Reaper folks have something they call the honest business model. First is the 30-day free trial, which is a fully functional version of the software AND doesn’t actually stop working after 30 days. Yes, you will get a notice telling you the software is not free after that time, but if you need more than 30 days, you can have more time to evaluate Reaper. Then – and this is the really amazing part – you decide whether to pay $225 or $60 for a full license to Reaper! What? Yup. If you are a business making more than $20,000 (USD) per year, then you should buy the commercial license for $225. If you don’t make that much, you pay $60. And nobody is going to check. It’s based on the honor system. I don’t know of anyone else who does this. Simply amazing.
Anyway, the Newbies Guide To Audio Recording Awesomeness 2: Pro Recording With Reaper also starts you from scratch and teaches the basics of audio recording – just like the first course – it simply goes further and teaches you a lot more cool stuff (time-saving voice-over automation tips and tricks, multi-track recording, MIDI, virtual instruments, and much more), mainly because Reaper is capable of doing all that stuff.
Click here for two free videos from the course.
Check out the video below, which is sort of a walk-through of the course:
Reaper Tutorial Home Recording Course Video
Helpful Audio and Acoustic Concepts For Recording Or Live Sound
The Home Brew Audio motto is “knowledge trumps gear.” With the right understanding you can make professional sounding recordings with very modest and inexpensive gear. But the converse is also true. It is not only possible, but very common for people lacking the right knowledge to make poor recordings even with the most expensive gear.
However, I don’t believe that the required knowledge has to be hard to understand. We try to make these audio concepts so easy to understand that anybody can put them to use, not just the techies out there. I do think that if you plan to go into business as a recording engineer, daily recording clients with different needs and genres, you should have a lot more technical knowledge. That’s primarily because the sheer number of problems you’ll have to solve will be much greater than if just recording yourself. And if you don’t know how to solve these problems quickly, you aren’t likely to remain in business as an engineer very long.
The following article lists 10 technical audio and acoustic concepts that engineers should understand. And since I believe knowledge is never wasted, you will benefit from reading through these even if you don’t plan to become a full-time recording engineer.
The first of the concepts is the understanding of the speed of sound. I actually just wrote an article about that – Felix Broke The Sound Barrier In His Sky Dive – But What Does That Mean? – just after Felix Baumgartner’s sky dive.
Check out the rest of the list here: http://www.prosoundweb.com/article/the_top_10_technical_concepts_you_should_know/