 There’s something every recording engineer thinks about as they are tracking (recording) musicians doing their thing. That is “should I have them do it again or can I fix it in the mix?” In a perfect world, if we heard something not exactly perfect (a drummer bit off beat or a singer bit out of tune), we’d definitely have them do it again. But time and money, not to mention the attitude of the performer, are all issues that need to be considered. Luckily, there are tons of things that CAN be fixed in the mix, which is another way of saying corrected after-the-fact – usually by means of effects like compression, tempo correction and vocal tuning.
I read an article by Graham Cochrane this morning that basically says yes, you can fix a lot things in the mix, but passion in a performance isn’t one of them. His point is that effects plugins like a vocal tuning program can’t fix a passionless performance. You absolutely need to get that right BEFORE the mix stage. So the basic message is that effects are no help here. Graham does say that as the engineer, he can be made more comfortable knowing exactly what CAN be fixed in the mix by effects if he hears those things happen while he’s recording.
But I think there’s one thing Graham is not considering here. I believe that an understanding by the performer of what can and cannot be fixed in the mix can also free them up to be more relaxed and give a great performance. I’ve seen it over and over, especially among singers who made recordings before the prevalence of Auto-Tune. Back in the day, if a singer had a particularly challenging note, they would get very nervous before having to sing that part when recording. That tightness actually made it more difficult to get that note right. So after multiple takes, the singer would be extremely careful to hit the darned note, over-focusing on the pitch or tone and not really caring about the passion of the performance.

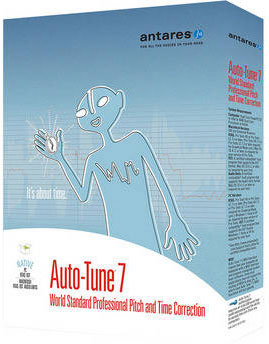
But then along came Auto-Tune. First, let me state that I think Auto-Tune (and other tuning programs) is way over-used in pop and country top 40 recordings. You shouldn’t just automatically snap every note to the grid the way so many producers do these days. But you can read about my thoughts on the proper use of Auto-Tune in my article – Auto-Tune – Any Tool Can Be Abused. The point is this – singers started to loosen up and worry a lot less about getting the pitch exactly right during the recording when they knew that it could be corrected in the mix! The existence of the effect plugin actually improved the quality of the performance, allowing a more relaxed and passionate delivery.
So though I agree with what Graham is saying in his article – you can’t add passion back into a flat performance with an effect plugin – I think it is worth noting that an effect plugin can make it more likely that you’ll get a passionate performance in the first place. We come full-circle:).
Here is Graham’s article: http://therecordingrevolution.com/2012/12/03/one-thing-plugins-cant-fix/
http://therecordingrevolution.com/2012/12/03/one-thing-plugins-cant-fix/http://therecordingrevolution.com/2012/12/03/one-thing-plugins-cant-fix/
Recording Tips and Techniques
Using Auxiliary Sends For Effects In Pro Tools
I just watched another WinkSound video, this time on using auxiliary sends for effects, as opposed to just placing the effect as an “insert” on each audio track. The advantage of using sends instead of inserts is mainly efficiency. You set up a single channel strip (aux) to run the effect – say, reverb – and then you can send multiple tracks through the one reverb, saving processing power and time over having a reverb effect on 5 or 10 tracks simultaneously. They can all share the effect on the aux channel. The other advantage of send effects is that you can easily and quickly hear the dry version of all the tracks routed to the aux channel by bypassing the effect on the aux.
Most DAWs do this in a similar way.
Here is the video from WinkSound showing how to do it in Pro Tools.
Q&A About The Rode NT2-A Microphone
 Someone sent me a question this morning after listening to the audio samples (of both acoustic guitar and voice-over vocal) in my review of the Audio-Technica AT2035 large diaphragm condenser microphone here: https://www.homebrewaudio.com/review-of-the-audio-technica-at2035-microphone/. In that review, I compare the AT2035 with the Rode NT2-A.
I thought I’d share his question and my answer.
Here is his question:
I was looking at your review of the AT2035 and i noticed an emphasis on the mid range. The Rode NT2-A mic sounds better to me.
 Now, I’m looking for a microphone that i can record my electric guitar ( loud volumes but not blistering loud) my voice, and my acoustic guitar. So I was wondering – can I record my electric guitar with the Rode mic that you demoed in the video?
Thanks!
Here is my answer:
Yes the Rode NT2a is definitely the better mic no question. And you can also get great results using it to record voice, acoustic and electric guitar. However, it is VERY important that you understand something about using a large diaphragm condenser to record an electric guitar amp. These mics are VERY sensitive so you’d need to make sure your amp’s volume is low enough when you record. You can still get great “big” sound with the amp volume turned down. Once it’s recorded, then crank it up in the mix. But if it’s too loud when recording you could damage the mic and/or clip your recording levels. Since the NT2-A has a pad switch, I recommend setting it to -10 dB.
Hope that helps!
Ken
Making The Vocal Track Sit Well In The Mix
 I am always saying that knowledge trumps gear. It’s actually our motto at HBA. One of the many reasons for that is how easy it is to make a recording that sounds bad even with the most expensive gear. And one of the things I hear done incorrectly most often is mixing the lead vocal with the rest of the instruments in a song. It is very easy to make the vocal stand out too much or allow it to be overpowered by those instruments. Creating space for the lead vocal so that it can be properly heard and understood while simultaneously allowing the drums, guitars, bass, piano, etc. to be head as well can be quite a trick.
There are several methods we use to make this happen, including compression to create a more even vocal level, and ducking (see our article – What is Ducking In Audio Recording? for a review of that technique) to sort of push everything else to the background ONLY when the singer is singing.
There are automated effects (FX) that do these things for us, but very often you can get a more natural and cleaner result by using volume envelopes to manually increase or decrease the level of certain phrases and words on a vocal track. It can take a lot (and I do mean a lot – like an hour or more sometimes for one track) of extra time to do it this way. But the result is usually worth it, especially for control junkies like me:).
In the video below, by Russ at AIR Users Blog, he shows us a technique that is a version of ducking, except that it’s done manually by riding the fader to create editable changes in the volume envelope of the instrument submix track. Riding the fader is a time-honored technique that we used a lot in the days before computer audio recording. IT basically means keeping your fingers on the fader of a track and moving it up and down over the duration of the song. It will make more sense in the video below:
Compression Basics
I talk a lot about compression because it is such an excellent audio editing tool. But it’s very powerful and so capable of big changes in your audio, including making it (the audio) sound really bad. So it’s important to understand what compression does and at least the basics of how it works. Here are a few of my articles on compression – Improve Or Ruin Your Audio With an Effect Called Compression and Vocal Compression Using Reaper’s ReaComp Effect Plugin.
I just ran across a pretty comprehensive, if a tad technical, article that covers all of those compression basics:
http://www.tenthegg.co.uk/tips/t018/