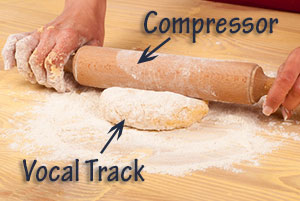
 For years I’ve been following the common and age-old advice for vocal compression, which is to start at about a 3:1 ratio, using a fast attack time (like 0-to-10 millseconds so little-to-none of the vocal is heard above the threshold), and medium slow release time (50-to-80 milliseconds so the notes decay naturally). Then set the threshold to -20 dB. You’ll then need to adjust the threshold setting until only the loudest notes are being reduced, and that reduction should not be much more than about 3 dB. Then just use your ears to make adjustments until you get things just right. To review what the heck I’m talking about with all these settings, see my video post Vocal Compression Using Reaper’s ReaComp Effect .
But as with all things audio, you should use your ears to determine what is “right.” Still though, it’s hard to stray too far from what you’ve been taught is the “normal” way of doing things. I just re-watched a video (see my post An Interesting Vocal Compression Tip) that I wrote about here a few months ago that suggests a bit of a different approach to vocal compression. At the time, I sort of thought it was interesting and suggested you might want to try it out. However, I did not take my own advice! Now I have, though. And I have a new normal.
In the video, Andrew Koss explains his technique of using super fast attack AND release times (like zero on both), with a very low ratio (try 1.5:1 or 2:1), and gain reduction of -10 or -12 dB. I tried it and really like the way it makes my vocals sound.
One thing to be careful of, though, is sibilance (that enhanced SSSSSS sound) being hyped, which can happen on some compressors (or compressor plugins) when extreme settings are selected. If you REALLY like the added pop in the voice that this technique gives you, and you get a bit of excess sibilance, you can always use EQ to reduce it. See our article – How to Fix SSS-Sibilance in Your Audio With Sound Editing Software.
Try it and see what you think!
Cheers,
Ken
Recording Tips and Techniques
Recording An Entire Rock Band With One Mic
I just saw a video done by Graham Cochrane where he records a rock band one track at a time, using just one mic. I thought is was funny in a way because that’s how I record everything pretty much:). I don’t have a band with me all the time, so I just play all the instruments and sing all the vocals myself (well, my wife and I sing all the vocals frequently). This is simply what you have to do under certain circumstances – be it lack of space, lack of money (for a lot of good gear or studio time), inability to get the band together, you name it.
Because of this, I think this is normal. Actually, in my case I do use two mics (shock! horror!) usually. That’s because on acoustic guitar, I like the sound of the Shure SM81. On vocals I always use a large-diaphragm condenser, usually my Rode NT2-A. But the concept is the same.
One thing Graham does here that I don’t do because I don’t have a drum kit (wife says “no drum kit until we get a house with a basement” – shya). I use virtual drums when I need a full kit. So I really learned something here about recording and entire drum kit at once with only one mic. Graham uses the over-the-shoulder technique with the mic just over the drummer’s right shoulder (for a right-handed drummer). It has several advantages explained by Graham here.
Anyway, the result is pretty awesome. But that didn’t surprise me. My constant harangue is “you can make awesome sounding recordings without expensive gear and without a lot of gear.” You just have to know what you’re doing.
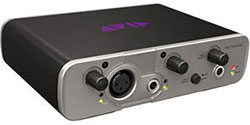
By the way, Graham used the new Avid Fast Track Solo interface, which I am going to review as soon as I get a review copy. Otherwise I’ll have to buy like my 9th interface. Sheesh. Oh well, that’s another story for another day.
Here is the video I mentioned:
Some Tips For Recording Acoustic Guitar
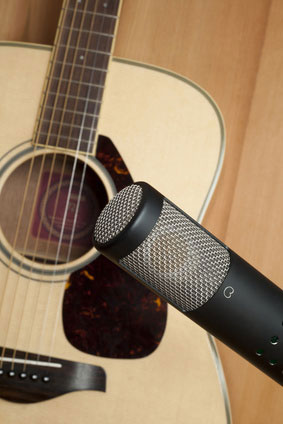 I record acoustic guitar a LOT. It’s my primary instrument and features in 99% of all my recordings. So I’ve learned some tricks along the way for getting a great acoustic guitar sound. But that doesn’t mean I can’t learn some new ones.
Björgvin Benediktsson just wrote an article with his top ten tips for recording acoustic guitar. Most of them I already do. Some I’ve never tried – putting a mic at the first fret is one of those. I’d like to add a couple of things to his list.
One of his tips is to “record in stereo,” by which he means recording with either a stereo microphone or with two microphones in a stereo configuration, such as the “coincident pair,” which means that two mics are placed with their capsules as close together as possible, but angled differently toward the guitar. And that is a fantastic way to get a stereo sound. But I would like to add the way I do it – which is basically “fake stereo” but doesn’t require you to have two mics or a stereo mic. You just record the guitar part once. Then on a second track, record the SAME part (meaning play it again!) again. Then pan the two parts left and right. The differences in the way you play the part will be enough to give you a great, full, wide guitar sound.
This was actually on Björgvin’s list under his tip for using different mics for double-tracking, which is the more formal term for doing my fake stereo thing. But his point was more for the added variety of sound when using two different mics rather than on using double-tracking as another way to achieve stereo.
One other tip I would add to his list is to pay very close attention to where the mic is pointing on your guitar, as well as the angle and distance. Make a note of it. Memorize it. This is because you will often need to stop a recording to do extra takes. And if anything is different, the angle, where the mic is pointing, etc. you will get a very different sound, which you do not want (unless you’re going for something whacky) on a single guitar track. It will sound jarring and just plain bad. So when doing additional takes, be sure to maintain the mic in relation to the guitar. Then double-check the consistency of the tone by listening through the transition from first take to second. I recently had to re-record an entire acoustic guitar track because I didn’t remember how I recorded the original days earlier, and I just could not duplicate the tone. Save yourself the time and effort by noting the details, and if possible, record the entire track on the same day in the same session. Of course, doing it all in one take is preferable.). Shya. Good luck with that.
Here is Björgvin’s article: http://audio-issues.com/recording-tips/top-ten-methods-for-recording-acoustic-guitar/#axzz2UJg6eXtR
Drum Kit Mic For Toms
I don’t have a real drum kit – though I have always wanted one (He’s whining. Ignore him). there has always been a female in my life to stop me owning my own kit. First it was my mom. Now it is my wife. She says if we ever get a house with a basement, I can have a drum kit. Shya. Anyway…
I mostly record small drums (bodhran, dumbek, tupan, tamborine, etc.) the “real” way, meaning with an actual microphone. If I want to record a rock or pop song, I use sampled drums, typically in the form of Storm Drum (what I used on my cover of My Eyes, from Dr. Horrible, and That Thing You Do, from The Movie of the same name, which you can check out here and here, respectively), Jamstix (what I used on my cover of You’re All I Have, by Snow Patrol, which you can hear and read all about here), and Drum Experience, which I will probably use for every virtual drum kit I ever use in the future (it’s THAT awesome – check it out here.
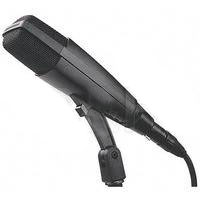
However, if you are fortunate enough to have real drums that you can record, here is a tutorial one recording just one of them, the tom. You typically mic each drum nowadays, and there is a different mic for each. For example it’s common to use a Shure SM81 on the snare, something like a Shure Beta 52 on the kick, and as in the following video, a Sennheiser MD421.
So here is the video – another form WinkSound. Enjoy!
Tips For Removing Breaths From Voice Recordings
 Recently, over at the Audio Daily Blog, the voice-over audio production blog at Voices.com, there was a post with suggestions about how to remove breaths from voice recordings. I figured I’d add my primary method for doing this to their list of 6 tips.
I typically record all my audio into Reaper, an outstanding multi-track recording program that rivals Pro Tools for a fraction of the cost. With music, and with move complex voice-over projects, I’ll do all my mixing in Reaper.
For voice-over jobs that require multiple parts – say a conversation between two or more people or a series of phrases that need exactly 3 seconds between them (I have done a lot of both types of jobs), Reaper is the tool I use to get everything in the right order and sounding good.
The Audio Editing Program
But after I create a single file by mixing it all down in Reaper (“rendering”), I open that single file in a different program – an audio editor – to do the final polish. Some folks consider this overkill, since so much can be done from within Reaper. But coming from a music recording background, I’m used to mastering my mixed-down/rendered audio. And to do that I use a separate audio recording software type called and audio editor. In my case, I use Adobe Audition. But there are much more affordable editors out there. I show you how to do this in Audacity (free) below, for example.
Adobe Audition
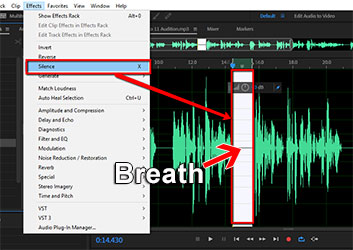
So once I open the rendered, “almost-finished” audio in my editor, I put the headphones on so I can hear every little breath, click, pop, etc. My primary tool within Adobe Audition for this is called the “Silence” tool (Effects > Silence). This tool removes all audio in a selected area, which is different from “deleting it!” If you delete the audio, you also delete that section of time. Silencing leaves the time alone, simply making it audio-free time.go through the audio, selecting breaths, and then silencing them with that silence tool.
Anyway, I actually silence all the sections between phrases to get rid of extraneous little noises that become audible when there is no vocal, including lots of the breaths. It works really well, and its fast.
Audacity
You can do the same thing in the free (but incredibly powerful) editing software, Audacity. The process is very similar. highlight just the breath sound between phrases and then locate the “Silence Audio Selection” button on the Audacity tool bar. See pic below.
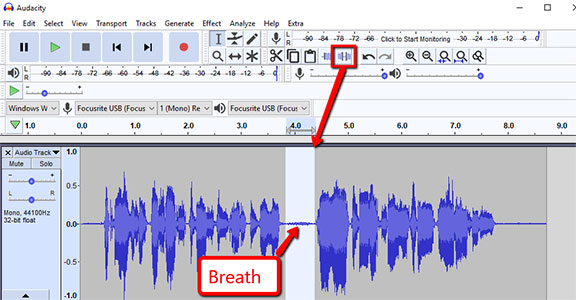
I love that there is a quick, visible button to use for this in Audacity. Adobe Audition (since moving to Creative Cloud) removed the quick button thing, which used to be there in the desktop versions. So you have to use the menu drop-down. That actually makes it easier to do in Audacity! Anyway, once you remove the breath using the button, you can just “Repeat Last Command” (CTRL-R) for the next breath and the next, instead of having to click the button every time, if you think it’s faster.
True Things No Matter What Editing Software You Use
Heed this warning though. A lot of breaths are just part of the way we speak, especially the breaths before a phrase (both my wife and I tend to put a little exhale or quick intake of breath sound at the end of our phrases. Most of these get silenced out. But many of the breaths that come before a phrase get left in, since people are used to hearing people breathe before they talk.
One more warning – if you silence most of the space between phrases, the start of a pre-phrase breath may be cut off. THAT will make the breath sound unnatural. You can fix that problem either by making sure the section you select for silencing does not include the start of the breath. Or you can use the “fade-in” tool if the start of a breath gets cut off. Creating a fade-in makes it sound natural again.
I hope this helps you get much better-sounding voice recordings!
By the way, the Audio Daily Blog post I referred to at the beginning of this article is here: http://blogs.voices.com/audiodaily/2013/05/6_tips_for_removing_breaths.html