 Your monitoring setup is super important if you are recording music. I would say that it is much less important for voice-over or video narration for a number of reasons, but primarily due to the fact that only your voice is being recorded, which is a pretty simple sound source at a predictable frequency that it doesn’t have to share.
With music though, you have multiple sound sources with energy at multiple frequencies, many of which overlap. That means you have instruments (including vocals) often competing for the same frequency real estate. That can cause some sounds to be hidden or masked in a mix. But on top of all of that is the enormous problem of monitoring in a less-than-acoustically-ideal room. Hint: for those of use monitoring music in rectangular rooms, like bedrooms, our monitoring spaces are less-than-ideal by definition. Sound waves coming out of the speakers bounce off the walls and ceilings and collide with other waves. The parallel boundaries (walls, celings, floors) create areas where certain frequencies combine to sound much louder than they really are (yes, the room lies to you!), or do the opposite – make certain frequencies sound much softer than they really are. Sometimes in the latter situation, frequencies disappear altogether!
So imagine mixing in such a room. If bass frequencies are being hyped by the room, and certain middle frequencies are disappearing, you will turn the bass down and the middle frequencies up until they sound “right.” But then in a different space, or on an iPod, etc. suddenly the song has no bass at all, and the mids are ripping your sinuses out!
The solution to controlling a monitoring setup is a combination of knowing your mixing room and its tendencies, and doing as much acoustic treatment as you can do reduce the distorting effects of the room. You can also make sure you listen in different spaces to help you get to the “truth” of the mix and then compensate accordingly.
So let’s say you have gotten used to your room and maybe treated it as well. You know how to create a good, portable (meaning it will sound good anywhere it’s played). But suddenly you either have to move, or mix in an unfamiliar room or studio. That new room will sound strange to your ears. You need to be able to calibrate your ears to that new space.
Here is a great article telling you how to do that quickly by creating your own playlist of songs that you can use to test the acoustic aspects of the new room. They recommend 6-10 songs, each designed to test a different parameter like stereo imaging, dynamic range, 3D imaging, low frequency response, high frequency response, etc.
Read the full article here:
http://en.audiofanzine.com/getting-started/editorial/articles/how-to-control-a-monitoring-system.html
Music Recording
Using The Sylenth1 Virtual Instrument Synthesizer To Make Trance Pads

I talk a lot about virtual instruments on this site – see Virtual Instruments articles at: Articles With “Virtual Instruments” Tag.
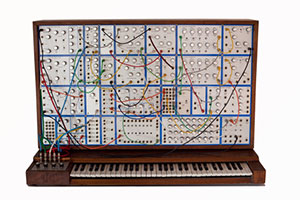
Today I watched a video about a VST virtual instrument, usually referred to as a VSTi, called Sylenth1. It’s been around for awhile and has a reputation as one of the best sounding software synthesizers around. The Sylenth1 emulates the hardware synthesizers that people (I never had one) use to create their own sounds. This is as opposed to virtual instruments that are actual specific instrument recordings – say, a trumpet – that you can trigger via MIDI on your computer. Synthesizers use sound-generators called oscillators or single-source waveforms. Then you can combine, change, mash, distort, etc. these sounds to create your own sounds. That is what the Syleth1 is.
Below is a video from the YouTube Channel BeatsforBeets showing you how to create pads for trance music using Sylenth1. Note that even though this video uses FL Studio as the recording software hosting the Sylenth1 VSTi, you can use Sylenth1 in any DAW that can host a VSTi, which is just about all of them on Windows, including Reaper, and ProTools.
Arpeggionome Pro Is A MIDI Instrument And Controller Designed For The iPad
Arpeggionome (the name is a mashup of the terms “arpeggio” and “metronome”) was released as a cool music-making device for the iPad. It could not only make cool music by itself, but it could act as a MIDI controller for other iOS MIDI devices, external devices and instruments, as well as computer recoding software. In December of 2012, Arpeggionome Pro was released, which had additional features and capability in the MIDI department. It also has a redesigned interface from the original Arpeggionome. It was updated to version 1.1 yesterday (June 23rd, 2013). Recently, Arpeggionome was released for the iPhone as well.
Arpeggionome Pro is $19.99 in the iTunes store. Arpeggionome for iPhone is $2.99.
See all the details and capabilities at this link: http://www.idesignsound.com/arpeggionome-pro-ipad/
Check out the video below for a demo of the music-making awesomeness of this cool iOS app.
More Virtual Drums For The iPad – Synth Drum Pads
There are several music-making apps for Apple iOS devices (iPads, iPhones, iPod Touch), and drum machines/virtual drum and percussion programs are certainly among them. I’ve written about a couple on this site:
MIDI Step Sequencer For iPad, which is about Nord Beat, a traditional type drum machine, and something that is sort of a virtual drum (and guitar) accessory for the iPad, Pix and Stix for iPad Garage Band App. These are actually drum sticks that you hit your iPad with. Crazy stuff, but may make drummers feel a bit more like they are playing drums.
Anyway, here is a new drum machine for the iPad only (not iPhone or iPod Touch) called Synth Drum Pads, from Paul Betowski. You can create all kinds of rhythm and melodic tones, which seem to be more suited toward the EDM (electronic dance music) genre, but certainly will find use in any music-making kit. Take a listen to an audio sample below:
Synth Drum Pads has 4 large pads, each with a set of parameters (tone, attack decay, etc.) above it that you set/tweak. The guide on the site shows you starting with a kick sound that is very similar to that in the popular TR-808. Note: there are no presets, so you’ll have to learn (or already know) a bit about drum programming. If you’ve used drums machines before, you should be OK.
But even if you have no experience, there are excellent instructions with pictures at the site here: http://designbypaul.co.uk/synthdrumpadshelp.html
Have fun!
Tips For Mixing Using Musical Function Rather Than Individual Tracks
 I just read a really good article on mixing music. The focus was different from what is normally talked about when mixing. Usually you hear things like pan the bass track, the kick drum track, and the lead vocal track, to the center of the mix. The pan the other tracks out from there to create stereo. Add this kind of EQ, compression, reverb, etc. to that kind of track, and on and on. But the article I mentioned talked mainly about “groups” rather than tracks.
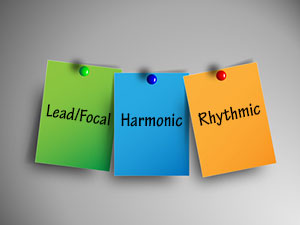
For example, the author, Rob Schlette, defines 3 groups: the lead/focal content group, the rhythmic content group, and the harmonic content group. The article even contains a cool graphic showing what instrument is on what track, and color-coding the groups. BTW, “BGV” means “background vocals,” which took me a couple of minutes to figure out:).
Then using tone as defined by the above groups, you can organize your mix in a certain way – by creating contrast between the groups (using tools like EQ, compression, and even saturation effects – to help the tones perform their roles better. The article doesn’t explicitly say that you can best do this by creating subgroups of tracks, called “folders” in Reaper, BTW, that correspond to the 3 tonal groups. See our article Creating Subgroups In Reaper and Pro Tools for a review of subgroups. But it is surely the best way to go about doing this.
The article also suggests that this kind of mixing is great for giving an entire album a more cohesive feel to it.
To read the full article, follow this link: http://theproaudiofiles.com/mixing-with-mastering-in-mind-tone/