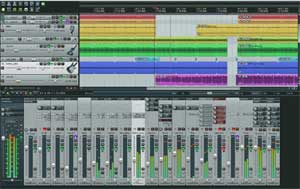
 Compression is an effect often used to add punch and power to kick and snare drums, especially in pop and rock music. Adding compression to the drums in your recordings is a simple matter nowadays (yes, I’m still all geeky about how much easier it is to do recording now that everything is software – even 15+ years since I was able to make the transition from analog tape).
Anyway, the process of adding the compressor effect (now usually a plugin on the tracks in your software) is the same with pretty much all recording software. Below is an article showing you how to do it using Cakewalk’s SONAR X2 Producer software. I did a video showing you how to add compression in Reaper using the built-in compressor plug-in, “ReaComp” in my post, Vocal Compression Using Reaper’s ReaComp Effect Plugin.
Read the article on drum percussion in Sonar here: http://blog.cakewalk.com/make-kick-and-snare-sound-more-aggressive/
Music Recording
Reaper 4.5 Has Awesome MIDI Improvements

Reaper, the incredibly awesome recording software (DAW – digital audio workstation), just released a major update in version 4.5 yesterday, Sep 2nd. If you are not aware already, you don’t pay for for this update if you already have Reaper. This is one of the unique and awesome features of Reaper ownership. By the way, I have no affiliation with Reaper other than how much I like it.
Despite the incredible features and community of Reaper – totally unique honor-based pricing system, uncrippled 60-day trial that never actually stops working, lightweight code (and hence, download), same basic professional features you find on DAWs costing 3 times more, etc., etc., (read our post about Reaper for more detail here – Why Reaper Rocks as a DAW ), one common complaint has always been its weakness in MIDI features and capability. This update has changed that!
Make no mistake, this update is huge across the board. But the MIDI changes are the coolest. Here are just a few of the improvements:
- See all the midi tracks/items in the editor
- Draw CC events on multiple tracks at once
- See the next/all items in the track
- New Track List (in MIDI Editor) that allows you to not only see, but also edit (!) multiple tracks and items ath the same time
One person in the Reaper forum said he used to dread getting up in the morning knowing he had to face the Reaper MIDI Editor, and now he looks forward to it. Of course, it’s only been 2 days;).
But that brings up another point. Reaper has ALREADY pushed an update to 4.5 (4.51) with even more improvements! That’s 24 hours between updates. Short of some iOS apps, can you think of any other software companies that do this?
To see the complete list of the new stuff in the new version of Reaper, see it here – http://forum.cockos.com/showthread.php?t=127648 . Be sure to read through the entire thread for some explanations and pics of some of these updates.
To download Reaper, and/or find out everything about it, go here: http://www.cockos.com/reaper/
Mixing With Headphones
When doing multi-track music recording, you obviously must mix all the instruments and voices together at the end so that everything is heard and plays well together. The challenge in mixing is to make sure many different sounds are audible in the right context and in the correct space – both left-to-right as well as front-to-back. One common rule-of-thumb is “never mix with headphones.” More specifically, it means you should not mix with ONLY headphones. You get a much more accurate picture (odd word to use for audio, right?) of what’s going on if you can hear the mix through loudspeakers (monitors), so the sound is coming through the air before it hits your ears.
However, if your space – typically a converted bedroom when we are talking about home recording studios – is less than ideal, mixing with loudspeakers creates its own problems. Reflections off the walls, ceiling, floor, etc. bounce around and create inaccuracies in what you ultimately hear (constructive and destructive wave interference are the culprits, in case you remember your wave mechanics from school;)). So there are times when it is advisable to do your mixing with both headphones and with loudspeakers.
Björgvin Benediktsson has some tips for this in his post over at Audio Issues. Check them out here: http://www.audio-issues.com/music-mixing/mixing-with-headphones-use-this-one-trick-for-better-translation/#axzz2ceYlFcI2
Auxiliary Sends For Effects
 I wrote about this topic once before in the post – Using Auxiliary Sends For Effects In Pro Tools. That article references a video from Wink Sound showing you how to use auxiliary sends in Pro Tools to process effects on a bass guitar track – as opposed to simply adding (instantiating is the word usually used here, meaning creating an “instance” of an effect) each effect directly onto the bass track.
Well, I wanted to add some things to what I said in that article. First, I stated that the main reason for using an auxiliary send was to save processing power on your computer. Though this is still a major benefit if you have multiple tracks all dipping their buckets (my metaphor) into the same effects (say, reverb) trough (a metaphor for the auxiliary track with the effect on it). However, that is not the only benefit of using an auxiliary send/track for processing some effects.
As shown in the example in the video, the main benefit is the extra control you have by processing the effect independently of the dry (meaning with no effects) audio from the bass track. In the video, Mike creates a new track – the auxiliary track – and puts a chorus effect on it. Then he uses something called a “send,” on the bass track, which basically just taps/siphons/splits off the audio signal so you can send it somewhere else, while the main bass audio continues to the master output as normal. The “send” is routed to the auxiliary track to be treated by the chorus effect.
So far, there isn’t much of an advantage to doing this as opposed to just sticking (instantiating) the chorus effect on the bass track, other than from an organization standpoint where you have both a dry and a wet signal to work with. But then Mike talks about adding an EQ to the aux track (which already has a chorus effect on it) in order to filter the chorus so that the chorus only happens in a certain frequency range. You wouldn’t be able to do that if you just slapped both the EQ and the chorus effects onto the bass track.
So to sum up ((ha! a little send/bus/aux pun for you:)), using a “send” from an audio track to process effects has multiple advantages. It allows you to create a common effect track that you can send multiple tracks in order to share the same effect (BTW, you use a “bus,” as explained in the video, to accept multiple track sends for summing. Tracks, like an auxiliary track, cannot usually accept inputs from more than one source. So you set that single source as the bus). And it also allows you the flexibility to process effects differently than you could if they were all just plugged into (instantiated) the audio track.
Below is that video I keep talking about. It uses Pro Tools, but the steps are the same in any digital audio workstation (DAW). However, things can get more flexible, and consequently more complex, in computer mixers like you have in DAWs. For example, in Reaper, tracks can also act as busses! That means tracks CAN accept multiple sends from other tracks. So you can set up a track as an effects bus, putting the effects on that track and sort of combining the aux and bus into one. So you wouldn’t have to route the send from and audio track first to a bus, and then to the aux track. Yeah, I know. That’s a bit confusing, even to me, to read it. I’ll write an article just on sends busses and auxiliary tracks to help it make sense.
Anyway, here is the video. I promise this time:).
Cheers!
The Vinyl LP – Yes It Is Still Alive

Back when I was a kid, the LP (which stands for “long play”) was the king of music. There was no internet (well, not for the public anyway), no streaming, no iTunes. When we went shopping for music, we went to Music Plus (the big record store chain near where I lived) and buy albums in LP format – we bought “records.”
But then along came the CD, and internet music. People pretty much forgot about records. DJs kept them alive for a long time, using them for scratching, stabbing, etc. But did you know that the music industry sells 7 or 8 million LPs a year? And not just for DJs. They are big with classic rock reissues, classical music, audiophiles and others.
It is generally agreed by certain audiophiles that vinyl records are capable of reproducing audio better than CDs – part of the analog-vs-digital argument. That argument will probably never end.
Anyway, the reason I bring any of this up is that my old frequent lunch buddy from when I lived in Virginia, Scott Dorsey, just wrote an article for Recording Magazine about LPs – what they are and how they are made. It’s really fascinating stuff.
Read Scott’s article here: http://www.recordingmag.com/resources/resourceDetail/113.html