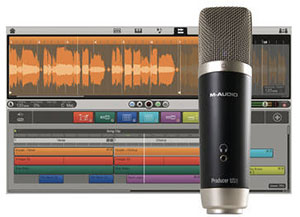
 Since NAMM (The National Association of Music Merchants (NAMM)) has just come to a close, we now know about all the newest gear – both software and hardware – for recording music in 2014. I wrote about a few offerings from Zoom (who make some awesome mobile recording devices) in my article last week – New Zoom Recording Products Just Announced At 2014 NAMM. There are so many cool things, but I thought I’d mention something specifically for home recording that is both awesome and very affordable – the M-Audio Vocal Studio USB Microphone Personal Recording Studio.
So what is it? It’s a package that contains the M-Audio Producer Microphone, which is a large capsule cardioid USB mic (comes with a USB cable and a desktop mic stand), and Ignite Music Creation software. The Ignite software works on both Mac and PC. It also comes with 275+ AIR instrument sounds, which are virtual instruments. Also, the software has “Smart MIDI Chord and Phrase Players,” which allow you to use MIDI preset patterns in modern genres that can assist in your compositions. You can read more details about these patterns, M-Audio’s Smart MIDI Chord and Phrase Players, and the Ignite software in general here: http://www.airmusictech.com/product/ignite.
Cost for the whole package: $99.95. That’s a pretty great deal for everything that you get!
CLICK HERE to purchase or to find out more.
Music Recording
Home Recording Studio Starter Bundle
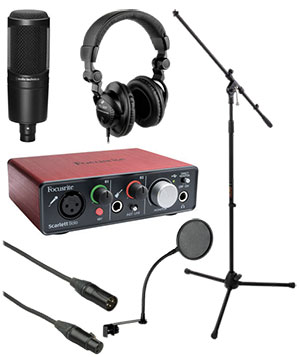
In partnership with B&H Photo-Video-Audio, we have put together a home recording equipment bundle – Home Recording Starter Kit.
[Update: Since Avid discontinued the Fast Track, we replaced the interface in this kit with the Focusrite Scarlett 2i2].
I designed this bundle with the primary goal of containing the bare minimum needed, at the lowest cost, to produce professional quality audio from just a regular computer in your home. There are a number of benefits to purchasing gear like this in bundles. It is convenient to not have to hunt and peck for each item when shopping – you just have to buy the one product. Also, you save money buying bundles.
The home recording starter kit – is primarily for people who want to record voice-overs, such as video narrations, podcasts, radio and TV ads, audio books, etc. It comes with a large-diaphragm condenser mic, great for voice recording but also a terrific all-around microphone. You then also get a pop-screen (to avoid “p-pops” when recording vocals), an XLR mic cable, a boom mic stand, closed-back headphones, and an audio interface (which comes with Ableton Live Lite 8 software). This type of set-up – a standard (not USB) condenser microphone plugged into an audio interface box which is plugged into the computer – is the foundation for high-end professional audio recording. I call it home studio configuration 2. Configuration 1 is a microphone (pc mic or USB) plugged directly into a computer. This home recording starter kit is $234.95. If you were to purchase each item individually it would cost you$282.88. So you save about $47 by purchasing the bundle!
If you find Ableton Live Lite 8 software isn’t right for you (it tends to be more for musicians than voice-over or basic recording), I highly recommend upgrading to Reaper software, which I find much more intuitive and powerful.
Here are the details of the package:
The Home Recording Starter Bundle ($259.95)
- Focusrite Scarlett Solo – Portable USB Audio Interface
- Pearstone 3-Pin XLR Male to 3-Pin XLR Female Audio Cable (10′)
- Auray MS-5230F Tripod Microphone Stand with Fixed Boom
- Audio-TechnicaAT2020 Condenser Microphone
- Polsen HPC-A30 Closed-Back Studio Monitor Headphones
Top Notch Small Studio For Recording And Mixing A Band
Someone recently asked for advice about gear to record her all-girl heavy rock band. She specified a budget of about $6,200 and asked for recommendations for:
- A microphone ideal for female voices
- A mixer for a small but contemporary recording studio
- A pair of active loudspeakers for monitors
First, it is important to point out that specific people and specific microphones may or may not make a good match. I once recorded a female singer who sounded fantastic through my AKG C3000. But my wife’s voice does not sound very good through that mic. For my wife, the Audio-Technica AT2035 sounds great, as does the Rode NT2-A. So you really need to try different vocal mics before you buy, if you can. A lot of music stores will let you try them out in the store at least. Some may even let you try them at home. Of course you can always rent if you must. Anyway, because it worked so well on several voices, not just my wife’s, I recommended the Audio-Technica AT2035 for the mic, which costs $125.
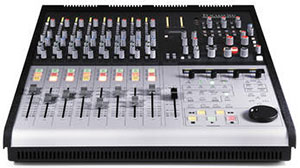
Normally, I don’t recommend a mixer in a home recording studio. They can cause more trouble than they are worth. See Why You Should Not Use A Mixer In Your Home Recording Studio for why I say this. However, it sounded like she really wanted a control surface for recording and mixing using a digital audio workstation (DAW) recording program like the industry-standard Pro Tools (current version as of this writing is Pro Tools 11). This will act like a mixer, but what it really does is allow you to control the knobs and sliders in your DAW with actual, physical knobs and sliders – which is what a “control surface” is, versus a “mixer”). Of course you can mix, but also you can do so much more with the unit I recommended, which is a Focusrite Control 2802. Here is a great video demonstrating it:
The Focusrite Control 2802 costs about $3,500.

She will also need a recording interface, which has analog-to-digital converters as well as mic preamps. And she’ll need at least 8 mic inputs for her band. So I recommended the M-Audio Fast Track Ultra 8R for this. I also double-checked to ensure that the Fast Track Ultra 8R is officially supported as a Pro Tools 11 interface and it is. You can see all the supported interface units here. This interface costs $400.
The final piece of the equation was a pair of active monitor speakers. My recommendation here was the KRK RoKit 6 G2 Studio Monitors Bundle. This bundle consists of a pair of KRK RoKit 6 G2 68-watt 6″ two-way active nearfield monitors, along with stands for the speakers and cables. This bundle costs $347 at B&H.
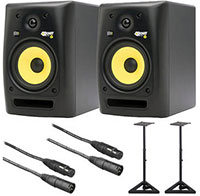
The total cost of the above excellent small studio for recording a rock band is $4,371.58, which saves her $1,828.42. Not too shabby.
I should point out that in order to record the entire band at once, she’ll need a few more mics. So she can use that surplus in the budget for that;).
Propellerhead Reason Recording Software Tutorial
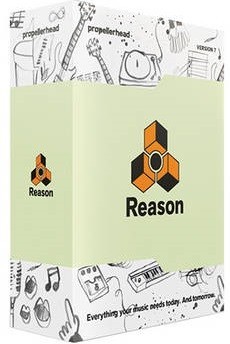 Propellerhead Reason was originally program that focused only on making music by providing the user with a virtual “rack.” Into this rack, you could put virtual instruments, effects, and mixers. It has been around since 2000, and up until last year (2012) it was a MIDI only program, meaning you could not record audio with it. That relegated it to the realm of a support program, requiring you to sort of attach it to a real recording program like Reaper or Pro Tools.
Recently though – with the release of version 6 – Reason became a a real stand-alone digital audio workstation (DAW), being given the ability to record audio.
Though you can record audio into Reason with any audio interface, you might want to check out Propellerhead’s own Balance, which has a few very interesting and awesome features. One that sounds like something I’d like to see on more interface units is something called Clip Safe. When activated, Clip Safe records two versions of your audio – one as normal, and another that has a limiter applied automatically to prevent any extra loud audio from distorting (clipping). Very cool.
One limitation with Reason, which truly holds it back from competing better with the big-boy DAWs, is its lack of support of VST. Propellerhead has such a large collection of effects and instruments already, that it might not be a problem for some. But most users feel severely hampered by the inability to easily use VST instruments and effects (I say “easily” because it is still possible to use them, but you have to use a thing called “rewire” to do it. So be warned.
Here is a link to a short tutorial on how to record audio with Reason:
http://www.musictech.net/2013/09/reason-power-recording-1/
Use Ducking For Electronic Dance Music Effect
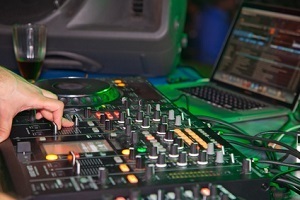 I originally wrote this article in September of last year – before I saw the movie, “Now You See Me.” I’m updating it because we just watched that excellent movie, and the effect I describe below for using ducking in electronic music can be clearly heard in the soundtrack at the end of the movie, during the credits. On the soundtrack album, the song is track number 8, “Now You See Me – Robert DeLong Remix.” It’s an electronic variation of the “Now You See Me” theme composed by Brian Tyler. Take a listen at the iTunes store here.
Ducking in audio recording is a really useful effect for any number of things. The basic idea is that when the audio on one track (you need multi-track recording software for this) gets louder, the audio on another track (or even all the other tracks) get less loud. It’s like one track pushes the other track(s) down and out of the way. Or put another way – the other track(s) “duck” out of the way of of the controlling track.
I wrote about how to do this using Reaper multi-track software in my article What is Ducking In Audio Recording? The object is most commonly to allow a single voice to be clearly heard over some background music. So whenever the audio on the vocal track is sounding, the volume on the music track gets correspondingly less loud. When listening to JUST the music track in that case, it sounds a bit weird. But when combined with the vocal track, you don’t even notice that the music is getting softer at those points because the voice fills in the void.
The way that one track controls another is by use of something called “side-chaining,” which just means that you send some of the output of one track to another track. In ducking, you put a compressor effect on the track that you want to do the ducking – the music track in the above example. But instead of the music controlling the action of the compressor, you bring in the audio from a different track (the vocal track in our example) to feed/control the compressor on the track doing the ducking.
But remember that I said ducking can be used for a lot of different effects? And remember when I said that listening to JUST the track doing the ducking can sound weird, since it is inexplicably lowering and raising its volume at seemingly random times? Well we can use THAT in Electronic Dance Music (EDM).
The idea is to set up a music track with a pad (synthesizer playing a long, sustained sound – a note or chord), and then to cause the the volume of that music to drop almost completely out periodically – typically to the rhythm of the song. So you set up a drum track to be the controlling track, and whenever a drum hit happens, the volume of the music track drops, gving out a sort of pulsing, throbbing sound perfect for EDM. Then just mute the drum track, and you have a very rhythmic and dance-to-able synth pad track.
The following article shows you how to do the EDM ducking thing using Cakewalk’s Sonar X2 Producer software. Of course you can do the same thing in Reaper using the same technique I described in the article linked at the top of the page.
Red that article here: http://blog.cakewalk.com/edm-ducking-synth-melodies/
