 When someone says “pro audio tools” what they really mean is equipment that is used at a professional level to create and/or produce top-notch audio recordings. That prefix pro conjures up images of high-end recording gear such as microphones costing thousands of dollars, gleaming mic preamplifiers and other outboard devices seen in big commercial recording studios. I would like to humbly challenge that automatic assumption and attempt to separate the word professional with the term expensive.
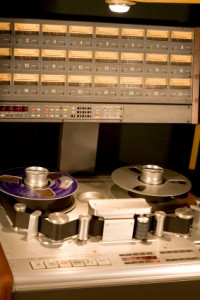
It is true that for most of the past several decades, the best audio recording quality was only realistically obtained through the use of expensive equipment. There were several reasons for this, but mostly it was down to the fact that in order to reproduce a sound anywhere near accurately, you had to use big, fast magnetic tape. By big, I mean wide; like one or two inches wide. And by fast I mean spinning on a machine much faster than consumer reel-to-reel tape machines could usually handle, like 30 inches per second. Cassette machines only got to a max of 3-3/4 inches per second. This was necessary because it took lots of tape particles to be magnetized and aligned to sound really good; or to sound a lot like the original (the word “fidelity” was used a lot for this). So first, you had to have a wider stripe than consumer tapes had, and then you had to have it hurtling past the head on the tape recorder to maximize how many tape particles could be realigned per second.
Tape recorders that could record multiple tracks (4-, 8-, 16-, 24-, or 32-track) at once, recording fast on wide tape were expensive. Mostly only commercial studios owned them. In addition to the recorder and the tape, you needed a mixing board, microphones, amplifiers, and effect racks for things like equalization, compression, reverb, etc. By the time you tot the price for even a modest studio using that kind of gear, you’re easily talking many thousands of dollars, not to mention the space you needed to put the stuff down.
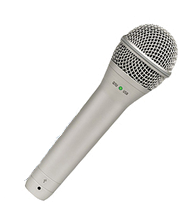
But now we live in the 21st century, where we can use our ubiquitous computers to be both tape machine AND tape. Digital audio makes it so we can reproduce audio to a very high fidelity quickly, inexpensively, and without having to buy much more than you could fit in your hand. Let that be the reason you separate the concept of professional from the idea of money. Today, if you already have a computer with an internet connection, you can put together a home recording studio capable of recording and producing professional quality sound for as little as $50, which is about the price of a decent USB microphone, such as the Samson Q1. With just that microphone, and a copy of the free audio software called Audacity, you’ll be on your way. Then as you decide you need more capability or even higher quality, you can upgrade your home studio a bit at a time.
Check out the many articles and tutorials on home recording at www.HomeBrewAudio.com, where we show you how to let your need drive your recording gear acquisition as you progress. That should save you a boatload of money while getting you started out in audio recording quickly and easily. The term pro audio tools these days becomes more about knowledge and skill than about cost.
Give us a visit. We’ll see you around campus!
Ken
Recording Software
How To Record A Voice Over With Audacity
 Here are some suggestions on how to record a voice over. Ready to land your next voice over job?
This is a fairly detailed step-by-step guide for creating a pro quality voice over using Audacity (the free audio software). The steps here will work for any mic, but you should use at least a decent USB mic like the Samson Q2U (which you can get for 59 dollarinis). Ready? Here we go.
1. Open Audacity (you can download that here)
2. Make sure your mic is set up in Audacity
To do that, go to Edit/Preferences/Devices (choose the Samson mic under “Recording” and make sure it says “mono” under “channels.”
3. Click the “Record” button (big red circle) in Audacity – a track will appear and begin recording.
4. Record your voice-over
Here are some tips for that:
- Use a pop filter if you have one. If you don’t, you can make one quickly by stretching an old pair of nylon stockings over a wire hanger that you have shaped into a circle. But you can buy one for about $10 on Amazon – Auray Pop Filter.
- Record in as quiet a place as possible.
- Keep you mouth close to the mic (3-5 inches). Most of us record in spare rooms in our house, which means lots of echo-y, reverb-y room sound. And one quick way to reduce that that you can implement immediately is simply to record close (that 3-5 inches I suggest) to the mic. I believe that this could be the most helpful bit of advice on how to record a voice over of everything in this post.
- Keep recording even in you make a mistake. I like to clap my hand or make some other quick, loud noise after a screw-up so that I’ll see it on the track when I’m editing. Just make that mark and continue recording. You can cut the bad takes out during editing.
- Make sure the wave forms (blue blobs) are fairly large in the track. You don’t want to over do it to where they go out to the edges and beyond. But if they are too quiet – not much more than what’s on the center line – then you should turn up the input level* and start again until you get fat and chunky blobs. This may be the 2nd most important piece of advice for how to record a voice over!
* If you are using an interface unit to plug your mic in, you can turn the input level up on that. If you have a USB mic, go into your Windows Sound control panel, click on the Recording tab, select your mic, select Properties, click the “Recording” tab, and then “Level.” Make sure the slider is at around the 85-90 percent mark. Sometimes Windows puts this level down to like 20% for some reason.
5. Hit the “Stop” button when you’re finished (big yellowish square).
6. Now find all the parts you want to cut out (bad takes, baby crying, phone ringing, etc.) by highlighting that bit of audio and simply hitting the “delete” button on your computer keyboard.
7. Once you’re left with the parts you want to keep, it’s time to reduce the ambient background noise.
8. Find a section of the recording where you’re NOT talking, but the mic was recording. Usually this will be low-level computer drive noise, electronic buzz or hum, etc.
9. Select Effect/Noise Removal in Audacity and select “Get Noise Profile.” The Noise Removal window will close. You’ve just told audacity what constitutes “noise.”
10. Select the entire audio recording (double-click on the audio), open the NR tool again, and click “OK.”
This will filter out the ambient noise and leave your voice alone (for the most part).
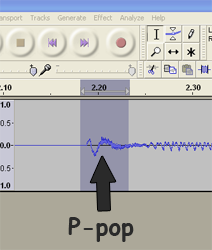
11. Listen carefully to the recording in headphones. You’ll likely have several “p-pops” or “plosives” as they are commonly called.
Zoom in to very beginning of an offensive p-pop (see:
https://www.homebrewaudio.com/how-to-fix-a-p-pop-in-your-audio-with-sound-editing-software for a bit more on this)
12. I find that bad p-pops tend to look like the letter “N” in the audio waveform.
See pic. Select just the “N” part and then go to Effect/Equalization in Audacity.
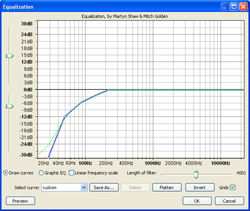
13. Create a curve on the horizontal line that starts sloping down to the left at about the 200-250 Hz spot.
Just click your mouse on the line wherever you want to create a drag-handle (4 or 5 spaced between 30Hz and 250Hz should do the trick). Then drag the 30Hz handle all the way down.
Drag the next one to the right down but not as far, etc. Continue until your curve looks like the picture above.
14. Then click “OK” and listen to the result.
The “p” sound should sound more natural and less like an explosion of air. You’ll also notice that the “N” shape is much smaller.
15. Next You’ll want to compress the audio just a smidge to even out the volume and give it some punch.
So select the entire audio file (double-click on the blue blob somewhere) and select Effect/Compressor. Set the sliders as follows: Threshold: -12 db, Noise Floor: -40 db, Ratio: 2:1, Attack Time: 0.2 secs, Decay Time: 1.secs.
Also, make sure there is a check in the box marked “Make-up Gain for 0dB after compressing.” Click “OK.”
16. Now listen carefully, through headphones, to all the audio.
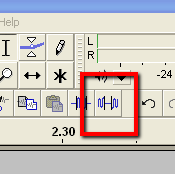
You may notice a few stray bits of unwanted noise in between the talking bits, so to fix those, just highlight them as you find them, and click the “Silence” tool button in Audacity (see Pic 3).
17. Lastly, save the audio in whatever format you need by selecting File/Export in audacity.
44.1KHz and 16-bit wav files are standard “CD quality” audio. Note that if you want to export the audio as mp3, you’ll need to download the Lame MP3 Encoder here: http://audacity.sourceforge.net/help/faq?s=install&item=lame-mp3 . That will install to the correct place automatically.
Hopefully that should give you an idea how to record a voice over, a professional sounding one, very quickly. For more in-depth info, check out our course, the Newbies Guide to Audio Recording Awesomeness.
Good luck.
Ken
Music Studio Equipment – What Is The Minimum Needed?
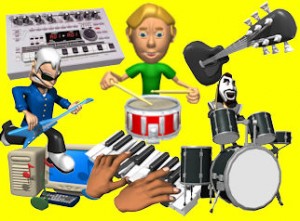 Music studio equipment can get really expensive really fast. I’m differentiating here between just any home recording studio, and one that specifically is set up for recording and producing music. If you are a voice over actor or podcaster exclusively, you can get by with quite a bit less in the way of studio gear. Musicians will almost certainly be needing, and hence, paying, more.
But that doesn’t mean you have to go broke. Remember that our goal at Home Brew Audio is to help you create the best quality audio for the lowest amount of money, and that is still true for the folks recording music in their home studio.
In order to make this article optimally applicable to the most folks, my example will be one or two people creating music on a computer using multitrack recording and audio editing tools. Things get pretty variable and different when you start talking about full bands or orchestras. I’m also going to assume for this example that the musicians already possess the musical instruments that will be on the recordings. Oh, and I also assume the person recording has a computer…pretty much any computer made in the last 10 years will do.
Okay, so the basics are these: you play the music, which goes through a microphone and then into a computer, which converts the sound into computer files that can be heard and manipulated by your audio software. See?! How hard is that? Alright, yes. It might be helpful to have a bit more information.
Let’s start with the first piece of music studio equipment you may not already have, the microphone. Let’s also say you are a guitarist and singer. Ultimately I would recommend two different kinds of microphones here, one for your guitar (acoustic for our example) and one for your voice. But let’s talk minimums here. We’ll go with one 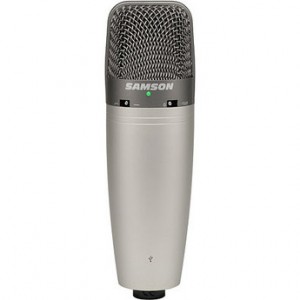 microphone, a large diaphragm condenser (side address) of the USB ilk, such as the Samson C03UCW (see pic). At this wonderful point in time probably the most bang-for-the-buck you can get in audio recording is a USB microphone. They cost much less than their traditional cousins, plus they don’t require a special computer interface or microphone preamplifier. Just plug it into your computer and go. You can use the same mic for your guitar as for your voice, as we are going to be recording one part at a time. Guitar first, then singing, etc. You only need one mic at a time for that. If the $139.00 for the C03U is a bit steep, you can get very near the sound quality for only $59.99 with the Samson Q1U handheld mic.
So what other hardware do you need? Uh, well let’s see. Something to hold your mic while you play guitar is about the only other thing you’ll need. If your USB mic didn’t already come with one, you can get them from your local music store for cheap. Heck, if you need to you could duct-tape one to a desk or just set one on a pillow on a chair or something.
So if we’re done with hardware, what next? Yup, software. You’ll need software that can record multiple tracks and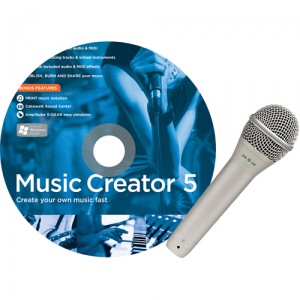 mix them together, which we’ll call tracking and mixing. You’ll also need audio editing capability. See last week’s article on PC Recording Software for more on this. Luckily there are recording software programs out there that do both functions, the lowest cost of which is free. “Audacity” is a program that is open-source freeware that can record, mix multiple tracks together AND edit audio. In fact Audacity is the most incredible value on the face of the planet. But since it is free, there are limitations, especially where musicians are concerned, such as in MIDI functionality. So you might want something with a bit more capability. There are so many choices out there for so many different prices, that it can make your head spin. Personally I use a program called Reaper, by Cockos (no affiliation) for tracking and mixing, and Adobe Audition for editing, though in truth, Audition is one of those programs that can do it all. I just prefer the ease and work flow in Reaper.
And that’s it! Yup, a computer, a usb mic and some software you can get you started with a very small budget (starting at about $25 for the mic). You’ll want a pair of headphones too, though you could get by with a regular old pair of earbuds if you have to. Then all you need to do is record that guitar part, hit “save”, add another track next to the guitar track, record your voice on that 2nd track while you listen to the first track on your headphones. Boom. You’ll probably want to add another guitar or another voice or 2 for harmonies, etc. No problem; just rinse and repeat, adding tracks as you go. When you have everything recorded, use your mixing software to pan the instruments and voices left, right, and/or in the middle like a group would be on stage. This also creates a nice stereo sound. Then make sure nobody is too loud or soft in the blend, hit “Save” again, and you’ve got a song. Now just open the song in your editing program, snip off any extra sound from the beginning (a count-in or a cough, etc.) of the recording. Fade the end out, make sure the whole thing is loud enough, save it, and you’ve got yourself a song that your recorded on your own home music studio.
Pretty cool huh? Check out the massive number of on-line tutorials out there for free, or you could go to Home Brew Audio’s site for lots of articles and videos to help you out.
Happy Recording!
PC Recording Software
PC Recording Software – The Two Kinds You Need For Home Audio Recording
 PC recording software comes in many different types and capabilities. What I want to focus on here is software you can use to record music or voice overs onto your computer. That narrows it down to two categories of audio recording software: programs to use for “tracking” or getting the sound into the computer, and programs used for editing audio after it has been recorded.
Audio Tracking Software
First off I should mention that there is considerable overlap between the two kinds of software I am describing, but the main difference is that one is primarily used to record the sound (music, voice over, etc.), and the other is primarily used to change the audio in some way, usually by altering the actual audio file (destructive editing). For audio tracking (our first type of software) you will absolutely want the ability to multitrack. What I mean by this is that you need to be able to record one thing on one track (say, an acoustic guitar), a second thing (say, a singer’s voice) on a second track that will play back AT THE SAME TIME as the first track, etc. If a tracking program is capable of multitrack recording, the number of tracks you can create (remember…all playing back at the same time) is usually unlimited for all intents and purposes. That means you’ll be able to do some very cool things like record yourself singing harmony with yourself (a quartet or entire choir!), add guitar, drums, piano, etc. and be a one-person band. This is truly the killer app for computer recording.
In the old days (like in the 90s and before….so yeah, not THAT old), it was difficult and expensive to do multitrack recording. When using audio tape, the professionals used tape so wide, usually two inches, and moving so fast through a recording machine (usually 15 inches per second) that there was minimal noise and maximum audio quality. Consumers were left with two choices, pay to rent time at a commercial studio, or buy a machine yourself. Regular people could typically only afford multi-track cassette recorders whose maximum track count was usually 4 because cassette tapes were so narrow. Because of the limitations, audio quality was not terrific coming from these consumer multitrackers.
So maybe you can imagine why it is such a big deal that software allows good audio quality and unlimited track count! Anyway, audio tracking programs are frequently referred to as digital audio workstations (DAWS). You “lay down” (record) one track, then another, then another, etc. until you’ve recorded all you need. Then you pan each track to make it sound like it’s coming from the left side of the listener, the right side, or the middle. You might also want to put some effects on each track to get them to sound just right. When you’re done with all that you mix all the tracks down into a stereo file. Nowadays this is also called rendering.
Audio Editing Software
Like I said, there is significant overlap between these two types of audio program. For example, most editors can also record audio as well. But you usually can’t do multitrack recording with an editor. For the purpose of this article, I want to focus on the editor’s use once multiple tracks have been mixed down/rendered to a single file. Sometimes this is called mastering. Though in truth, audio editors have many other uses.
So after you’ve mixed all your audio tracks and files down to one final stereo sound file in your DAW, you’re ready to use your editing software. The main difference now is that you’re working on how one single file sounds, rather than how a bunch of different bits of audio sound, alone and together with the other bits of audio. That is such a big mindset difference that in the music business it is common for different people entirely to do each job. For most home recording projects though, we frequently end up doing both jobs.
You open the file in the editing program and turn it into a final product by slicing, fading, turning up, turning down, and other actions that change the audio in some way. For example, if I were doing the final edits for a song, I would make sure any extraneous noise at the beginning and end of the song are cut out, and that the song starts and ends smoothly. Sometimes there’s a count-in, or someone coughing just at the start or end. An editor can slice that right off.
Next you’ll want to pay attention to loudness. In order to get the entire song loud enough, you may need to turn parts of the song down before you can increase the average loudness of the file. You can read more about this process of compressing or limiting audio in another article on the Home Brew Audio site.
Other things you can do in the final editing stage is filter out parts of the song that may be too loud, like certain bass frequencies, or SSS sounds, etc. Then you might want to add some effects like echo or reverb.
When you’ve finished editing your song, you save it in the editing program as a single stereo file (though it could be mono or even surround these days). Now the audio is ready to use in any way you see fit.
Examples of tracking software, or DAWS are: Reaper, Pro Tools, and Cakewalk Sonar. Popular editors include Audacity, Adobe Audition and Sound Forge.
So as a review, there are two main varieties of audio software, tracking programs and editing programs. You use the first type to record all the different audio onto tracks, apply track effects and mix all the tracks together to create one single audio file. Then you open the file in your editor and snip, stretch, massage, squash and polish it until it sounds just right, and you save it as the final product. Believe it or not, that is a nutshell version of audio production in general:).
What Is Absolutely Necessary For Home Recording Studios?
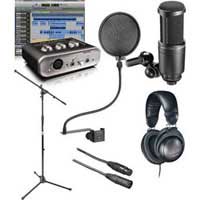 I hate to keep beating the same proverbial dead horse, but here we go again. First of all, I’d like to state that the Yahoo Answers feeds we receive are “pushed” to us based on the topic of home recording. We are not hand-picking these to make a point; there really are that many posts THAT frequently (like every day) asking how to get started doing home recording with the least money, or some variant of that theme. Today’s Q&A is no different. The person asking the question wrote three sentences and used the terms money and cheapest. One might almost be led to believe there is a theme here, mostly because there IS.
The other part of this repeating pattern is the answer part, which usually advises the newbie to spend upwards of $1,000 or more just to get started. Today’s reply, however, happily breaks that pattern. Though short on details, it is the answer we would have given, which is basically to use your computer as mixer, editor, composer, and storage. The original Q&A is below. See the end of the post for the Home Brew Audio answer.
Q: What kinds of things are absolutely necessary for home recording studios? Just the essentials, and why? I’m planning on making a home recording studio, but I don’t have much money. And, what’s the cheapest way to go? : )
A: It depends on what you want to do. If all you want to do is capture analog, then just need a mixing board with a few inputs. Check out music shops in area for used and sale specials. If want to author music and produce electronically, then you will need computer and software such as Cakewalk, Ovation, etc. Also check same places for these too.
Much more details are going to be needed on what it is that you want to do with your home recording studio. Technically, the bare minimum would be a tape recorder since it can record 2 tracks (left and right) and a way to get signals into the recorder.
You obviously already have a computer, you should consider using it as your mixer, editor, composer, and storage. Everything else can be brought in via firewire / usb dongles (converters). Your mixer channel ability will be limited only by the speed of your processor, the number of raw inputs, and the size of your drive to store the results. That might be the most cost effective way, as well as the most capable way in long and short runs. But, you will never be able to record to analog media (tape) without distortion from the converting digital signal back to analog.
Here is the Home Brew Audio answer:
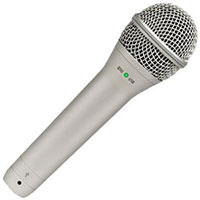
To start with, please, please, PLEASE do NOT spend much more than about$100 to start out! And do NOT buy a mixer! (see our article Why You Should Not Use A Mixer In Your Home Recording Studio for more on that). I know that may sound too good to be true. But trust me. It is. Yes, you’ll probably want to add equipment and software as you develop a need for them. But if you are just learning you can do all you need to (learn multi-track recording, basic audio editing, and production) with an average computer and any mic (even the cheap plastic computer mics will do). If you don’t have a mic, you can get a pc mic for about $5.00. Then you can get recording software that is free – called Audacity. That’s all you need for the learning part. You can do quite a lot with just this equipment with a little skill and guidance. I would stop short, however, of saying you could produce pro quality audio with just that. So how much do you have to spend to actually start producing that pro quality audio? I’d say about $49. Sounds crazy, I know. but it’s true. Just moving from a $5.00 mic to, say, this USB mic: Samson Q1U – will allow you (again with the right skills) to turn out audio quality that I would call “minimum professional level.” To learn about moving on from there, and all the accessories you’ll want, etc. – basically a sort of shopping list – check out our 5-part post series How To Build A Home Recording Studio.
Cheers!
Ken