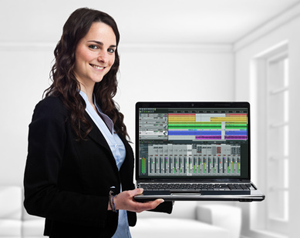
 The term voice recording software, especially in the context of recording voice overs, is actually sort of a misleading term. That’s because pretty much any software that is designed for recording on a computer is going to be just as capable of recording the human voice as any other audio. So the real question, becomes something more like “what else other than voice recording will I need to do with a particular audio recording program?”
Let’s take an example. Many folks use a free recording program called Audacity, which is pretty darned amazing for a piece of free-ware. If all you ever really want to do is record your voice to do introductions for your own programs, videos or podcasts, Audacity is likely to be the only audio software you’ll ever need. It has the ability to record at high resolution, do basic edits and produce professional sounding audio.
If, on the other hand, you also want to record music, especially involving multiple tracks or in-depth and intuitive editing, Audacity probably isn’t your best choice. Once you get beyond the basic “push-record/stop/play” functions, Audacity loses out on simplicity and capability. It becomes worth your time and money at that point to use two programs, one designed for recording and mixing, and the other designed for editing and finishing/producing.
It may seem counter-intuitive, but think of it this way. It is ultimately better for your workflow, not only physically but mentally as well, if you can compartmentalize discrete tasks, especially when the software being
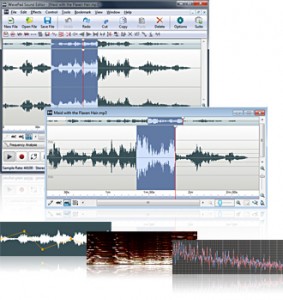
used is specifically designed for that purpose. The more focused the reason for a program, the faster and more intuitive it tends to be for users. In my case, I use a program called Reaper (by Cockos), for recording and mixing, then I use another program called Adobe Audition for editing and final production. This workflow is so natural to me that even if I need to record a quick voice over job, I open Reaper to do the recording, then I double-click on the audio item on the track to automatically open my editing program, Audition. I can then quickly reduce ambient noise, fix p-pops, even out and optimize volume, and save as any format I want.
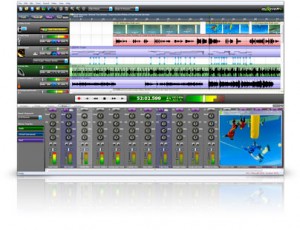
Now obviously these are not the only two programs out there you can use for this kind of work-flow. You could use Reaper + Audacity, for example. There are also some really affordable, intuitive and powerful new-comers, such as Mixcraft 8 for recording and mixing. And if you need more capability or better workflow than Audacity can provide, a really good (and much more affordable than Audition) alternative is WavePad Sound Editor.
So basically it comes down to this. Any recording program is going to be at least as good at recording voice as it is at recording anything else, so don’t worry about looking for voice recording software so much as something more generic, like audio recording software. At that point, you just have to know what capabilities you’ll need. Extremely basic voice over jobs, like for your YouTube videos or podcasts, can be handled by something like Audacity. But if you want to ad any capability beyond that, the best choice is to divide and conquer with two programs working together, one for recording and mixing, and the other for editing and final production.
Recording Software
Video: Cover Recording of My Eyes From Dr. Horrible
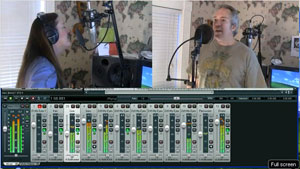 The video for this is finally done! Recently we published an article on how to take a song apart (figuratively) in order to learn how the pros record music. In order to demonstrate this concept, we used a song from Joss Whedon’s Dr. Horrible’s Sing-Along Blog. The song is called My Eyes (sometimes referred to as “On The Rise”), Music by Jed Whedon; Lyrics by Maurissa Tancharoen, Jed Whedon, and Joss Whedon. That article is here https://www.homebrewaudio.com/cover-recording-of-my-eyes-from-dr-horrible
We were asked to do a video of the result and have finally finished that, though it took several days longer than we (and by “we,” I mean me:)) anticipated. The result was worth it though. See below:
[jwplayer mediaid=”4381″]
The detailed, step-by-step tutorial version of the video has been added to “The Newbies Guide to Audio Recording Awesomeness” video course, as well as to The Newbies Guide To Audio Recording Awesomeness 2: Pro Recording With Reaper.
Cheers!
Ken
Audio Recording Equipment I Cut My Teeth On
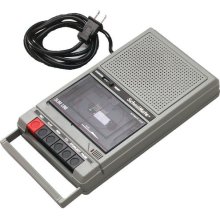 Over on the Home Recording Forum, someone started a post entitled: All You Old Farts – Born Before 1967. Now I don’t know what the significance of 1967 is, but by that definition (born in 1964), I guess I’m an old fart (even though I LOOK fabulous…shyaa). The idea was to get some idea what audio recording equipment we used way back when.
Anyway, the question was:
Come on tell us what gear were you weaned on? Inspired by the “how do you know so much post”
Here is my answer, for whatever educational value it is worth:
Wow, I’m officially an old fart? Do I get a card or something?
I started out with an old cassette recorder similar to the Hamilton Electronics HA-802 Cassette Player and Recorder. I would play a guitar part and sing along (or play another guitar part along for those cool Jim Croce songs) while recording into my brother’s boom box. I used the little built-in condenser mic for both. Then I would play those 2 parts back from the boom box onto my cassette recorder as many times as I needed instruments and harmonies. This hiss was incredible.
Eventually I graduated to doing the same thing but with better machines, like the ones in entertainment centers, and used a PA mixer in there somewhere. Finally, in 1988, I bought a Tascam Porta 5 4-track cassette recorder. That was a life-changer. One more 4-track cassette machine and a Sony DAT machine later, I got my first digital machine, the Roland VS-840. The next year I bought the VS-880 off e-bay for the amazing deal of $1200. That was my primary throughout the early 2000s, when I added outboard gear, monitor speakers (starting with Alesis Monitor Ones…now using the Event TR-8s), separate mic preamp (the Peavy VMP 2 Tube mic preamp, which I still use), compressor, EQ, etc. Then I made the jump to doing everything in the computer right around 2003, using Adobe Audition. Eventually I added Reaper as my DAW and continue to use AA as my editor.
That’s about it in a nutshell from this old fart.
Cheers!
Ken
Running a Virtual Recording Studio
 There isn’t that much difference in 2013 between a traditional recording studio, as in recording onto tape, and a virtual recording studio, where you record directly to a computer. Audio immediately enters into what we might call the virtual realm immediately upon recording. Instead of being held on tape format, audio can literally be beamed through the air and transferred from one box to another. It can also be duplicated and replicated any number of times without losing any fidelity.
The best news of all is that the virtual recording studio is the one that is simultaneously more advanced AND more affordable. In fact, odds are incredibly high that you already own a virtual recording studio. If you have a computer with a sound card and any kind of microphone, then your virtual recording studio is probably sitting in a room in your house, or on your laptop.
Just a few years ago, that kind of home recording studio would not have been quite enough to yield professional quality audio. But today, with the availability of unbelievably affordable (some ever free!) recording software (Audacity, Reaper, Adobe Audition, or n-Track Studio just to name a few) and USB microphones (such as the Samson Q1U, Samson G-Track or Blue Yeti), professional sound audio is achievable for just about anyone with a computer, or even a smart phone now!
At the risk of over-simplifying it, the process goes something like this:
- Open your recording software that might have cost you anywhere between $0 and $50 to start out with.
- Speak, sing, or play an instrument in front of a microphone that is hooked up to your computer via a USB cable (or to your iPhone, iPad, or iPod touch if you have the IK Multimedia iRig Mic!).
- Save your finished song, voice-over, or whatever audio you were recording.
- Done.
Speed, quality and ease are the benefits of the virtual recording studio. And if you are collaborating with others on a project involving audio, there is no better way to do it than virtually. Say you need someone with that movie-announce voice to do the intro and “outtro” of your podcast or radio show. Just send that person (if you don’t know them already, you can hire them from places like Voices.com…all in cyberspace) the script via e-mail. They record your script and send it back to you via e-mail. Now all you have to do is insert the movie-announcer voice into your recording software, put some royalty-free background music behind it (or even music you composed and recorded), and voila, you have a professional podcast or radio show introduction and closer, all done in the virtual world; no tapes or CDs to mail back and forth, etc.
Of course you can do the same thing with music. Is your singer in Washington, your other singer in London, and your bass player in Los Angeles? No problem. Send them all an audio file of the demo song over the internet, have them record their parts and e-mail them back to you, then mix it all together into a final song. Your band may never have even seen each other during recording! How amazing is that?
If you’d like to investigate the virtually (no pun intended) limitless audio possibilities of a virtual recording studio, come visit Home Brew Audio on the web. Who knows? A new career may be in the offing with the virtual recording studio you may not even know you already had.
What Do I Need To Record Music At Home?
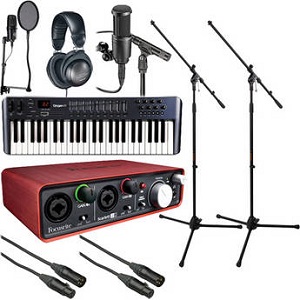
A version of this question is asked every day. Today on Yahoo! Answers, somebody asked a pretty common question, which was:
Q: I’d like to set up a home studio so I can record guitar parts and maybe vocal parts, and I want them to have really good sound quality. What would I need to do this?
Here is how we answered the question:
A: Hi Chris, Definitely go download Reaper (by Cockos). It’s free for the 60-day trial period (yup – I said “60 days”) and then only $60 if you want to buy a license. That is until you start making 10-20-grand a year with it, at which point they prefer you buy the $220 “commercial license.” But it’s all the same exact software. These guys are awesome. Oh, and their forum is super active. Questions are usually answered within 24 hours by several people.
Anyway, that’s your software. As for the mic, don’t start out with a big expensive mic. I say try out a USB mic (like the Samson Q1U) for about $49. That way you won’t need a separate interface box to plug a normal mic into. If you’re not happy with that, then I recommend a small-diaphragm condenser mic (I use a Shure SM-81) along with an audio interface like the Avid Fast Track. My personal interface is a Focusrite Scarlett 2i2, and has been for the last few years. I love it.
It might help to take a look at our 5-part post series called “How to Build A Home Recording Studio” here.
Hope that helps!
[update 2017] Since writing that, I have some more resources that I would have included for this answer. Those include two home recording started kits/bundles that B&H Photo-Video-Audio put together according to our specs. You can read the details about those two bundles here:
Basic Home Recording Starter Bundle
The Home Recording Musicians Starter Bundle
Ken
Home Brew Audio