 IK Multimedia have recently created such cutting-edge audio products as the iRig MIC (see our review here), the iRig PRE, iRig MIDI (our review is here), AmpliTube iRig (our review here), iRig MIX (DJ mixer for iOS), and the iKlip, which clips iPads and iPhones onto mic stands (our review here).
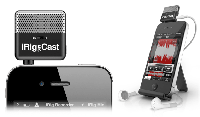
This week they announced a new product, the iRig MIC Cast, which is an “ultra-compact” (their word) microphone for the iPhone, iPad and iPod Touch. The MIC Cast is a stereo microphone that plugs into the mini-jack of an iOS device. It’s stated purpose is to record interviews, lectures, voice notes, speeches, video calls, podcasting, etc. It is also very handy for using FaceTime on the iPhone or for Skype meetings so you can set the device down in front of you (using the included table top stand) and see the screen while you talk.
So it is more like a very quick way to turn your iPhone into a mini recorder whose main goal is to capture the information and not really for broadcast as a pro audio product later. But still, that is something that a lot of people need. If you already carry an iPhone with you anyway, and you need to record a conversation, it’s a lot easier to reach into your pocket and plug the ultra-compact MIC Cast into your phone than it is to carry around a little mini voice recorder.
As I mentioned earlier, it comes with a table-top stand. To record the audio, just download one of the free IK Multimedia apps such as VocaLive and iRig Recorder.
The iRig MIC Cast costs $39.99/€29.99 and is available from electronic and music retailers around the world.
For more information on iRig MIC Cas visitt: www.irigmiccast.com
Pricing and availability:
iRig MIC Cast costs $39.99/€29.99 (excluding taxes) and is available from electronic and music retailers around the world.
For more information on iRig MIC Cast:
www.irigmiccast.com
Home Recording Equipment
How To Build A Home Recording Studio: Part 5 – Accessories
 This is part 5 in our How to Build a Home Recording Studio series that shows you how to set up a computer-based studio capable of recording pro-quality audio. In part 4, we talked about audio recording and editing software.
Today, let’s talk about the accessories – things like mic stands, headphones, pop filters, etc. These are the supporting actors in most cases – the things that make it easy for us to use the microphones, interfaces and software that make up the leading roles in our studio.
An argument could be made for monitor speakers being more of a lead actor, especially for music recording and mixing. But since we are starting out with more of an all-around basic studio that many of us will use only for voice-over type work, the speakers get second billing.
Mic Stands
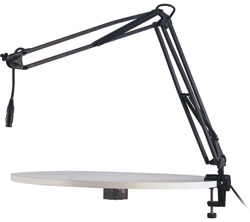
Since I’m recommending a large diaphragm condenser type mic, you’ll need a mic stand of some sort. For non-talking-head voice-over stuff, I highly recommend a scissor stand such as the AKG Table Mounted Scissor Stand. You can clip it to a table or desk, and rotate, push or pull the mic away as you need it. I use one of these and find it incredibly handy, especially for voice-over work. The mic is always right there when I need it and I can just push it up and out of the way when I’m not using it. These run between $70 and $170 and come with the mic cable built in, which is also really convenient.
If you use the hand-held type of mic, a standard desk top stand, such as the Atlas Sound Stand, will only run from $15-$30 bucks or so.
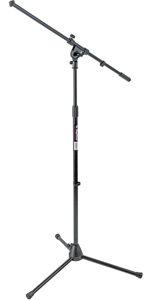
For music or voice-over use, another great and versatile choice is a boom stand like the On-Stage MS7701B Euro-Boom. You can move these around and put them anywhere, and the boom functionality allows you to place the mic at any angle or height you want.
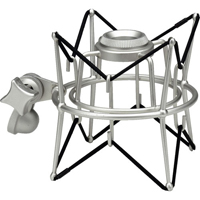
Shock Mounts
Large diaphragm condenser (LDC) mics are very sensitive to any bumps or vibrations coming through a mic stand. That is why it is almost mandatory to use a shock mount, which holds the mic suspended in a spider-web-looking thing made up of elastic bands. Most LDCs have specific shock mounts designed for them by the mic manufacturer, and some even come with one, like the Audio-Technica AT2020 and AT2035 microphones. But you can also get a universal shock mount such as the MXL-USM001 Universal Basket-Style Shock Mount that will work with any LDC you have.
Cables
If you’re using a non-USB mic and not using a desk boom stand (which come with the cable built in), you’ll need a mic cable, which usually cost about $25. These cables have the 3-pin XLR connectors. Of course if you are using a USB mic, you’ll use a USB cable. Be sure to use the one that came with the mic if you can, as these are designed for audio. Not all USB cables are up to that task.
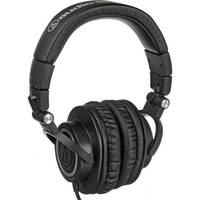
Headphones
You can get away with using mp3-player-type ear buds if you need to, or if you’re going to stick to the headsets, that’s fine too. But having headphones allows you to hear the audio much more clearly and are very useful if you do any Skype chats or other types of on-line meetings where you need listen as well as speak into your mic. Otherwise the speakers will also be picked up by the mic and cause feedback and other unpleasantness.
Of course, if you’re doing any multi-track recording (usually with music studios), headphones are necessary. I use both the Sennheiser HD 280 and the Audio-Technica ATH-M50 and recommend either or both.
Speakers – Again, if you already have speakers hooked up to your computer (most people do), you can get away with using those for now. When you can afford it though, a good upgrade would be to invest in a pair of monitor speakers such as the KRK Rokit G3 Active Monitors. The 6″ version will run about $200 per speaker.
Pop Filter
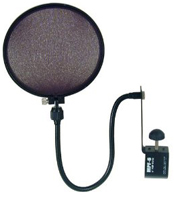
If you are recording your voice, you NEED a pop filter/screen to reduce the p-pops that are inevitable in human speech. Large diaphragm condenser mics are extremely sensitive to the little blasts of air that hit them when we say the letter “P” (or other plosive sounds). The result in the recorded audio is little low-frequency splat type of sound. A pop filter set up between your lips and the mic will reduce or even eliminate p-pops. One good example is the Auray Pop Filter. They cost about $23.
Mixer
You don’t need one. Yeah, I know. The popular image of recording studios of show big mixing boards with lots of impressive knobs and sliders. But for a computer based home recording studio, you do all your mixing in the computer. Trying to route things through a mixer can really confuse things. Notice that neither of our home studio configurations include a mixer. The quality of mic preamps on a typical mixer are usually not good for recording.
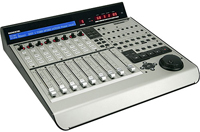
One exception to what I’m saying about mixers in home studios is the MIDI control surface unit. These units are designed to give you physical control over your software mixer. Folks doing mainly voice-over work would probably not need one. Musicians who prefer using their hands to move sliders and knobs rather than a mouse are typically the ones who like to use control surfaces. One example is the Mackie Control Universal Pro – Expandable Control Surface
That’s pretty much it for basic accessories! Let’s review the basic home recording studio set-up options configurations.
– Configuration 1 (a mic plugged directly into a computer) – For pro quality audio you’ll need a USB mic on a stand with a pop filter plugged into a normal computer running, say, Reaper software. Total cost would be about $159.
– Configuration 2 (XLR mic plugged into an interface plugged into a computer) – The basic pro-capable option would be a Large Diaphragm Condenser mic (non USB) on stand (I think full-sized boom stands are much more versatile than a simple desk stand) with a pop filter, plugged into an interface which is plugged into a normal computer running Reaper software. The total cost for that would be about $340 – IF you buy them separately. However…
Home Studio Bundle Deals
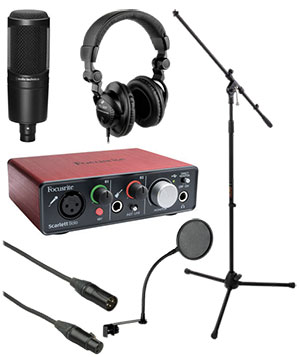
We were able to get a bundle deal with B&H Photo-Video-Audio called The Home Recording Starter Kit, which gives you everything you need in one product for a much lower price – $229.95. It would cost $288.91 if you bought each item separately. Click here if you’d like to see the details of that package and/or purchase it.
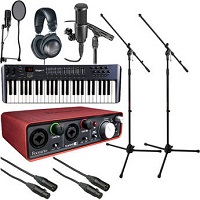
For musicians, we tweaked the bundle to include a MIDI keyboard, a 2-mic-input interface, and added a small diaphragm condenser mic so you could record an acoustic guitar or other instrument as well as your voice. That bundle, the Home Recording Musicians Starter Kit is $429.99 (would cost $529.79 if you bought each item individually, so you save about a hundred bucks there). Click here if you’d like to see the details of that package and/or purchase it.
Now What?
So now that you know how to put your studio together, you’ll want to know how to actually do the recording, right? That’s what Home Brew Audio is all about!
We’ve got tutorials, articles, tips and resources to help you on your recording journey. Also, we have a video tutorial series called The Newbies Guide To Audio Recording Awesomeness. The first course that takes you step-by-step, even if you’ve never done any recording before, through creating your first recordings and teaching you the basics of audio recording even if you have no budget for gear. It uses the free Audacity software and a pc mic you probably already have (or you could buy for around $5). The second course, The Newbies Guide To Audio Recording Awesomeness 2: Pro Recording With Reaper, shows you how to the same basics from part 1 when using Reaper software, plus introduce you to even more powerful and awesome recording tricks and techniques.
Below is a video explaining parts 3-5 of How to Build A Home Recording Studio:
You can watch this video on You Tube here: How To build A Home Recording Studio – Part 2
Now that you know how to put together an affordable but professional home recording studio, AND you have a place to learn how to use it, you can start recording awesome voice-overs, songs, video narrations, audio books, etc. Have fun
How To Build A Home Recording Studio: Part 4 – Software
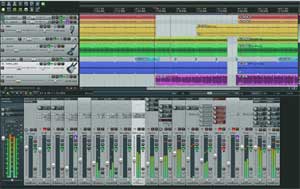 This is part 4 in our How to Build a Home Recording Studio series that shows you how to set up a computer-based studio capable of recording pro-quality audio. In part 3, we talked about microphones and sound cards and other type of interfaces. Today, let’s talk about audio software.
The Software
I left this part until the end because if you get everything else right, the software is probably the least important part of the equation. There are tons of programs to choose from, so it can be tough to figure out what you should get and how much you should pay. My suggestions will be based on my experience and will enable you to sound professional even with a limited budget.
Audacity
 For most voice-over stuff, you can probably do most (if not all) you need to do with the free program called Audacity, which you can download from the web and start using right now. For a free product, Audacity is pretty amazing, capable of just about any basic audio recording and editing function, including multi-track recording.
But it is a bit hard to use, not very intuitive, and some of the editing tools aren’t great, especially the noise-reduction tool, which as we have mentioned, is important for voice-over recording. By the way, our “recording 101” course called The Newbies Guide to Audio Recording Awesomeness – Part 1” uses Audacity to teach you the basics of recording. Part 2 of the course (due out this summer) will use Reaper.
Reaper
 I always recommend Reaper, by Cockos, which is incredibly powerful. I use it for everything, even my music studio. Make no mistake, this is professional software that rivals programs 10 times more expensive. From basic voice-over recording to full-blown multi-track music recording, including MIDI, virtual instruments, etc., Reaper can do it all. I’ve recorded 5 CDs (for Raven Boy Music) using it, and have several more in-work.
I mention this next bit only because I made such a big deal about noise reduction in this series. Even though it isn’t labeled as such, there is a tool in Reaper that is one of the best noise reduction tools available, called ReaFIR (FIR=finite impulse response). It actually works better for reducing noise than many programs designed for the purpose! And ReaFIR is just one of dozens of effects that come bundled with Reaper. That’s just a bonus tip;). I put up a post with a video on ReaFIR here.
Cockos also has a “Fair Pricing” scheme for Reaper that is unheard of in any kind of business. Unless or until you start making on the order of 20 grand per year with the audio you produce using Reaper, you don’t have to buy the commercial license, which costs $225. You can use the “discounted” license, which is only $60. And the software is the same!
Also, the 30 day trial is a completely un-crippled, full version of the software – the exact same as the commercial license version – and will never stop working. Though after 30 days you’ll start getting pop-ups reminding you that the product is not free. They understand that it sometimes takes more than 30 days to evaluate audio software, especially if you’re just getting into recording. All of this is on the honor system. Who does that? Well, I can’t think of any other business off-hand. I recommend Reaper all the way.
Adobe Audition
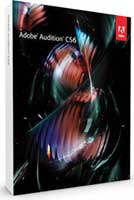
I use Adobe Audition along side Reaper to edit individual files and final project renders (aka mix-downs). Audition started out as just an audio editor called Cool Edit back in the 90s. It didn’t do multi-track recording, but rather focused on making changes to a single audio file.
You could analyze, filter, and apply treatments by the dozens – multiple kinds of EQ, compression, reverb, echo, noise reduction, clicks-and-pops reduction (really helps with recordings transferred from old LPs), and tons of other things. These edits were “destructive,” which doesn’t mean “bad.” It simply means that once you apply them, they affect the underlying file.
Cool Edit Pro added the ability to do multi-track recording, was bought by Adobe and had its name changed to Audition. Now you can pretty much do it all with Audition – destructive AND non-destructive editing, MIDI, virtual instruments, the works. It, like Reaper, is decidedly professional software. Though it used to be a stand-alone program (and you can still sometimes get DVDs on Amazon for older versions), it’s now part of the Adobe Creative Cloud.
Some words about the editing thing
I use Adobe Audition strictly as an editor – I usually don’t record audio with it. Though you can do most things, including editing (non-destructive), with Reaper, I prefer to finish every project with a full-fledged editing program like Audition or Sound Forge (Audacity can be used as an external editor with Reaper as well).
These programs have more specialized tools for really getting down into the bits (literally) of an audio file, as well as music mastering and CD authoring, and some things simply cannot be done in Reaper such as redrawing a waveform with a pencil tool to get rid of a glitch in the audio.
But it isn’t only that. There is a different mindset to working on the final audio from a project. It’s like taking off the recording and mixing hat and putting on the final editing and mastering hat. To me it is a workflow thing.
For example, let’s say you had several tracks of audio in a Reaper project. in voice-over work you might have the voice on one track and music and/or sound effects on other tracks. You can’t send it to a client until you render (mix down) the project into one audio file (mp3 , wav etc.).
That final audio file is what I then open in Audition. It’s where I put on the headphones and really listen to the details, doing things like clipping out odd mouth sounds like breathing or what I call “saliva clicking” (don’t dwell too much on that last one:)), editing and eliminating offending p-pops, fading in and out on specific phrases, evening out overall volume with compression, and controlling maximum volume with normalization.
Finally I can save the audio as any number of different formats quickly and easily. It’s polishing and finalizing the audio before it goes to a client or onto a CD or some other sale-able form. Some of these things can be done in Reaper, but I find them faster and easier in Audition. In the end though, whether you use an external editor comes down to need and personal preference.
The software mentioned in this article, though there are dozens of others out there, should be enough to do anything you need to do from recording, mixing, editing and final mastering. Join us for the final installment of this series on building your home recording studio when we’ll talk about the accessories such as mic stands, pop filters, shock mounts, speakers and headphones.
Cheers!
Ken
How to Build a Home Recording Studio: Part 2 – Four Tips For Preventing Noise
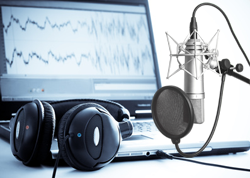 This is part 2 in a series called How to Build a Home Recording Studio, where you learn how to set up a computer-based studio capable of recording pro-quality audio.
In part 1, I left off in the section talking about ways of preventing noise in our recordings. The best way to do this is to record in an acoustically ideal space. One that not only is dead quiet, but does not affect the audio in a negative way either.
What are my options?
Since those spaces are really hard to come by, the next best option would be something like a purpose-made vocal isolation booth. You need the kind treated with acoustic materials to prevent and/or absorb echos, allowing you to record only the signal. Let’s take a look at some of these.
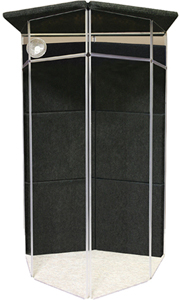
You can buy a full-blown vocal booth, such as the Clearsonic IsoPac, which will run you about $1,100. You can also build your own, or convert a closet for the purpose.
I do NOT recommend trying to convert a closet in your room into a vocal booth. Yes, it will be quiet and block out external sounds. But simply blocking out the lawn mowers, trucks, and barking dogs is not enough. The room sound in even a tiny room can sound bad, especially in the case of a square or rectangular closet. Either stuff it full of very absorptive materials so no sound can reflect of the walls, or make sure there are no parallel surfaces – preferably both.
For most of us, it is often impractical or too expensive to have either a very quiet recording space, or a good sounding isolation booth. Most of us do our recording in a spare bedroom, and bedrooms are notoriously effective at producing “bad” echos that when added to the signal, make the audio worse.
Why do bedrooms sound so bad?
Sound bounces off of hard surfaces all over your room, combining with each other to amplify and/or reduce certain parts of the sound. Then all these different mutant versions of your voice arrive at the microphone along with the direct signal. The results are echo-y at best, and likely will also sound unnatural and funky (sounding muffled, tinny, or like it came over a telephone – or even all of these).
If you’ve watched a lot of internet videos where someone is narrating, you have almost certainly heard the echo-y room sound thing. In fact it is way too common that a very slick and professional looking video has poor audio laid over the top. Usually it sounds like the person is speaking in a bathroom or something.
In the case of talking-head videos (a person talking to the camera – not the 80s rock group:)), this is almost always caused by the fact that the narrator is relying on the built-in camera mic, which is several feet away. The further your sound source is from the mic, the more room sound will be recorded.
Alternatives to sound booths
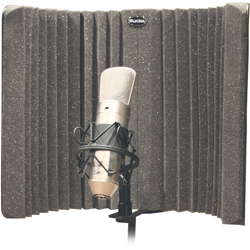
One alternative to a full isolation vocal booth is a small and portable boundary or isolation “shield” that can be placed behind a microphone, such as the sE Electronics Reflexion Filter, or the Aurlex MudGuard Isloation Shield.
These have several different types of acoustic treatment materials to prevent your voice from bouncing off the walls, and helping to block any reflections from getting back into the microphone. These are usually semicircular and protect the areas behind and to the sides of a mic. But something like that won’t work for a talking-head video.
So the first thing we have to do is deal with room noise before any sound reaches the mic.
If you can afford acoustic absorbing foam on your walls, it will be so much easier to reduce room noise. A good place to start is with Auralex products. But if you do not have any acoustic foam on the walls, the following tips will help immensely.
If you don’t have any acoustic foam on the walls…
Tip #1: Use a mic with a cardioid pickup pattern.
Fortunately, most mics default to that pattern. Cardioid mics record only what is in front of them. They reject any sound coming from behind it and most of the sound coming from the side. These can help reduce room noise a lot.
Tip #2: Get your mouth close to the mic – like just a couple of inches.
This will help the mic get mostly your voice (the signal) and less of the reflected sound. This is probably the most important thing you can do if your recording space is less than ideal. This is doubly true if you are shooting “talking head” video. See our article, 3 Must-Know Tips For Getting Quality Audio From Your PC Recording Studio for more on this.
Tip #3: Make sure you record as loud as possible without distorting/clipping.
A LOT of people make this mistake. They record their voice at a low level, and then they raise the level after the fact. The problem is that they are also raising the noise when the do this. So make sure to capture as high a level as possible of your voice in the first place. You can use the gain level on your interface (if you have one) or use the software mixer panel controls to do this.
Tip #4: Noise Reduction.
The next step in producing clean audio is to reduce the noise that will inevitably be in our recording when our rooms are less than perfect. The way to do that is to use tools in recording software called noise reduction.
What NR does is sample a section of the audio that is ONLY noise (when there is no voice talking), so it knows what to turn down. Then the program separates the noise from the signal and gets rid of it, ideally leaving the signal/voice unaffected. That last bit is really hard to do. There is often some “artifact” left behind after NR is performed. It usually sounds like swirling water. So you have to play with the settings to find the right balance of noise reduction without making the signal sound too weird. And the more noise there is to start with, the worse that swirly artifact is.
If you do all four of those things, you can get the best possible audio out of the cheapest possible gear. It’s what I did in the $5.00 vs $500 thing.
That is the first answer to the question of how we move toward pro audio from the $5.00 setup – having a basic understanding of how to limit noise.
In the next installment of this series, we’ll talk about digital audio what kinds of microphones can be used to give us even better sounding audio.
Review of The Blue Snowball USB Microphone
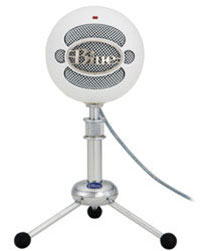
The Snowball, by Blue Microphones, is a large diaphragm USB condenser microphone that is, at the very least, unique in shape and appearance. I can say that I’ve never used a spherical microphone before, so I looked even more forward to testing it out than usual.
The first thing I noticed was that the actual mic was larger than I thought it would be, having only seen pictures of it. It is about as large as a softball, about 4 inches in diameter. It has a standard microphone stand coupling (hole) so you can use any stand you have. But it comes with a shiny chrome tripod desk stand as seen in the picture on the left, with rubber feet, which helps prevent noise from the desk traveling through the stand and into the mic. This makes it very handy for voice-over applications and as well as computer communication for use with as Skype, and other on-line conferencing applications.
The Specs
The Snowball is a 44.1KHz/16-bit mic. In digital audio sound must be converted to ones and zeros (digital). USB mics have converters built right into them, which is what makes them so handy. Standard mics must be plugged into a separate interface with converters inside. Motherboard sound cards also have converters, but they are of low quality and not recommended for recording. Anyway, moving on with the specs.
There is a switch on the back of the mic with 3 positions. The manual reveals these 3 positions to be:
- First Position – activates cardioid capsule
- Second Position – activates the cardioid capsule with a -10dB PAD
- Third Position – activates the omni capsule
So this microphone has two pickup patterns, cardioid and omni-directional. That’s pretty darned cool. Cardioid means it picks up sound best that is in front of the mic, rejecting what’s behind and to the sides of it. This helps keep noise down. Most mics default to that pickup pattern. Omni-directional is just what it sounds like. It picks up sound equally from all directions – behind, below, above, etc. – a 360-degree sphere. This setting is useful for small singing groups (can gather around the mic), conferences, interviews, and environmental recordings (using a laptop I guess). A word of warning about the omni setting though – if your recording space is not ideal, the omni pattern will pick up a lot more noise and room echo/reverb than the cardioid pattern.
Set up was a breeze. I was wondering how to adjust the angle and tried shifting it around. To my delight it reacted exactly as I had hoped, swiveling on a ball-and-socket joint built into the mic. Very nice.
I tried it on a Windows 7 (32-bit) machine, attaching and plugging in the included USB cable. Windows automatically installed the driver when I plugged int the cable, in about 15 seconds, and it showed up as an audio device called Blue Snowball in Devices and Printers.
Next I opened Reaper, my standard recording software program, to actually test out how it sounded. First I wanted to see if it showed up as an available mic, so I went to Preferences (Ctrl-P), changed the Audio system to “DirectSound” (it had been set to ASIO for my Focusrite Scarlett 2i2 Interface), and voila! Under Input Device was “Microphone (Blue Snowball).” Excellent and so very easy.
How Does It Sound?
The first thing I wanted to check for was the low-level hiss I have noticed in all the USB mic I’ve used to date. The result? Holy cow! I couldn’t believe how quiet the Snowball was, especially compared to the Samson C01U USB mic, which is a comparable product, even costing the same. The Snowball is $69.99 and I picked up the C01U at Best Buy for $70.
So the first thing I did was record a of seconds of silence with both mics. Then I recorded my voice into both mics, reading the same short passage.* The result was still pretty amazing. The hiss is quite loud in the Samson, where there is no hiss at all in the Snowball. In fact, you can actually hear the clock on my wall ticking in the Snowball sample. Take a listen to both samples below.
Samson C01U – silence only
Snowball – silence only
How did the voice recordings sound? Well this is where it gets interesting. Though they both sounded good, the Samson C01U sounded a bit better to me, more balanced and full. I also noticed that the Snowball picked up more of the room sound (a bit echo-y). However, the Snowball was much better at not over-emphasizing plosives (p-pops), which is a big plus in my book. Normally, even using a pop-filter in front of a mic, I still have to edit out the p-pops in my vocal recordings. Not only did I not need a pop-filter for the Snowball, but there was no need to edit them out as usual.**
Upon double-checking I discovered that the Samson’s pickup pattern is actually “hyper-cardioid,” (compared just “cardioid” for the Snowball), which means that it will pick up less room sound from the back and sides of the mic, but also make it more sensitive to plosives. This explains why the Snowball sample had more room sound in it, but fewer problems with the popping “Ps”. Listen to the 2 samples below.
Samson C01U – voice recording
Snowball – voice recording
They’re both very good, just different. And at least some of that difference is explained by the different pickup patterns. Looking at several reviews on the web comparing these same two mics, I found that some folks preferred the Snowball and others liked the Samson better. I think this is a case of personal preference.
Summary
Overall I give the Snowball high marks. It gets maximum style points – it just looks cool. It also generated less self-noise than any other USB mic I’ve used. And on the most important scale – sound quality – the Snowball is very good, especially for the price. To find out more, or purchase one of your own, click here: Blue Snowball USB Microphone.
* I “normalized” the levels of both mics to make sure the differences in noise volume were not affected by sensitivity and gain differences.
** I did not use a pop-filter with either mic in either test recording, nor did I edit them out. This allows you to hear how prevalent they are in the Samson but not in the Snowball.