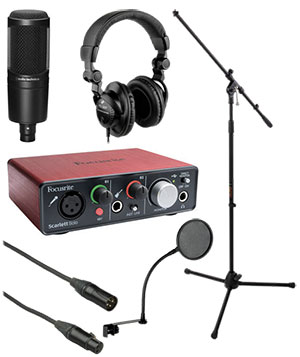
One of our core beliefs at Home Brew Audio is that you should never spend money on gear that you don’t need. It sounds logical, but the truth is that most folks who decide to start a home recording studio go out to their local gear dealer and wholeheartedly listen to the salespeople who suggest buying thousands of dollars of gear right off the bat. This leads to a bunch of problems, such as perpetuating the myth that it is expensive to get into home recording; saddling customers gear with software and equipment they not only don’t need, but often don’t know how to use; and ultimately leading to unsatisfactory recordings, even after dropping thousands of dollars.
So we say “let your need drive your gear purchases.” We help folks understand what gear they need to get started – see our series “How To Build A Home Recording Studio.” After that, you can incrementally add to your studio, spending small chunks at a time, AS YOU NEED TO. Heck, some folks – those doing primarily voice-over or video narration recording, for instance – won’t ever need to go beyond the basic setup.
Our aim in 2015 is to show people how inexpensive and easy it is to record and produce professional audio at home. So I was really pleased to find a post on the Disc Makers blog (by Graham Cochrane at The Recording Revolution) giving this same advice. Check out “Equipment You Need For A Home Studio Setup.”
And good luck with all your recording in 2015!
Ken
Home Recording Equipment
Wireless Microphone For iPhone: How to Use Any Wireless Mic With Your Phone (Video)
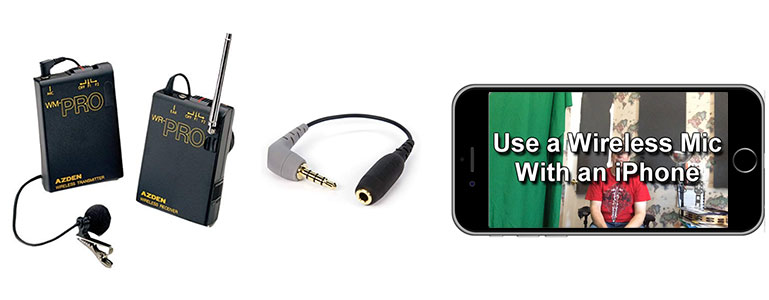 Looking for a wireless microphone for iPhone? Here is how to make any wireless mic work with an iPhone.
Recently, a friend asked me how he could use an external microphone on his iPhone to shoot video.
Why Would I Want To Use a Wireless Microphone With An iPhone?
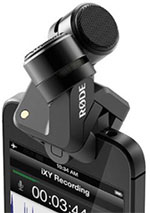
The basic reason for using an external/3rd-party mic is pretty easy, since any number of companies now have good mics available specifically for iPhone/iPad use (like the Zoom iQ6, the Rode iXY, and the Blue Mikey Digital, to name a few).
All those companies, however, assume you will be close to the mic, using it as a mobile field recorder or in the studio to record music.
Why Does The Mic Need To Be Close?
Shooting video when your subject is many feet away from the mic usually yields pretty poor audio. See my article, along with a video, which shows you how to solve this problem, here: How To Get Good Audio On Your Videos.
My friend wanted to do just that: use his iPhone to record video of himself from several feet away. And to make things just a little bit more difficult, he wanted to be able to move around. So he needed a wireless microphone for his iPhone.
How Do You Make That Happen?
Now, if he were using a regular video camera / camcorder, I would refer him to the advice in the above article.
If it has an external mic jack, I would say to use that camcorder with a wireless lapel mic Azden WMS Pro).
If that camcorder does NOT have an external mic jack, I would say to simply record onto either a good handheld digital field recorder (like the Zoom H6) or directly into a computer through a decent audio interface (like a Focusrite Scarlett).
In all those scenarios, you’d want the microphone as close to your mouth as possible.
The Challenge For My Friend’s Video Needs
But he wasn’t using a camcorder, he was using an iPhone. At first, I thought it might be possible to plug the 1/8th-inch pin on my Azden wireless receiver directly into the iPhone’s dual headphone/mic jack – it certainly fits in there. But nope, that doesn’t work as a wireless microphone for iPhone, primarily because Apple built their jack to accept very specific types of plugs which carry just the right kind of signal.
So though it might fit in the hole, an external mic will not work like that with iPhones – it needs a little help.
The Solution For Using a Wireless Microphone for iPhone
That help comes in the form of a humble-looking little cable about 12 inches long. Technically it is a 4-pole male connector (they have 3 strips on the pin) on one end and a female adapter on the other. There are a few out there. The one I tested in the video below is the KVConnection KM iPhone Microphone Adapter. But that doesn’t appear to be available any longer. So here is one by Rode: Rode SC4 3 inches Microphone Cable.
This little puppy (which costs $14.28) converts a normal microphone plug into the type that an iPhone wants in order to recognize the mic – a 4-pole “TRRS” (tip-ring-ring-sleeve).
You simply insert your mic’s plug into the female end of the Rode adapter, and THEN plug the Rode’s 1/8th-inch pin into the iPhone jack, and “hey presto,” “Bob’s your uncle,” etc.
You can stand across the room with the Azden lapel mic stuck to your shirt and walk around to your heart’s content. The lapel mic will beam its wireless audio signal to the Azden receiver, which is plugged into the KM adapter.
Is There A Video Demonstrating This?
Why yes there is:). I didn’t have a special “wireless mic for iphone.” But I did have an Azden WMS wireless lavalier. In the video below, I compare the audio with video shot with my iPhone 5S, first using just the built-in mic, then with the audio that came through the wireless mic attached as described above.
If you have headphones, I recommend using them to get the full effect of how different the two audio samples sound.
[jwplayer mediaid=”18146″]
By the way, there are other products that allow you to plug external microphones into iDevices. One that is a fantastic all-in-one solution is the Samson Go Mic Mobile Smartphone Wireless Microphone.
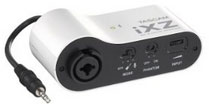
Another one that looks really useful is the Tascam iXZ Instrument/Mic, which you can plug XLR and 1/4-inch microphones – basically, most standard mic cables – into.
I’m glad my friend asked that question. Now I know how to plug a wireless mic into an iPhone, and so do you!
New Portable Audio Recorder For DSLR Video Shoots
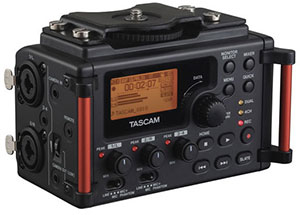
The Tascam DR-60DmkII 4-Channel Portable Recorder has just been released and is perfect for recording high-end audio while shooting video. The product description says that it caters to the needs of DSLR (“digital single-lens reflex,” or just “digital SLR”) cameras. But it will work great for any video recorder, of course.
So what makes the DR-60DmkII so awesome? Lots of things. But that’s not very helpful is it? OK, let’s start with the important thing. It allows you to record very high-quality audio so your videos can sound professional, which is something that is lacking in so many videos these days. Just about every day I see a video that looks great, but sounds awful. You can solve that problem with this recorder.
The DR-60DmkII captures audio up to 24-bit/96 kHz WAV/BWF (broadcast wave format) files. It also has 4 audio input jacks – 2 combination XLR/TRS for standard microphones, and 2 1/8″ (3.5 mm) input plugs. You can record 4 audio sources simultaneously (which is better than typical home recording audio interfaces, I might add). It also has built-in phantom power (for your highest quality microphones), A-D converters and mic preamps.
A few other things worth knowing about:
- Attaches to a tripod and has a tripod screw on top of it so you can attach your camera on top of the recorder.
- Slate tone generator for easy track marking when shooting, and easy recognition
- Multiple stereo outputs allow you to monitor the audio in headphones as well as send reference audio to your camera (assuming it has a microphone jack)
- Built-in Mixer allowing you to control over panning and levels for each of the 4 tracks.
- Records onto SD/SDHC up to 32GB
I had not looked at the price of this recorder while writing about it. In the back of my mind, I was expecting it would be somewhere between $500 and $1,000. I’ve seldom been so happy to be wrong:). This awesome piece of kit costs only $199.99!
There are a lot more features on this incredible new device, which you can read about in the more detailed description. CLICK HERE to go check those other details out or to order one of you own.
In-Ear Monitors Ariana Grande Wore On Saturday Night Live
 Ariana Grande wore some very stylish silver in-ear monitors when she performed on Saturday Night Live last night – Sep 27th, 2014. They are called Ultimate Ears UE 18 Pro in-ear monitors.
Hers were “blinged out” with a silver jewel coating and immediately caught my eye when she started her performance. One thing that is a bit out-of-the-ordinary about them is that they have very visible wires running from the ear phones behind her ears and down behind her shoulders, contrasting nicely with her black hair and almost acting as a fashion accessories in themselves. Plus, the shiny sliver jewel coating is not in the “standard” model either:). Typically, musicians want these monitors to be as low-profile as possible.
But even though there is a visible cable, most in-ear monitors (IEMs) are wireless. Those cables connect to a body pack that receives the audio wirelessly from the monitor/PA system. Of course that makes sense. It would be pretty hard to be on stage with 20 feet of tiny wires criss-crossing the floor!
So what are IEMs anyway?
Musicians wear in-ear monitors to hear themselves – and the rest of the band – better while on stage. The usual method for monitoring is to have monitor speakers – typically “floor wedges” – on the front of the stage facing back toward you. If you don’t have these, then it is VERY difficult to hear what you’re singing/playing. And singers will often sing off-key or hit several bad notes when this is the case. Over the many years that I’ve watched SNL, I’ve noticed that some VERY good singers hit a lot of painfully bad notes while singing on the SNL stage. And I’ve suspected that the stage monitoring situation there must be pretty bad for this to be true. So if I were going to sing on SNL, I would absolutely want to use in-ear monitors to give myself the best chance of hitting all my notes.
By the way, I should mention the difference between in-ear monitors and just earphones/headphones that you wear to listen to your portable music device. As I mentioned earlier, IEMs are part of a wireless system made specifically for singers and other stage performers to be able to hear themselves through the PA system so they know how the audience is hearing them. When you’re behind the PA speakers which are facing the audience, as performers have to be (otherwise you get terrible feedback when the speaker sound gets into the microphones), it’s really hard to hear what’s going on. All you get is whatever echo that bounces back off the walls from the rest of the venue. That is why IEM earphones are usually so much more expensive than your typical ear buds for listening to your iPod/iPhone (or whatever). They have to do more than just play music back. They have to isolate, and they have to pay more attention to accurate sound rather than nice sound. Consumer headphones and speakers want to make the music sound good. But reference monitors (which is what IEMs are) need to reproduce what is ACTUALLY happening, regardless of whether it sounds good or not. The good news is that IEM earphones can do both! In fact the excellent fit and isolation provided by the custom IEMs make them great for listening to your portable music device when they aren’t being used on stage.
The UE 18 Pro in-ear monitors are not cheap ($1,350). Even so, PC magazine says “believe it or not, this earphone pair is well worth its outlandish price.” There are lots of other options out there (see below). But hey, if you have the money for them, why not? Based on reviews by several sites (PC Magazine review, Hi-Fi.org’s review), these things do an incredibly good job. PC Mag says “Unparalleled in-ear audio performance that even the snootiest audiophile will appreciate.” There are six drivers in each ear to give detail to the entire frequency range. They go on to say “in-ear sound quality may have reached its apex: the outrageously priced Ultimate Ears UE 18 Pro earphones are a sonic masterpiece.”
The UE 18 Pros are custom IEMs, which means they make them to fit perfectly into your own ears. In order to do this, you must provide them with a mold of your ear – yes, inside and out. Then they make them to fit. Lots of IEM companies make custom ear phones like this. It requires you to go to an audiologist to create the molds for you. The UE site provides a list of recommended audiologists based on your geographical location. But any qualified audiologist familiar with how to make “open mouth impressions, full shell with CIC canal” will work.
More affordable in-ear monitors:
If you aren’t a stage performer and only want to be stylish while listening to your portable music player, you can get Ultimate Ears for that too, and for much less money since they don’t have to stand up to the work that IEMs do.
Getting Good Audio For Your Live Streaming Event
 Somebody asked a question in a forum about how to do live streaming of an event. She’d never done this before. Somebody jumped and gave her advice about the video part of the equation, but said “Ken probably has a better idea about the audio.” Thanks Phil:). The truth is that the same tips I give about getting good audio for any kind of video will also apply to a live streaming event. There are just a few additional potential situations that you may have to deal with, like if there is already a PA/sound system there to amplify the presenter.
Anyway, after I posted a rather lengthy reply, I thought it would be helpful to any of our readers who may want to live stream an event and has not done it before. So below is the advice I gave:
There are a lot of variables at play here (the person who asked the question didn’t give many specifics about the event she wanted to stream). Things depend on how the event is being presented. For example, a simple person-sitting-in-front-of-a-computer can be done using a webcam as Phil (the first person in our group to give her streaming advice) said. The webcam’s software can use whatever audio device you have connected. I recommend at least a large USB mic (not the headset kind) – something like a Samson Q1U ($38) on the lowest cost end, but preferably something more like a Samson C01U ($80) or the new Rode NT-USB ($169) (there are lots of choices these days). That’s the simplest set up.
On the other end of the spectrum is capturing a presenter who is already being mic’d through a PA and speaking in front of an audience. For that, the webcam may be insufficient and you may need a video camera/camcorder. For that scenario you have a number of options. If the camcorder has a mic input jack (many don’t!), you can put 2 mics in front of the presenter, one for the PA and one for the camera. That’s the easiest. If your video camera does NOT have a mic input, you have to capture the audio to the computer via a USB-connected (easiest and cheapest) audio interface – something like a Focusrite Scarlett Solo ($99.99), or Alesis MultiMix 4 ($79). Again, if the event is already being amplified by a PA, you could run a separate mic just for the streaming and set that up next to the PA mic. If the presenter is wearing a lapel mic and walking around a lot, you could either ask the event sound guy for a split output from his mixing board and run that cable to your audio interface. Or even simpler, just set your mic in front of the PA speaker.
Once the audio is going into your computer, it all depends on the streaming service/software you use. Many (maybe all?) of them simply use audio already coming into your computer. On the video side of things – actually getting a camcorder video into the computer for streaming live – well, did Phil mention I was the audio guy and not the video guy?:-P.
But I’ll give you my two cents on getting the view into the computer or live streaming. I was stuck in the paradigm of a “webcam” being a little thing that clips to your monitor. But there are webcams now that are tripod mountable and pretty much designed to do what you’re doing. If you’re using a laptop and can get close enough to your subject with it, a simple USB webcam is a good affordable solution. But there are also WiFi webcams that would allow you to “untether” from the computer. Of course that’s more expensive (Logitech Broadcaster Wi-Fi Webcam – about $200 ).
And if you already have a standard camcorder, it might support USB live streaming if it has a USB output (might depend on the service you’re using to stream as well). Or it may have an HDMI output. You could get/add an HDMI input for the computer if it doesn’t already have one. Hopefully you’ll be able to do what you need with all those options. Or maybe somebody who has done more live streaming of events can chime in.
One last important point about live streaming. Doing it on your personal internet connection might result in choking of your signal if more than 100 people want to watch. So you should look into a streaming service such as Ustream or Wirecast. They can take the signal onto a cloud or content delivery network that can flex with traffic and still provide a good non-stuttering signal to the end user.
Good audio is the ingredient usually missing from most internet video, including live streams. I leave you with a great quote tI found on a live streaming tutorial at Tuts+: “A high-quality audio stream can make jerky video more bearable, but terrible or distant-sounding audio can’t make up for great video quality. If at all possible, use a lapel or headset microphone for a moving source or a good quality mic close to a stationary source.” Yes!