 There is a tendency for musicians to want loud mixes. This is not an inherently bad thing. There is even a term now to describe the phenomenon: “loudness wars.” Who will win?
But often people do bad things to their audio, such as squash it with compression so they can turn everything up to the max and ruin their dynamics. But there are ways to mix for loudness and still have the audio sound good, which will help us get the better audio from our home recording studio.
Here is an article with some tips on how to mix for loudness from Audio Fanzine:
http://en.audiofanzine.com/recording-mixing/editorial/articles/mixing-toward-loudness.html
Audio Recording
Buss Compression Tips
 Now that you have had a bit of a primer on what a mixer bus (or “buss”) is (see the last post, What Is a Buss in Audio Recording?, I thought it would be a good time to tell you about a good article on using buss compression. Since most often the output of a buss is going to contain signal from multiple sources, you have to think about compression a bit differently than you do when simply applying compression to a single track with a single sound source like a voice, guitar, piano, bass, etc. This article from Audio Fanzine gives some tips and suggestions for settings when using buss compression.
Read the full article here: http://en.audiofanzine.com/recording-mixing/editorial/articles/buss-compression.html
What is a Bus in Audio Recording?
 There is a term in audio recording that is a bit confusing (go figure) to a lot of folks who are not immersed in in the audio or electronics world. Oh, who am I kidding? There are scads of those terms. That is part of the why Home Brew Audio exists – to translate the techno-lingo into the common speech:). But the term I refer to today is “bus”, also sometimes spelled “buss” or mixer bus, though that just confuses the issue even more. But I digress (Really? Me? but that never happens;)).
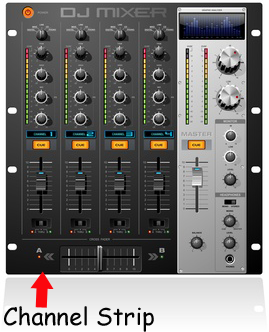
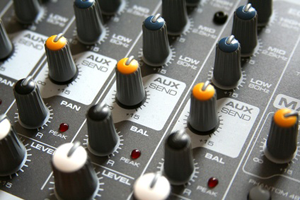
 Anyway, the term, as so many are, is a left-over from the analog days when physical mixers were necessary in audio recording (hint: they are no longer necessary in computer recording). A buss is an output channel on a mixer that has collected all the audio from any channel that is sent to it. For example, If you have a 16-channel mixer, there will be a channel strip for each of those 16 channels. The “master” channel is actually a buss, because it takes the output of all the channels on the mixer and outputs them to your speakers or headphones, etc. All channel strips on mixers are usually sent there by default. But you can also choose other busses to send these channels to. For example, there is usually an auxiliary (often abbreviated as just “aux”) buss knob on each channel strip which lets you send the audio on that channel to the (you guessed it) the auxiliary buss on the mixer. Then the aux buss will output all channels sent to it, and only those channels.
Regardless of how many busses are present on a mixer, there will always be a master-level control somewhere on the board. For example, there will be a “master” strip for the master buss, and there will also be a master Aux section (often not a strip, but a section at the top of the mixing board) with an aux output and input and level control.
 There are other types of busses and even other names for the ones I described. For example, sometimes the aux buss is called the effects buss. But at the end of the day, the only thing you need to know is that a buss combines signals from several other places on a mixing board. We use the same concept on non-physical computer mixers nowadays, which are almost always designed to mirror the way a physical mixer works, though we have a lot more flexibility to create our own virtual busses to create groups, submixes, and any combination of inputs and outputs.
OK Slow Down – What’s a Submix?
You caught me! I just casually used a term like everyone in the world knew what it meant. Mea culpa! I promise to come up with a suitable punishment for myself. But first – the submix thing.
OK, let’s say you have recorded a song with a guitar, a bass, a lead vocal, and 6 harmony tracks (I like to have each harmony part sung twice; so 3 harmony parts will need 6 tracks. I know! Awesome huh?). Then let’s say that I want reverb on all 6 of those vocal harmony tracks. I could go to each track separately, and set up a harmony effect on each one. Well THAT’S tedious! Doing the same thing 6 times. Wouldn’t it be cool if I could just set up the harmony effect once, and have all the harmony tracks share it? Hint: the answer is “yes!” And that’s exactly what you can do with a buss! Just create a buss track, set up a harmony plugin effect on it, and then route the harmony tracks through that buss, and they all share like good little harmonies. And…and (this is the best part) you can control how loud all 6 harmonies are with one volume control! The one on the buss track where they are sharing a reverb (note to the techies – you would want to disable the direct sends from each harmony track to the Master buss first).
What Good Is A Submix?
So now, if you’re listening to the test mix with your wife, and she says (as she always does) “the harmonies are too loud in the mix,” you can nudge them down with one slider/knob instead of trying to adjust the volume on all 6 tracks? One track to rule them all! Now isn’t that useful? It is.
Hopefully this information will allow you to put another seemingly baffling audio term into your vocabulary.
2 Things You Should Know About Your PC Recording Studio
 What? You say you don’t have a PC recording studio? Let me ask you this. Do you have a computer? Was it made in the last 10 years? Does it have a sound card? If you answered “yes” to all 3 questions, you have a PC recording studio. Maybe you just didn’t know it.
So now that you DO know, you can create awesome audio for, well, for whatever. Record your songs and release an album. Send out a podcast. Narrate an audio book. Do voiceover recording for any videos you might be making, or to start a voiceover business of your own. There are so many possibilities.
Now before anyone raises their hand to protest that you can’t record really good audio using just a home computer unless you also spend a gazillion dollars on an audio interface, microphones, and special software, let me just say something first. You CAN record really good audio using just a home computer without having to spend a gazillion dollars on an audio interface, microphones, and special software. In fact, getting back to the title of this article, there are two important things about home recording you should know. First, good audio is more about knowledge than money, knowledge anyone can learn quite easily given the right lessons. Second, most people can create excellent sounding audio without spending more than about 30 dollars (for a USB mic if you don’t already have one).
1. The Basics of Home Recording are Easy to Learn
Most home recording needs will center around voiceover recording for any of a number of reasons, such as podcasts, audio for video, audio books, etc. You will probably have noticed that a lot of amateur narrated audio such as you find in videos on YouTube is really quite bad. It’s thin, echo-y, noisy, hard-to-understand, or any combination of the above. But that isn’t because the people recording this audio just have cheap gear. They could make much better audio with just a little knowledge, mainly about how to avoid and/or reduce noise, where to put the mic, etc.
2. You Can Create Good Audio With Your Current Computer and Free Recording Software
There are some good audio recording programs available free of charge on the web. Probably the best known is called Audacity. When I say “free,” I mean open source, not just a trial version. Audacity is amazingly powerful for the price ($0.00). I recommend you download it before someone figures out how good a deal it really is. Audacity is both a multi-track recording and sound editing software. It comes with lots of built-in effects like EQ, compression, reverb, and great editing capability. For many folks, especially the ones just recording vocal narration, this is the only home recording software they’ll ever need.
So now you know where to get the hardware, but you are wondering where you can gain the knowledge I said was so easy to understand. There are many tutorials on the web, but Home Brew Audio is dedicated to teaching home recording skills so that anyone can understand them, using enjoyable and humorous video tutorial videos. Why not give us a visit at www.homebrewaudio.com if you have a few moments? I bet you’ll be glad you did.
Your Home Studio and Reaper – No Additional Audio Editor Needed

I’ve been saying that for your home studio, with Reaper software you also need an audio editing software program. It turns out that for most people in most situations, this is simply untrue. I know, crazy right? I’ve been giving out advice that may have been wrong. Gasp. For me, sadly, I think there is no going back; at least not easily. I started many moons ago using a program called Cool Edit Pro (now Adobe Audition), which had two “views” that you could toggle between; one for multitrack use and mixing, and one for audio file editing. When I was working in multitrack view and wanted to edit a file (which actually changes the underlying wave file in a process called “destructive editing”), I would click on the View toggle and presto! I was in the editing view. I worked like this for years.
Part of the reason I worked that way was that my computer was feeble, which is to say, normal. In order to treat a track in multitrack view with effects that could have done some of the same things that I was doing in the edit screen, I would have been using “non-destructive” editing. These treatments, in the form of effect plug-ins, didn’t actually do anything to the underlying wave file in the track. The effect would just plug into the track and affect whatever audio happened to be on that track. This kind of non-destructive editing eats up massive amounts of computer horsepower in a hurry, especially if you have several tracks and several effects running. It didn’t take much at all for my computer to simply raise the white flag and lie down in exhaustion. Destructive editing, especially if I saved a back-up of the original file, was the way to go for non-specialized computers.
Eventually, a program called Reaper came on the scene and had, as one of its biggest benefits, a streamlined architecture that ate up fewer computer resources than its fellows. I jumped on-board immediately and started doing a lot of my formerly-destructive editing tasks in Reaper (like compression, EQ and reverb) with no ill effects on my computer. But there were still things I did in Adobe Audition, mostly our of habit. Those were things like p-pop elimination, noise reduction, and final mix mastering. I still do that today.
But you almost certainly don’t have to use an external editor at all. I’ve been challenging my assumptions and habits and it turns out that for most readers of Home Brew Audio (we cater to recordists of voice over and musician alike here). I’m going to be doing some more checking up on this, just to fully convince myself, especially in the noise reduction arena. I’ll let you know what I find out. But if you’ve been confused in the past by my assertion that if you use Reaper, you’ll also need an external audio editor, please know that I have reversed (mostly) my thinking on that score.
Go forth and record AND edit with Reaper!