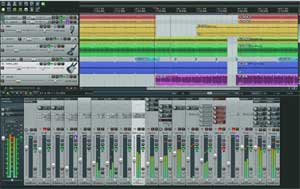
Audiofanzine just listed the top 18 digital audio workstations (DAWs), otherwise known by the names audio/MIDI sequencers, multi-track recording software, etc. This is always an interesting thing. Not only do people love “top” lists, but I like to see whether the software I use s my primary DAW, Reaper, is on the list. It is:). Why wouldn’t it be?
But it’s also cool to check out what else is on the list. Who knows? You may see something you’ve not heard of before and want to try it.
I don’t know why they chose 18 as their “top” number. Why not top 10? My guess is that there are too many good programs out there that are just as good as many of the others.
One note about their list is that they focused only on music production programs, as opposed to the more expensive broadcast-focused ones like Nuendo (1,700 bucks), Sequoia (2, 980 bucks), and Pyramix (2,962 bucks).
Reaper is number 11 on their list, interestingly right after Pro Tools at number 10. I say that’s interesting because Pro Tools is widely regarded to be the industry standard. But lists like this are subjective for sure. They (Audiofanzine) even admit this right up front. Maybe that’s why they chose Sony Acid as number 1. I’m thinking it’s possible the list may not even be in rank order. Maybe they just randomly through up the top 18 in any order.
Anyway, here is the page with the list and descriptions of each program: http://en.audiofanzine.com/plugin-sequencer/editorial/articles/the-best-daws.html
As I said, sequencers/DAWs are pretty personal. But it may be worth trying a few to see which ones you like best.
Transformers And Why They Are Used In Audio Gear
I just read a very informative, if somewhat technical, article about transformers and why they are used in audio hardware.
If you are not an electrician, or don’t have a background in electrical engineering of any shape or size, you may not know what a transformer even is. If I’m being honest, I have to think about it myself sometimes. And I had both digital and analog electrical engineering courses in college – though I now desperately which I had paid better attention at the time:-P. In my defense, the material never spoke to my needs, which at the time had to do with my band’s PA system and our issues with feedback, etc.
Anyway, I digress as usual. In the most basic description, a transformer transforms things. Duh. But we’re not talking about cars-into-robots here. It’s about electrons. Those pesky electrons and how they flow (another simplistic explanation of electricity in general).
A transformer separates two electrical things physically. For example, instead of a single wire connecting two things – say a switch and a light bulb, you can stick a transformer in the middle of the wire. A transformer has two coils of wire inside it. If you had paid attention in your physics or EE class, you may have had a lesson in “induction.” This means that an electrical current can be passed between two things without them even touching. Often this is demonstrated with magnets or even rubbing a rabbit fur on a plastic rod and then holding it over your head to watch it suck your hair to through the ether. This is a form of induction. One thing (a magnet or a charged rod) “induces” the current in something else (metal shavings, hair, etc.).
But why is that useful? Well, if you have some unwanted thing traveling along the first electrical portion, like a hum or something, you don’t want to pass the hum along to the destination. So you can “de-couple” (a fancy way of saying “physically separate”) the signals. But then how do you keep the desired power flowing? The answer is induction. The first coil of wire (remember the two coils thing in a transformer?), which is physically separated from the second coil, induces the signal to the second coil. This “air gap” (my term for understanding it) drops the unwanted stuff and only passes the wanted stuff along the circuit.
Now before the experts start hurling criticisms – yes, this does only describe one use of a transformer. You can use them for other things like transforming one type of electricity to another, useful for taking your hair dryer to Europe from the US. We lived in England for 4 years and had to have these heavy transformer boxes all over the house so we could plug in our American appliances.
Anyway, here is that article that speaks to how and why we need or want them in our audio gear. http://www.prosoundweb.com/article/making_it_match_an_introduction_to_transformers_in_audio_devices/
Recording An Entire Rock Band With One Mic
I just saw a video done by Graham Cochrane where he records a rock band one track at a time, using just one mic. I thought is was funny in a way because that’s how I record everything pretty much:). I don’t have a band with me all the time, so I just play all the instruments and sing all the vocals myself (well, my wife and I sing all the vocals frequently). This is simply what you have to do under certain circumstances – be it lack of space, lack of money (for a lot of good gear or studio time), inability to get the band together, you name it.
Because of this, I think this is normal. Actually, in my case I do use two mics (shock! horror!) usually. That’s because on acoustic guitar, I like the sound of the Shure SM81. On vocals I always use a large-diaphragm condenser, usually my Rode NT2-A. But the concept is the same.
One thing Graham does here that I don’t do because I don’t have a drum kit (wife says “no drum kit until we get a house with a basement” – shya). I use virtual drums when I need a full kit. So I really learned something here about recording and entire drum kit at once with only one mic. Graham uses the over-the-shoulder technique with the mic just over the drummer’s right shoulder (for a right-handed drummer). It has several advantages explained by Graham here.
Anyway, the result is pretty awesome. But that didn’t surprise me. My constant harangue is “you can make awesome sounding recordings without expensive gear and without a lot of gear.” You just have to know what you’re doing.
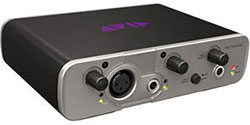
By the way, Graham used the new Avid Fast Track Solo interface, which I am going to review as soon as I get a review copy. Otherwise I’ll have to buy like my 9th interface. Sheesh. Oh well, that’s another story for another day.
Here is the video I mentioned:
What is A Virtual Instrument? Play Music Without Having To Know How To Play Instruments
 A virtual instrument is software that can sound exactly like the real thing.
Professional sounding audio recording is not as dependent on money (for good gear, studio musicians, commercial studios, etc.) like it was for so many years. Now you can produce pro audio right from your computer without having to spend much (or any) money at all. This new technology has also made it possible to record instruments for your music that you don’t actually have. You can have drums, piano, trumpets, guitars, etc. playing in your song without knowing how to play these instruments or without having someone else play them. Sounds impossible, right? Well that’s the magic of virtual instruments.
Real Virtual Instruments
I’m sure you’re familiar with the typical sounds a computer plays when a MIDI file is launched (for a review of what MIDI is, see our article: MIDI Recording – What Is It And Why Is It Awesome?). These are computer-y sounding cheesy “instruments” that come built into most sound cards. Technically these are virtual instruments. Let me state right up front that these are NOT the sounds I refer to when I say “virtual instrument.” Oh no. What I want you to know about is the host of real-sounding software instruments available to load up on your computer and then play with your MIDI keyboard (or depending on the software, your computer keyboard). If you can think of an instrument, odds are you can find a virtual version on-line somewhere.
Sampled Instruments
What is the difference between the cheesy sounds on your sound card and the virtual instruments I’m talking about? The major difference is that a virtual instrument can (usually does) sound indistinguishable from the “real” version of the instrument. At least to most people. that’s because the instrument is created by taking lots of recordings of an actual instrument. These are called sampled instruments.
Try this experiment (for which you won’t even need the keyboard). Find a simple MIDI file on the internet. They are everywhere, just type “MIDI file” into a search engine and download one for a tune you know. Nursery rhymes work well…just something simple. Double-click that file (MIDI files have a “.mid” extension) and listen to it play through your sound card’s piano sound.
Let’s Try It Right Now
Now we’ll listen to the same MIDI file played through a free virtual instrument. There are several types of virtual instruments out there, the most popular of which is probably a “VST” (virtual studio technology) type of instrument. To play one of those, we need to download something called a “VST host” from the web. There are several free ones to choose from (yup, type “free VST host” into a search engine). Try VSTHost or MiniHost.
A VST host is just a piece of software that can play VST virtual instruments. If you already have recording software such as Pro Tools or Reaper, you can play VST instruments within the software and won’t need a separate VST host. Either way, once you have the host program installed, you’ll need to attach or “load” an instrument. For this let’s use a free VST instrument called “4Front Piano Module” (which you can download here: http://www.yohng.com/software/piano.html).
Once that is downloaded, all you have to do is load the 4Front Piano from within your VST host program and you’re ready to rock. Import the MIDI file you played earlier on your sound card into the VST host (with the 4Front piano loaded up) and hit “play.”
Can You Hear It Now?
Hopefully you’ll notice that the piano sound coming from the virtual instrument, 4Front Piano Module in this case, sounds vastly superior to when you heard it coming from your sound card’s factory instrument. And this was just a free instrument! For a few bucks, you can get an even better sounding VST piano to plug into your VST host and play that same MIDI file.
Want to hear the same notes on a different instrument? Trumpet, maybe? Or violin? Download some trumpet and violin VST instruments and try those in your host program. You can play that same MIDI file through any MIDI instrument you can find! The possibilities are just about endless.
What Kind Of Virtual Instrument Do I Use?
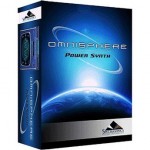
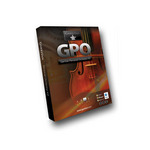
Some of the virtual instruments I have on my computer include: The Garritan Personal Orchestra, Spectrasonics Omnisphere, 4Front Piano, Storm Drum, and a few others.
Eventually you’ll learn to create your own MIDI files to play back through a virtual instrument, and then mix that instrument in with actual audio files you’ve recorded to create a rich ensemble. Use virtual bass guitar and virtual drums along with real electric guitar and real vocals to turn yourself into a rock band. Are you starting to see how this can be life-changing if you are a musician?
If you don’t already have a home music studio, this can be your start. If you do have one but didn’t know about virtual instruments, this will take your productions to a whole new level. There is not reason (at least no monetary reason, since the example here used only free stuff) to give this a try right now! You’ll be amazed and inspired. I know I was.
If you would like to learn more about MIDI and virtual instruments, check out our new tutorial video course The Newbies Guide To Audio Recording Awesomeness 2: Pro Recording With Reaper, which has a 3-part lesson (Lesson 11 – Intro to MIDI and Virtual Instruments) guiding you step-by-step through creating and playing virtual instruments.
Here is a video from the course:
Some Tips For Recording Acoustic Guitar
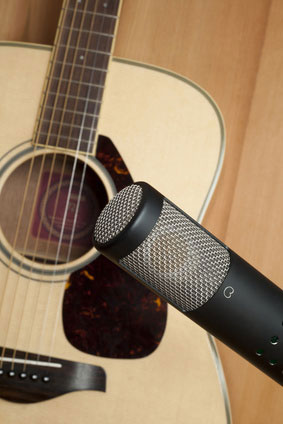 I record acoustic guitar a LOT. It’s my primary instrument and features in 99% of all my recordings. So I’ve learned some tricks along the way for getting a great acoustic guitar sound. But that doesn’t mean I can’t learn some new ones.
Björgvin Benediktsson just wrote an article with his top ten tips for recording acoustic guitar. Most of them I already do. Some I’ve never tried – putting a mic at the first fret is one of those. I’d like to add a couple of things to his list.
One of his tips is to “record in stereo,” by which he means recording with either a stereo microphone or with two microphones in a stereo configuration, such as the “coincident pair,” which means that two mics are placed with their capsules as close together as possible, but angled differently toward the guitar. And that is a fantastic way to get a stereo sound. But I would like to add the way I do it – which is basically “fake stereo” but doesn’t require you to have two mics or a stereo mic. You just record the guitar part once. Then on a second track, record the SAME part (meaning play it again!) again. Then pan the two parts left and right. The differences in the way you play the part will be enough to give you a great, full, wide guitar sound.
This was actually on Björgvin’s list under his tip for using different mics for double-tracking, which is the more formal term for doing my fake stereo thing. But his point was more for the added variety of sound when using two different mics rather than on using double-tracking as another way to achieve stereo.
One other tip I would add to his list is to pay very close attention to where the mic is pointing on your guitar, as well as the angle and distance. Make a note of it. Memorize it. This is because you will often need to stop a recording to do extra takes. And if anything is different, the angle, where the mic is pointing, etc. you will get a very different sound, which you do not want (unless you’re going for something whacky) on a single guitar track. It will sound jarring and just plain bad. So when doing additional takes, be sure to maintain the mic in relation to the guitar. Then double-check the consistency of the tone by listening through the transition from first take to second. I recently had to re-record an entire acoustic guitar track because I didn’t remember how I recorded the original days earlier, and I just could not duplicate the tone. Save yourself the time and effort by noting the details, and if possible, record the entire track on the same day in the same session. Of course, doing it all in one take is preferable.). Shya. Good luck with that.
Here is Björgvin’s article: http://audio-issues.com/recording-tips/top-ten-methods-for-recording-acoustic-guitar/#axzz2UJg6eXtR