 It’s been a few years since the initial tutorial course for audio recording beginners – The Newbies Guide To Audio Recording Awesomeness 1: The Basics With Audacity – was released. And as will happen, the software we teach you to use in that course, the free recording program called Audacity, has been updated several times in the interim. Today’s version, Audacity 2.0.5, has been so altered from the original that the videos in the course refer to menu items and audio effect locations that do not even exist any longer:-P. THAT is not very helpful, is it?
This first course is designed not only for people who have little or no experience recording audio, but also for people who have no budget for gear or software. I even recorded the audio narration for the first several lessons using that same budget – essentially somewhere around $0 to MAYBE $5 for a computer microphone that you plug into your computer’s sound card. I did that so you could get an idea how even the most basic no-frills, no cost home recording studio (your computer with free software) can sound.
[NOTE: The updated course was completed in Jan 2015! No need to buy anything again, if you already bought the course. The old videos have simply been replaced with the new ones. If you would like to purchase the course, visit the page here: The Newbies Guide To Audio Recording Awesomeness 1: The Basics With Audacity] So I am going through each video in each lesson and updating it so that it is consistent with the latest version of Audacity. This is pretty tedious work, so it will take another couple of weeks to complete the updated and revised edition. But I will publish the each new video as I complete them. That way you won’t have to wait until the entire course is updated before you start benefiting from the updates.
[Latest status: As of Dec 2nd 2014, Lessons 1 through 7 (15 videos) have been updated.]
I will keep you apprised of my progress as the milestones are met.
Cheers!
Ken
Pre-Roll And Punch Recording: Why I Don't Use Them
 Someone just asked about using pre-roll and punch in Reaper. If you don’t know what that means, it’s basically a way to insert just a bit of audio into an already-recorded track, usually to fix a mistake. In the old tape days, you had limited tracks to deal with, so it helped to correct a few seconds of audio by recording over it. But it was hard to hit Record and then Stop and have the replacement audio sound natural. And if you were recording by yourself, it was virtually impossible. So a bit of automation was invented that told the machine the “get ready” 5 (or 10 or whatever) seconds before the insertion point. That’s the “pre-roll.” The singer (or voiceover artist, or instrumentalist) would start singing/talking/playing. Then the machine would automatically start recording at the insertion point WHILE THE SINGER WAS ALREADY SINGING. Then it would stop recording at the end of the part you are replacing. That process is called “punching” or “punching in.”
But in the days of computer recording where you have unlimited tracks AND you can SEE your audio, as well as hear it, there is rarely a need to punch in on the same track. You might as well just open a new track under the original one and start playing/singing along just before the mistake while recording on the new track. Then you can “peel back the area of the original audio where the mistake is, trim the size of the replacement audio, and drag it up. You can do fine adjustments of the edges and length of sections, etc. after the fact until it’s perfect.
So I don’t punch in anymore. I do that thing I just described with a spare track. See our 2-part post for more details on how to do this here: Quickly Fix Audio Recording Mistakes by Overdubbing.
What Do Those Switches On My Microphone Mean?
 A reader recently asked about the switches he had on his microphone. He referred to one switch that selected between a straight horizontal line (he said he’d read it was called a “high-pass filter”) and a bent/broken white line, and another that provides an alternative between a 0db or -10db setting. I must admit that I remember having the same question when I first saw these switches on a mic.
Here is my reply to him:
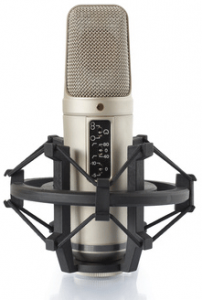
As for the switches on the mics, one of them is called a “roll-off” switch. That’s the one that looks like a broken line. You’re right that it is a high-pass filter (lets the higher frequencies “pass,” but turns the volume down on the low frequencies). It reduces the low-end frequencies that get picked up by the mic. I use this if I’m getting too many p-pops in my vocals, or if there is too much bass in whatever I’m recording. But as a default, I’d leave it flat. The threshold frequency (the point where the line bends) is usually written on the mic, but not on the Oktava, if it’s like mine (see the picture on the right), which is the Oktava MK-319. You would have to look that up in the mic’s documentation. I just looked up the specs on line (www.oktava-online.com/mk319.htm) and it did not say. Usually it’s set to either 80 Hz (“hertz,” or “cycles-per-second”) or 40 Hz. My Rode NT2-A (picture at top left) has both of those. So what this does is pick up all frequencies as normal, except the ones starting where the line bends (was to the left end of the frequency spectrum, which is the low or bass end), typically at 40 or 80 Hz. From that point, all the frequencies to the left (the frequencies lower than that) are turned down. According to the Oktava site, this high-pass filter reduces bass frequencies “directly at the input of the microphone amplifier.”
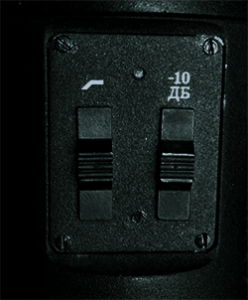
The 0dB or -10dB switch reduces the output of the mic when engaged. See the pic on the right of my Oktava and note the cyrillic characters for “d” and “b.” This is because the mic is Russian.
Anyway, so leaving it at 0dB is the default and causes no reduction in output. Engaging the -10 dB switch will reduce the output of the mic (basically turn it down) by 10 decibels. I never use this unless, for some reason, the mic’s output is too much for whatever it’s plugged into (some sort of audio interface or a mixer). But if you do need to reduce the level of the mic’s output, you can use that switch.
I hope that helps!
Cheers,
Ken
The Trouble With Recording With Omnidirectional Mics In A Small Room
 [I’m re-posting this article from January, since it has a lot of relevance to the recent series we’ve been running on controlling room sound.]
A reader asked me this week if I could shed any light on why his recordings weren’t sounding very good. He was using two very good microphones to record an organ, which he described as a large classic “church” type organ. He was using a pair of omnidirectional microphones and had tried various positions around the room, including the “spaced pair” configuration common when using “omnis.”
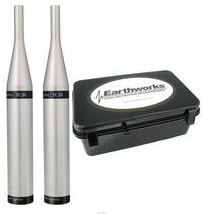
We had a few back-and-forth exchanges, concluding that even though the mics he was using, a pair of Earthworks SROs, (now redesignated the Earthworks TC20) are very fine microphones, they will pick up a lot of room noise, being omnidirectional. So if the room is small and has the same issues as most home recording studios, namely that there are lots of room echoes and generally bad acoustics, the resulting recording won’t sound very good. By the way, the acronym “SRO” stood for “Sound Reinforcement Omni.”
The Recommended Solution
Below is the full exchange.
Hi Ken,
I am trying to record organ music but the resulting sound is quite dry and seems “flat”. The organ is a large classic “church” type organ. I am using Earthworks SRO match mics (bought them because they were supposed to give an essentially flat response), and have done a lot of experimenting with placement in the room with negligible improvement. Also using Apogee Duet (the Firewire model) and their Maestro software on a MacBook Pro. Any suggestions would be appreciated. I am quite willing to change any of the equipment if that is important. Have enjoyed learning from your website.
Warmly,
John
Hi John,
So you’re using a pair of Earthworks omnis? You said you’d done experimenting with placement, so I assume you’ve tried the standard stereo positions. I think the recommended thing with omnidirectional mics is to have them in a spaced-pair configuration (http://goo.gl/YCFzwj). If you’ve tried that and it still does not sound good, it is likely to be the room the organ is in. Omni mics will sound terrible in a room with a lot of “room sound,” like a small room in your house (though it doesn’t sound like a church organ would fit in your home – not sure how big it is). If that is the case (bad room), I would try using a pair of large diaphragm condenser mics (LDC) in cardioid mode (most default to this) instead, just as a test to see if it gives you any better of a result. You might also try just a pair of dynamics like the Shure SM-57 or Shure SM-58.
Another question would be something that sounds simple, but a lot of people get wrong. In your recording software, are you recording each mic to its own track? In other words, there should be two tracks of audio when you’re done recording, one for each mic. Even that isn’t enough, though. You then have to pan the tracks “hard left and right,” meaning that track 1 needs to go 100% to the left and track 2 needs to be panned 100% to the right (or vice versa). It’s one of those things that isn’t always so obvious.
I hope that helps!
Ken
Hi Ken,
Thank you for the quick reply. I did try the spaced-pair configuration along with others with not much difference. I think you are right about the room size. It is a large church organ but it is in my home – a room about 18’ x 22’ so there is a lot of organ for the small room. I could always sell the Earthworks pair if the large diaphragm works better. I notice you like the AT2035 in one of your reviews. Is there another that you would prefer for such big sound in a small room. Do you feel I need two mikes in this situation or would one do it since there is not a lot of stereo effect in the smaller space.
Also (don’t want to bug you too much or take too much of your time), I would have not trouble moving to the Reaper 4 software if you think it would be helpful. Not quite sure why, however, in your video demo of Reaper you switch to Audacity to do the editing. Can you not do the same in Reaper 4?
Thanks a lot,
John
Hi John,
I have been asked the question about why I go to a separate editor in that video a lot. I actually put commentary on the You Tube video that says it isn’t strictly necessary – just something I have done for years. But in my Reaper course, I show you how to do everything right in Reaper.
As for the organ, I thought it might be the case that a poor room sound was causing the problem. Home recording studios almost all have that problem, ans it’s made much worse by the use of omni-directional mics. So using cardioid mics will help quite a lot, and the closer you get them to the organ, the better (less room noise). This is because the cardioid pattern picks up audio best from in front of it and rejects sound from behind it, something omnis don’t do (hence the name).
As for the types of LDCs – yeah, the AT2035 would be great, though there are a lot of choices (I use a Rode NT2-A as my main vocal mic, but it’s more expensive). The AT2020 might work well too for much less money than the AT2035. What mic will work best for you all boils down to your space and your instrument (including voice). Plus budget is a factor for most. If I had the budget, I’d have a matched pair of Neumann U87s :).
About the stereo thing, you may be right. It depends on how the sound comes out of the organ in that room. If, by the time it reaches the mics, it’s just a wall of very loud sound, then stereo imaging will be difficult. But again, only trying it will show you. One trick you can try is to record with just one mic onto one track. Then copy the audio on that track and paste it into a 2nd track. Then offset the 2nd audio item by 30 milliseconds or so (experiment) and pan both tracks hard left and right. You create “fake stereo” this way. It can be very effective. Also, this is demonstrated in the Reaper course:).
I am not familiar with the software you mentioned – Maestro, but I always recommend Reaper since it so fabulous.
Hope that helps.
Ken
20% Off Acoustic Fields Acoustic Foam Until Saturday, May 24th
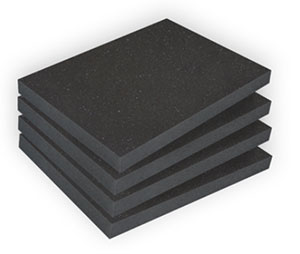
[The sale from 2014 is now over. That obviously does not mean it isn’t worth the regular cost. Far from it. I would go so far as to say the piece of your home studio budget currently dedicate to your next microphone should instead go to acoustic room treatment instead (unless your room is already treated.]
If you’re ready to get yourself out of your closet (folks often use closets for makeshift recording booths), get your microphone out of the box or other foam thing people sometimes stuff them in, get out from under the covers (yup – people do that to:)), and/or stop having to set up and move bulky baffles on extra mic stands, etc., check out all the information about this amazing foam by CLICKING HERE to be taken to the Acoustic Fields web site.
Hear Some Audio Samples for Yourself
I do not affiliate myself with any product that I don’t personally use and believe in. And to be honest, I was skeptical about this foam. So we tested it thoroughly in my home studio, which is a converted bedroom like so many folks have. You can read about my tests and hear “before-and-after” audio samples in my post Improve The Quality Of The Audio You Record At Home – Tip 6: Acoustic Foam. We were blown away by the results. All the room echo and reverb was gone from our vocal recordings. This allowed us to back off the mic by a few inches, which reduces p-pops (plosives) by a lot, which translates to spending much less time editing a voice recording! It also allowed me to use the “omnidirectional” setting on my Rode NT2-A microphone, which is impossible without room treatment because it makes the echo problem much worse! But omni mics do not have the “proximity effect” that cardioid mics do, which means less low frequency build-up when the mic is close to your mouth. That translates into even fewer p-pops! AND it allows me to get very close to the mic, if I want to create a more intimate vocal sound, without worrying about p-pops. So awesome!
Check it out for yourself! Acoustic Fields offers a 30-day money-back guarantee, so there’s nothing to lose. Just click the button below to find out more and to get some for yourself.
