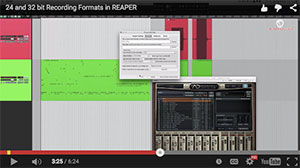
 Yeah, the headline uses a “techie” sounding bit (ha!) of lingo, which I usually try to avoid. But sometimes you will run into these terms and it helps to know a little something about them.
Bit depth in digital recording (using a computer or digital recorder rather than analog tape) refers to how many characters are used to represent the audio in digital language – you know, all that binary “ones-and-zeros” stuff. To get an idea what that even means, see my article: 16-Bit Audio Recording – What The Heck Does It Mean? where I tell you how “bit depth is like champagne”:-).
Anyway, the Reaper Blog recently published a video showing you why you might just want to stick to 24-bit recording and rendering, rather than thinking you can benefit from using something called “32-bit floating point.” You can see that video at the link below. But I wanted to say a few things about it before you check it out. The video not only explains what it promises in the title/headline, but in doing so, it shows you some other cool things as well. You’ll see what a “clipped” audio recording sounds like. That’s when you overloaded your interface and ended up with distorted audio. It looks squared off on the top. I always say that once you have distorted audio, you cannot “undistort” it just by turning it down. The damage has been done. You’ll see that in this video. You’ll also see a MIDI drum file in one of the tracks, along with the virtual instrument (Addictive Drums) that the MIDI is triggering.
So go and watch this short 6 minute video here. It’s full of great information: http://reaperblog.net/2015/02/video-24-and-32-bit-recording-formats-explained/
Use This Simple Technique To Make A Boring Song Pop
 I just watched a cool video from Graham over at The Recording Revolution, showing how he turned one of his songs from one that was a bit boring (his word:)), to one that really popped. He did this using just one plugin – a vocal pitch effect similar to Antares Auto-Tune and Harmony Engine EVO. It was called Neptune Pitch Adjuster & Voice Synth, which is part of a recording software program called “Record,” by Propellerhead. Of course, you can do the same thing with other DAWs and vocal pitch and harmony plugins. I use Reaper as my main DAW, and you can use any VST plugin with Reaper.
Anyway, the key here was that Graham used this effect to create contrast in his mix, making it more interesting and complex. He used a combination of extreme vocal pitch tuning – think T-Pain or that one song by Cher in the 90s – along with a sort of robotic sounding harmony generator creating some nice vocal harmonies on the verses. Then he left the vocal on the chorus untouched by those effects such that the natural sound of his voice there is very different from what it is on the verses. The overall effect is a mix that now pops more.
Watch the video – and more importantly – listen to the before-and-after audio here:
http://therecordingrevolution.com/2015/03/05/a-simple-way-to-make-your-mixes-pop-video/
Tips For Mastering Your Own Music
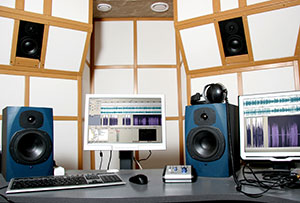 If I could have my way all the time (shya!), I would never master my own music. Why? Because there are people out there who do NOTHING but audio mastering all day every day. It’s a highly specialized skill, and the people who do it professionally have super developed hearing and, usually, high-end gear designed for the purpose.
However, I understand that I will NOT have my way all the time. And that means I won’t always have as much money as I would like (well, who does?:)). So it is sometimes necessary to do your own mastering. For times like those, it is best to have at least SOME knowledge of what you’re doing and why you’re doing it.
For an overview of what mastering is, you can check out my article Mastering a Song – What Does It Mean?
Here is a handy article with twenty additional tips for mastering your own audio:
http://www.musictech.net/2015/02/twenty-mastering-tips/
Free Zoom H4n With Purchase of Sennheiser Wireless Mic System
(Update: This deal is no longer available from B&H. But keep reading for info about how to use this gear for awesome audio on your videos).
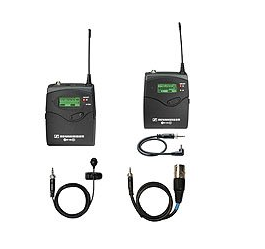
Initially, this article was about a deal where you could get a free mobile handheld audio recorder if you purchased a Sennheiser Wireless Mic System. that deal is no longer available. But you can obviously still buy these two products separately, which I recommend for getting the best sounding audio on you videos.
I’m always talking about how rare it is – in this day of easy HD video – to hear decent audio on otherwise great-looking videos. See our post How To Get Good Audio On Your Videos for several ways to to fix this problem.
Two of my suggestions involve using a lapel mic (to solve the all-important issue of getting the mic close to you mouth), and recording the audio separately from the video (since even when a camcorder DOES have an external mic input, it records pretty noisy audio).
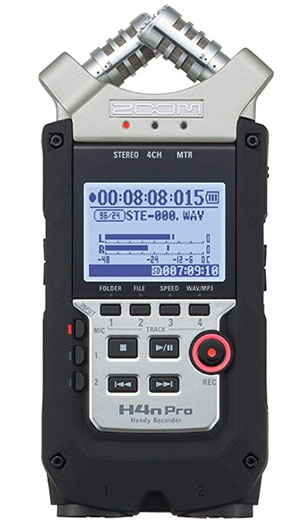
So in order to get the best quality audio, you record it onto a device that is specifically designed to record pro audio, such as a digital mobile recorder like the Zoom H4n. Then when you are editing/producing the video, you simply import the audio from the Zoom into the video program, just underneath the audio recorded by the camcorder’s built-in mic (which will almost certainly sound bad, with a far away, echo-y or reverb-y quality).
You can then sync the “good” audio up with the camcorder audio track and then mute/delete that camcorder audio, and presto! You’re left with a good video AND good audio.
With a wireless mic system combined with a Zoom H4N, you can do exactly as I describe above. The lapel mic will transmit to the wireless pack at the camera, which you then can record into the Zoom H4n. You won’t need to hunt for a camera with an external microphone input because you’ll have all you need to capture pro audio on all your videos.
Click here for more info on the Sennheiser wireless system and click here for the Zoom H4N.
Review Of The Pauly Ton Superscreen Pop Filter
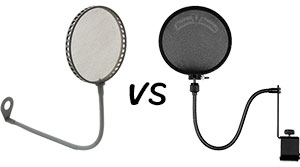 Recently I heard about a pop filter – that thing (usually round) that you see placed in front of microphones to helps prevent certain mouth sounds, mostly p-pops, from causing unpleasant sounds in a vocal recording – that actually DOES prevent p-pops. So I was eager to test it out for myself.
In my experience, if you are using a large diaphragm condenser (LDC) microphone, which is extremely sensitive, a pop-filter is a must. But though they usually help, they never completely prevent those explosive p-pops from finding their way into the recording. If we want pop-free recordings, we are forced to edit them out (see our article – How to Fix a “P-Pop” in Your Audio With Sound Editing Software) after the fact, which takes quite a long time.
Some folks (me included) try lining up 2 or even 3 pop-filters in a series in front of a mic in a desperate attempt to prevent p-pops altogether. These folks are usually disappointed.
But when I read about the Pauly Ton Superscreen Pop Filter, I was willing to pay the rather astoundingly high price (compared to the typical $20-$70) for one of my own if it actually did prevent p-pops at least 90 percent of the time. I would make up the extra cost in time savings after just a couple of voice-over jobs. So I ordered one and tested it. The results of my test are below, along with audio samples from recordings I made with both the Pauly Ton and a $33 Shure “Popper Stopper.”
The Good
First though, what did I like about the Paluy Ton? I have to say that I’ve never seen a sturdier or more “industrial” looking filter than this. It looks like it seriously means business – battleship gray and hefty. They say it’s built to last a lifetime and I believe that. Heck, it looks and feels like it would survive the apocalypse! The gooseneck is also amazing. It’s totally silent and moves so smoothly and effortlessly that it’s very clear you’re dealing with a well-designed and well-built piece of gear. It’s sturdy and pliable at the same time, which is no mean feat. The fabric is also different from most pop filters, soft and delicate, yet guaranteed to last, again, “for a lifetime.” It was designed to simultaneously prevent the bad sounds (p-pops caused by plosives) from the mouth, while leaving the quality of the rest of the audio untouched. Folks say that some pop filters remove some of the “airiness” or other desirable vocal qualities along with the p-pops, which is not a good thing. People pay good money for their microphones and recording rooms. So to reduce or prevent plosives at the expense of recording quality seems a bad trade-off.
The Not So Good
The price. This thing costs $300! Now if you think long-term, and realize that you’ll never have to buy another pop-filter again, it starts to make a bit more sense. And if it actually DOES stop p-pops dead, like advertised, then it would be worth it for sure. Like I said earlier, it would pay for itself in just 2 or 3 months in time-savings alone if it could prevent MY plosives from having to be edited out in post-production.
Now let me state right up front that everyone is different, which means that the severity/strength of a plosive will vary greatly from person to person. There are some folks who say they never need a pop filter AT ALL (!). In my world, that’s crazy talk. I can’t even imagine that world, because my plosive-foo is strong (and not in a good way). Also, there are those who say that the Pauly Ton has stopped all p-pops for them when no other pop filter would. That might be true for them. So I encourage you to try one out, in case you are one of those people. As you will shortly hear, I am most decidedly NOT one of those folks.
As you will hear below, the Pauly Ton Superscreen did not do much better than the Shure Popper Stopper at knocking down the p-pops for me.
The Test
I recorded three separate tracks of myself reciting the nursery rhyme, “Peter Piper,” which is full of plosives. That is probably no text in the universe that has so many “P” sounds so concentrated in just a few lines – perfect for a test like this.
The first recording was me reciting directly into my Rode NT2-A microphone (through a Focusrite Scarlett 2i2 interface), in cardioid mode, with no pop filter at all. Then I recorded the same thing, only with the Pauly Ton filter between my mouth and the mic. Finally, with everything else the same, I recorded myself with a different pop filter – a “Popper Stopper” – in the same position as the Pauly Ton had occupied.
The Results
Both pop filters reduced the p-pops by quite a lot. But neither one performed noticeably better than the other in this regard. The Pauly Ton is also supposed to result in better quality audio AFTER it reduces p-pops, as it supposedly allows the rest of the voice recording to come through, when cheaper filters do not. I gotta say, I didn’t hear any difference in audio quality either.
But that wouldn’t be a scientifically valid test, since I knew which was which. You need at least a “blind” test in order for it to mean anything. So I had the lovely Lisa Theriot (my wife and fellow voice-over actor and singer) come to the studio and put on the headphones (Audio-Technica ATH M50s). I played both samples for her several times, in pairs, asking if she could detect any difference in plosive reduction. She couldn’t. Then I asked if she could detect any difference in overall audio quality and tone. She couldn’t.
We repeated the test with her voice and came up with the same results.
So, for us at least, the Pauly Ton was not the answer. That isn’t to say it wouldn’t be for you or for someone else. That’s why I encourage you to test it for yourself. Everyone’s voice (and lips and tongue, etc.) are different.
Here are the audio samples of my voice. The first is obviously the one with no filter at all. The two that follow are the with the two filters. I won’t tell you which one before you hear them. You can find the answer in the text that follows these audio players. If you don’t want the spoiler, don’t scroll or read the answer before you listen. Use headphones if you can.
| Unfiltered | |
| Pop Filter A | |
| Pop Filter B |
Which Was Which (Spoiler)?
If you have not had a chance to listen and you don’t want to know which filter was which, then don’t read this yet. But if you want to know, then HERE IS THE SPOILER:
Pop Filter A was the Shure Popper Stopper ($33)
Pop Filter B was the Pauly Ton Superscreen ($300)