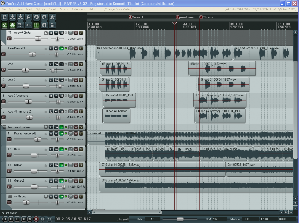
 After several folks asked for this, I went ahead and did a video on the basic use of Reaper digital audio workstation (DAW) software. In 10 minutes, I demonstrate how to create a voice over with background music, then a song with piano accompaniment (if a very brief song;-))), using midi and a virtual instrument.
I also include how to use Audacity along with Reaper for the tracking and editing software “1-2-punch.”
I put the first video up on YouTube, but it was pretty blurry. so I put up the new one here:
I’ve also embedded it into this post for your viewing pleasure:
I’ll be adding more Reaper videos to the tutorial collection very soon.
Cheers,
Ken
Voice Over Recording Using Audacity and a $49.00 USB Mic
 In order to demonstrate how professional sounding voice over recordings can be made (and in turn, voice over jobs be gotten) with very inexpensive home recording studios, I decided to do a quick demo. Take a listen to the below recording. It was recorded with a home studio that would cost you about as much as the USB mic I used, which is to say $49.00. Uh, huh. You heard right. If you already have a computer, you can set up a recording studio that can produce voice recordings like this for only about $49.00. I’ll say it one…more…time just for effect. You can start a home recording studio for $49.00!
I recorded about a minute or so of an article I wrote to create this demonstration.
Recording Gear Used
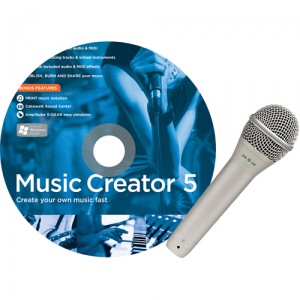
1. A run-of-the-mill Windows XP (Intel Core Duo, 3 GB RAM)
2. The Samson Q1U USB Microphone
3. Free recording software called Audacity
That was all I used. Here is how it came out:
[jwplayer config=”Custom Audio Player-200″ mediaid=”14417″]
The Step-By-Step
1. I plugged the USB mic into a USB port on my computer
2. I opened Audacity
3. I selected “Samson Q1U” as my recording device under “Edit/Preferences” in Audacity
4. I clicked the “Record” button in Audacity and spoke into the mic.
5. I performed the following edits on the recorded audio using Audacity FX tools:
a. Equalization and high-pass filter to reduce p-pops and other overly bass-y bits
b. Compression to even out the volume
c. Silencing and Cutting audio to cut out retakes and silent bits that were a little too long
d. Normalization to turn up overall volume to the point where the loudest bit of audio is JUST below 0 dB (the loudest that digital audio can be before distorting)
That was it. Then I just saved it as an mp3 and uploaded it.
If you’d like to get started learning to do this, check out our articles and video tutorials. Or you could snag The Newbies Guide To Audio Recording, our main tutorial course.
Better Audio On Your Videos With The Q3
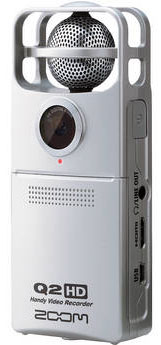 Most videos on YouTube have crappy audio. That’s because video cameras almost never have good quality microphones built in. But that’s all changed with the Zoom Q3 Handy Video Recorder note: this has been replaced by the Zoom Q2HD. It’s not only got a high-quality studio mic built in, it’s got two! They’re arranged at the top to give you excellent stereo sound to go with your video. This is an excellent piece of field or home recording gear. Of course, you can use it either as a video camera that has great audio, or as simply a hand-held digital audio recorder by switching modes and telling the Zoom not to record video – only audio. The Q3 (now Q2HD) is a very handy (ha ha, get it?) piece of recording equipment.
Just point and shoot, and when you finish with the high-quality stereo recording along with your video (or just the audio part if you don’t really need the video), plug it straight into your computer with the built-in USB cable. How’s that for awesome as well as convenient?
You should keep in mind on this, however, that if your are far away from the source, especially in a rectangular or otherwise “echo-y” room, the sound will still not be quite as good as if the Q2 is only a few feet away.
For more on how the quality of your audio is affected by how far away the source is on a video, see our post How To Get Good Audio On Your Videos, where you can hear examples of this in the video in that article.
VoiceOver Jobs: Where to Find Them and How to Get Them
 Voice over jobs are posted by the dozens every day on just one site. So there are probably hundreds or thousands available daily. Many of those won’t be available to the public, but the ones on the site I mentioned before definitely are. That site is Voices.Com. It’s free to sign up for a profile, and as soon as you do you get to start putting up samples of you voice recordings.
Making The Recordings
That last part might scare some people, but don’t let it put you off at all. If you have a computer, you won’t need to spend more than about $49 to start making professional sounding voice over recordings. And that’s only if you don’t already have a half-way decent mic. $59 is about the minimum price for a USB mic (such as the Samson Q2U) that can yield good quality audio. Then if you don’t have any voice recording software yet, simply download the free tracking and mixing program called Audacity. To figure out how to make recordings with Audacity, do an internet search for tutorials. Or you could check out the Home Brew Audio tutorials on Audacity here: Recording Tutorials.
Audition for The Voice Over Jobs
Once you have some demo recordings you can upload them to your Voices.com profile. But the real potential is in auditioning for open jobs. Voices.com will send you notices when voice over jobs get posted, and all you have to do is go to the listing for the job, find out what kind of voice-over they want, quote your price and send the recording in for your audition. Each job posting will have specific details, like what their budget range is (the minimum is $100), and what type of voice they need. The listing will also usually (I’d say 90 percent of the time) contain an attached script that will have parts of what the client is looking for. I highly recommend you record from that script for your audition. This is called a “custom” audition and will be much more targeted to what the client needs, which will increase your chances of getting the job. One thing to be careful of at this stage is protecting your recording. If a client is looking for just one paragraph for the entire job, and they provide that paragraph as the audition, anyone who reads the entire thing will have given the client what they need already. Less scrupulous folks can (and have) simply use the audition to fill their job without having to pay you. Preventing this is pretty easy. Either don’t read 100% of the script, or insert a “watermark” to make it impractical for the the audition to be used as a final product.
Getting the Jobs
Here is where knowing the reality of a situation can make the difference between success and failure. Before doing any of this, you should know that as with any acting job, voice over jobs are highly competitive. I would venture a guess that you will get a job about every 100 auditions. This sounds bad but really it isn’t. If you know it going in, you won’t be ready to throw in the towel when your 50th audition still has not yielded one job. Do at least 100 before even starting to get discouraged. The people who succeed in this business are the ones who are persistent and focused.
There are lots of tips on the web about how to make the best recordings for voice overs, how to increase you odds of getting voice over jobs, etc. One such source of advice is the Home Brew Audio website. However you decide to proceed, good luck in your new voice-over career!
How To Record Acoustic Music At Home – Step-by-Step
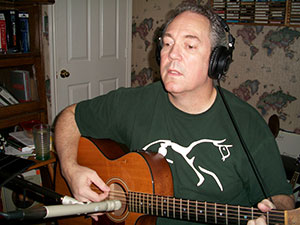 Recording acoustic guitar, along with some voices and other instruments, is one of the most common home recording activities out there. Today I thought I’d describe the techniques I use when recording this type of music. If you’d like to get an idea of how my recordings sound (pretty-much all acoustic/folk/singer-songwriter type music), you can hear a bunch of samples here: Ken Theriot’s Music.
I recently finished recording a full CD of seasonal music, Ken and Lisa Theriot’s The Gifts of Midwinter, and I’ll be using one of the songs from that album as a sort of case-study for this article. Before we start, take a listen to the song here:
This song is close to “as basic as it gets.” It’s acoustic guitar, one voice singing, and a bass guitar. Here’s how I recorded it:
Recording Equipment
Let’s start with the microphones. For the guitar parts, I used a Shure SM-81, which is a thin pencil-style condenser microphone. The mic was plugged into my computer interface box, which in my case is an E-MU 1820m. It’s about 6 years old now. You can pick up a similar audio interface like that today starting at about $75. One example is the M-Audio M-Track, which you can get for just over $100. Plus it comes with Ableton Live Lite music creation software.
Anyway, that got the sound into my computer. To record the sound, I used my favorite recording and mixing software, Reaper, which you can pick up for $40 as long as it doesn’t make you more than $20,000 a year (honor system!).
For the voice I did the same thing as with the guitars, except there was a different microphone involved, the Rode NT2-A.
For the bass guitar, I used a “direct inject” box called the Line 6 Tone Direct similar to this one.
The Step-by-Step
First, I told Reaper to open a new project/song file and set the metronome to the correct tempo and time signature. I then turned on the click-track so everything I played would be synced to the same time.
Then as I listened to the click-track in my headphones, I played the guitar part onto the first track in Reaper. Next I started a 2nd track and played the same guitar part again. Then I panned the 1st track 100% to the right and the 2nd track 100% to the left. That gives the guitar a large stereo sound.
I opened a 3rd track and recorded one more guitar part. I put a capo on my guitar, transposed the chords, and played some different finger-style guitar in this higher register. I panned this guitar part about 20% to the right.
I then opened a 4th track and sang the vocal part, leaving it panned “dead-center” (panning – 0%).
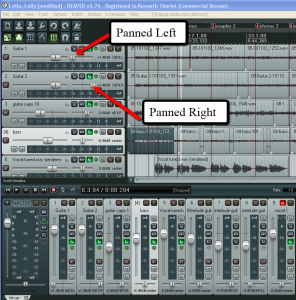
Next I opened a 5th track and recorded a bass guitar part. I plugged the bass into the Line 6 box, told Reaper to bring sound in from the Line 6 device, and simply played along. I left the bass in the center of the stereo field (panned 0%) like the vocal.
I then listened to all the tracks together, altering the volume of each track so everything could be heard properly (this is the “mixing” part).
When it sounded good, I “rendered” or “mixed down” the project, resulting in a single stereo song file.
Finally, I opened the rendered song file in my audio editing program called “Adobe Audition.” I clipped off any extra space or noise from just before and just after the song, fading the end out smoothly. I made sure the overall volume as good, not too loud, not too soft, and saved it.
Finito. Have another listen to the finished product here: [jwplayer config=”Custom Audio Player-200″ mediaid=”15049″]
Please feel free to post any questions you may have about what I did to record this song in the comments section below.
Happy recording!
Ken