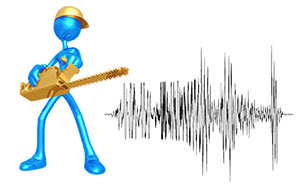
 Making sure your audio can be heard easily and clearly is important. One of the best audio editing tools available to us is called compression. With a compressor, we can even out the volume of certain tracks in our recordings, or even the entire mix. One primary reason for this is to prevent the listener from having to turn up the volume to hear the soft parts, but then also having to turn the volume down to keep from getting their ears blasted out during the loudest bits.
This loudness leveling has another…ahem…benefit. Since it turns down the loudest bits without turning down the perceived average loudness of the entire song (or any audio content, like voice-overs, podcasts, etc.), some blank space is left between the former loudest bit and 0dB, the loudest possible level, before distorting. “Well…” say the producers, “we can’t have any blank space on the final track. That would mean the song isn’t as loud as it could be.” So now the entire song’s average loudness can be increased by raising ALL the levels until the loudest one is just barely below 0 dB.
Here is an interesting article about “the loudness wars,” as they are sometimes called, and how the search for ever-louder mixes can crush the life out of the music.
The original article is here: http://www.prosoundweb.com/article/the_loudness_wars_a_graphic_look_at_hypercompression/
Cheers,
Ken
Audio Quality for Videos
Why does it seem like the audio quality for videos, especially internet video, is crappy even when the audio looks great? Every day video capability is improving, pictures are getting sharper, technology is getting faster and almost everything is high definition or three dimensional. When recording your own videos, it turns out that it is pretty hard to get your audio recording to the same quality as your video. What is up with that? To achieve fantastic audio to accompany your fantastic video, you may well need to follow a few more instructions and go through a few more stages. It isn’t hard, but it seems like a whole lot of folks are just living with crappy audio even when the video looks great.
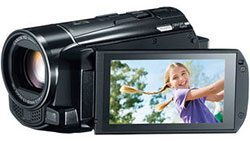
Your camcorder may have cost you a fortune and be top of the range but its built-in microphone probably isn’t. These microphones are generally very cheap, and the distance from the speaker or sound emitter (unless the camera is 6 inches from the narrator’s face!) means too much echo and reverberation are mixed in with the desired sound by the time it reaches the camera’s audio recorder. To achieve on-the-spot quality audio, invest in an external microphone. To achieve quality audio the microphone needs to be near to the speaker or sound emitter. The optimum distance for recording great audio is around 12-18 inches, and this can really only be achieved by using an external mic jack. This option is great for video where it is OK for the microphone to be seen or you will be recording up close. If you don’t want the mic to be seen in the video, you can use a kind of mic called a shotgun mic, which is capable of picking up good, noise-free audio from a few feet away, usually just outside the picture. This is what they do in the movies. Or you can actually use a small-diaphragm condenser mic or even a USB mic (if you have a computer). I explain how to do this – and you can hear an audio comparison of audio from the camera and from the external mic – in a video I put on the post How To Get Good Audio On Your Videos.
Picking the right camera up-front is the best solution here. It is a good idea to contact your camera supplier to make sure you get one with an external mic jack, especially if you are serious about your film making. It actually isn’t as common as it should be. I had to investigate about 10 different camcorders before I came up with one that met both my video needs AND had an external mic input. that camcorder was a Canon Vixia HF M500 Full HD Camcorder.
If you are recording a theatrical or cinematic video, you could use a small lapel-based microphone which would be barely visible to the viewer or you could use a completely different method. The other potential method involves using state of the art video editing software. Reputable programs include Sony Vegas Pro and Adobe Premiere Pro. With these programs you can record your audio and video files separately. This is especially handy if you don’t have a shotgun mic, or your camera does not have an external mic jack. You can record the dialogue along with the video, then align the audio track to the video track in the software. That allows you to cut, splice, move, etc. the audio and video together simultaneously. Then you can add background music, sound effects, etc. to the edited video as additional audio tracks to really make things sound professional.
Technology is developing at an alarming speed. Every day there is a better camcorder or more advanced program on the market and to keep up with the trends in video and audio technology, you need to be aiming for the top in BOTH instances. Putting cheap-sounding audio onto a slick looking video pretty much tanks your goal of trying to create a professional end-product.
Pix and Stix for iPad Garage Band App
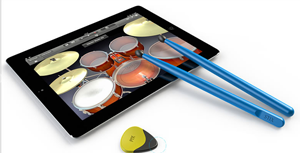 In the latest in really cool new toys, tools, and gadgets for the recording enthusiast (especially the musicians), I give you Pix and Stix for the iPad Garage Band app.
Apple’s Garage Band is an audio recording program for Mac users which now comes bundled with iPhoto and iMovie in Apple’s iLife ’11 . It’s pretty all-encompassing and also inexpensive for recording and producing in a home studio. Not surprisingly, there is a Garage Band iPad app that lets you record music into your tablet wherever you happen to be.
So what is Pix and Stix? They are rubber-tipped drum sticks and guitar picks that you use to trigger virtual instruments in Garage Band on your iPad. I’ll let that sink in for a sec.
I have written about virtual instruments here and here if you’re wondering what they are. For the Garage Band iPad app, you get pictures of instruments on your screen that you can play using the touch screen. You’ve probably seen that iPad commercial showing somebody actually plucking guitar strings with their fingers on an iPad? That’s what we’re talking about with Pix and Stix. You use the rubber-tipped picks to strum virtual guitars and the drum sticks to, well, hit the drums. How freakin’ cool is that?
Check out Pix and Stix and/or order yours HERE.
No word yet, that I can find, on incidence of broken iPad screens at the hands of these tips:).
Here is a video of someone playing drums with Pix and Stix:
Cheers!
Ken Theriot
Microphone For iPhone, iPad and iPod Touch
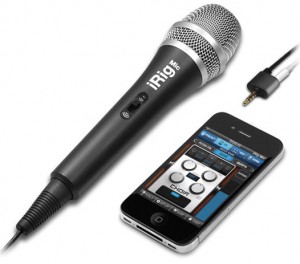 Hey home recording ninjas! Need to do any recording whilst out and about? How’s this for the ultimate portable recording rig? The IK Multimedia iRig Mic that plugs straight into an iPhone, iPad, or iPod Touch.
The iRig gives you excellent audio quality and comes with a vocal effects app and the recording app to use with your device. I am reviewing one of these babies as we speak and will publish that in a few days, but early results are: “wow.” I can’t say much more than that.
You can have your own portable recording studio for $54.99! I’m actually…just…almost speechless. This is such an incredible bit of tech. I’ll summarize. Maybe it will sink in better.
This is a good quality microphone for $56 that plugs directly into your iPhone, iPad, or iPod Touch. And the software (actually an “app”) is free! An entire multi track studio for $56, without your even having to have a computer! What?!
Check back on Tuesday, June 21st for my complete review of this little baby. I did the review, complete with audio examples, here: https://www.homebrewaudio.com/review-of-ik-multimedias-irig-microphone-for-iphone-ipad-and-ipod-touch/
Find out more and get your own iRig here: The IK Multimedia iRig Mic.
Enjoy!
Ken
MIDI and Virtual Instruments For Live Backing Tracks
I received an e-mail yesterday from someone in country rock band who wanted to augment their live performances with instruments they don’t typically have for live shows, such as fiddle and banjo. He has the midi files for the parts already. The problem is that the instrument sounds being played by the midi tracks for fiddle and banjo sound really cheesy and cheap. That’s because his recording software, Apple’s GarageBand, comes with some low-end synthesized instrument sounds built in.
He needed more realistic sounding instruments. Below is the advice I sent him:
Hey Scott,
 It sounds like you’re dealing with the joy and wonder of on-board or built-in midi instruments, which are typically very cheesy sounding.
To get decent sounds for these instruments in particular you usually have to spend a bit of money. There are free plugins out there but you usually get what you pay for:). Do you have the Apple JamPack Rhythm Section software? There is a banjo in that collection that is sure to sound better than the built-in one. And the pack is pretty affordable at $99.
I have tried many fiddle and guitar sounds and they seem to be among the most difficult sounds to re-create for cheap. I have heard many times that the fiddle AND acoustic guitar sounds in a product called Quantum Leap Gypsy are incredible. I’ve used Quantum Leap sampled drums in just about every recording I’ve made, so I know they are fabulous in general.
Once you have the virtual instruments installed, they will show up as choices on your GarageBand tracks. Just load the midi files and select the appropriate instrument for each part and mix down the result. That should do the trick. Plug your laptop into your sound system and you’ll instantly add new band members for your live performances. Another bonus is that they don’t drink beer;).
See an earlier Home Brew Audio article on virtual instruments here: https://www.homebrewaudio.com/home-music-studio-awesomeness-virtual-instruments
Cheers!
Ken