 If you could have access to some super high-end recording gear to record vocals, what would that be? Most people cannot afford to have this stuff for their home recording studios. And for most people, that’s OK.
In 2017, there are tons of affordable mics and interfaces that get you so close to the high-end stuff that it’s good enough.
But if you DID have the budget for the high-end gear, there’d be no reason no to get some, right? I’ve been saying something similar to this to my wife for years:-P.
Anyway, Booby Oswinski just published an interview that mentioned – among other things – the gear used to record Queen and ELO, two of my favorite bands ever!
In thearticle, an interview with the engineer called Mack goes into some interesting techniques and specific (high-end) gear he used to record Queen and ELO, as well as a few other famous bands.
I have long been a particular fan of the way both of these bands sound – particularly their stellar vocal harmonies. So I was very interested to hear about the gear used to get that sound.
For vocals, he said he normally uses U47s. By that, he is referring to the Telefunken U47. But it seems like he is saying that he now uses a Neumann M 147 tube mic. As I mentioned in my post The Frank Sinatra Microphone, the M 147
For the preamp/converter, he says he uses “HD3C Millennia with the built-in Apogee converter. “I think he may have meant the Millennia HV-3C. I couldn’t find one with built-in converters. It must be a custom thing. But the kind of converter he is talking about is the type you can find in the Apogee Element thunderbolt interface.
About Jeff Lynne and ELO:
Interviewer: “The ELO stuff was always so squashed, even back then. But that’s Jeff Lynn’s sound, isn’t it.”
Mack: “Yeah, he always liked any compressor that was used set to “stun” and he still does that today. And he didn’t want any reverb or effects. You always had to sneak some stuff in to make it a little more roomy.”
The entire original post is here: http://bobbyowsinskiblog.com/2017/06/28/mack-recording-queen-elo/
Audio Normalization: What Is It And Should I Care?
 If you’ve heard the term “audio normalization,” or just anything like “you should normalize your audio?” you may well wonder “what the heck does that mean? Isn’t my audio normal? Do I have abnormal audio?” And you would be right to wonder that. Because the term is not really very self-explanatory. So what else is new in the audio recording world?
To answer the questions in the title – let’s take them one at a time, but in reverse order, because it’s easier that way:).
Should I Care What Audio Normalization Is?
Yes.
That was easy. Next.
What Is Audio Normalization?
You COULD just use the definition from Wikipedia here. But good luck with that. As is typical with audio terminology, that definition is super confusing.
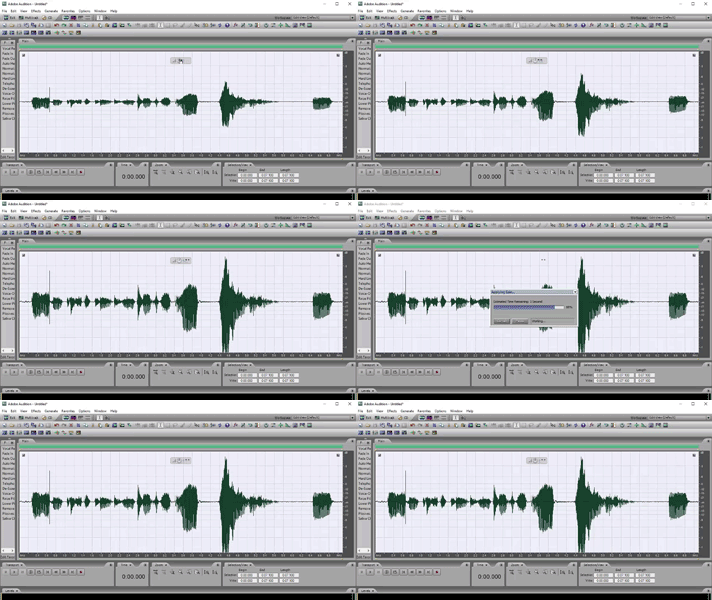
It’s actually pretty easy to understand and not really that easy to put into words. But I’ll try. When you “normalize” an audio waveform (the blobs and squiggles), you are simply turning up the volume. Honestly, that’s really it. The only question is “how much does it get turned up?”
The answer to THAT takes just a little tiny bit of explaining. First, let’s recall that with digital audio, there is a maximum volume level. If the audio is somehow pushed beyond that boundary, the audio gets really ugly because it distorts/clips.
Some Ways That Digital Audio Is Weird
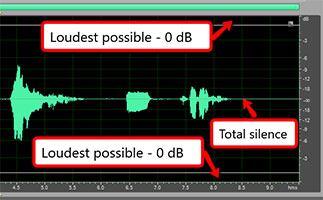
This maximum volume level I mentioned is at 0 decibels (abbreviated as “dB”), by the way. Digital audio is upside down. Zero is the maximum. Average levels for music are usually between around -13 decibels to -20 decibels, or “dB” for short. Really quiet levels are down at like -70 dB. As the audio gets quieter, it sinks deeper into the negative numbers.
Yeah, digital audio is weird. But as long as you buy into the fact that 0 dB is the loudest the audio can gt before clipping (distorting), you’ll know all you need to know.
So Ways All Audio Is Weird
In case you didn’t know this, sound/audio is caused by waves in the air. Those waves cause air molecules to vibrate back and forth. The way a microphone is able to pick up audio is that those “air waves” ripple across the surface of a flat thing inside the mic. That causes the flat thing to move back and forth (in the case of a dynamic mic) or to cause back-and-forth electrical pressure in the case of a condenser mic. For more detail on this, check out my post What Is the Difference Between Condenser and Dynamic Microphones?
Some What Is The Weird Part?
Audio waves show up in audio software in a weird sort of way. For instance, you might expect the quietest audio to be at the bottom and the loudest to be at the top. But that isn’t the way it works with audio.
Because of the fact that audio comes from waves – the back-and-forth motion of air molecules – the loudest parts of audio are shown at the top AND bottom, and absolute silence is in the middle. Since pictures make things easier, see Figure 1.
So rather than thinking of the maximum allowable volume level as a “ceiling,” which is what I was going to do, let’s think of it like a swim lane. And in this swim lane, BOTH edges are boundaries not to be crossed.
This also means that when looking for the loudest part of your audio, you have to look both up AND down. Admit it. That’s a little weird. As it happens, the loudest part of the audio in our example below is in the bottom part of the audio.
Normalization Math
OK, back to normalization. Let’s get back the the question of how much audio is turned up when it’s being normalized. The normalization effect in audio software will find whatever the loudest point in your recorded audio is. Once it knows the loudest bit of audio, it will turn that up to JUST under 0 dB (you can set this in the Normalize controls to be AT 0 dB or whatever level if you want). So the loudest part of your audio gets turned up to as loud as it can be before clipping.
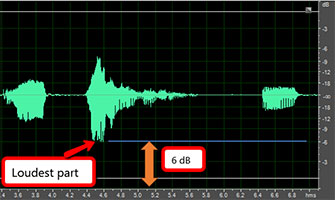
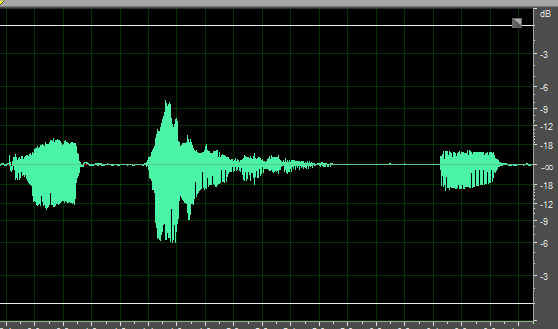
Let’s say the loudest part of your audio, which is a vocal recording in our example, is a part where you shout something. See Figure 2 for an example.
And let’s say that shout is measured at -6 dB. The normalization effect will do some math here.
It wants to turn up that shouted audio to 0 dB. So it needs to know the difference between how loud the shout is, and the loudest it could possibly be before distorting.
The simple math (well, that is if negative numbers didn’t freak you out too much) is that 0 minus -6 equals 6. So the difference is 6 dB.
Now that the software knows to turn up the loudest part of the audio by 6 dB, it then turns EVERYTHING up by that same amount.
Let’s look at a “before” picture of our example audio.
And here is what it looks like AFTER normalization.
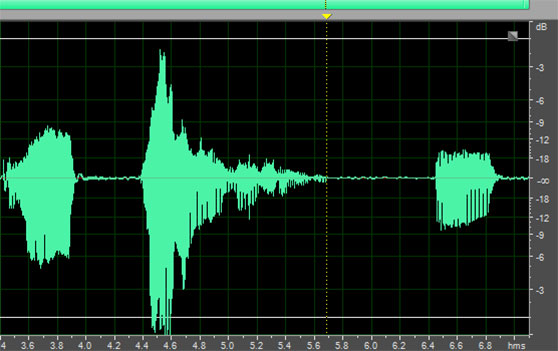
That’s It?
Yeah. That’s it. Remember I said that audio normalization was really just turning it up? I know it took a fair amount of explaining, but yeah. The only reason to normalize your audio is to make sure that it is loud enough to be heard. That could be for whatever reason you want.
Use With Caution
As I have preached again and again, noise is the enemy of good audio. Before you even normalize your audio, you’ll want to be sure you’ve gotten rid of (or prevented) as much noise as possible from being in your audio recording. See my post series on how to do that here: Improve The Quality Of The Audio You Record At Home.
The reason it’s so important is that by normalizing your audio, you are turning it up, as we have seen. But any noise that is present in your recording will ALSO get turned up by the same amount. So be very careful of that when using this tool. Audio normalization is powerful, and so can also be dangerous.
Google Doodle Is A Sequencer Synth With 4 Instruments
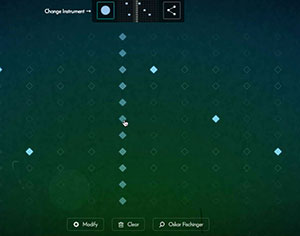 Today’s (June 22nd 2017) Google doodle is basically a sequencer, meaning there is a time grid that you can put musical notes onto that will play when the sequence comes to those notes.
The doodle is a fun musical toy. You get 4 instruments, one sounds like piano and the other three sound like bells of various sizes and shapes. And you get a large grid. You use your mouse to put a tick on any spot. Then a cursor moves left to right across the grid. As it reaches the spots where you’ve put a tick, it sounds.
You can make chords or melodies or both. Once you’ve putin some notes for one instrument sound, you can change the instrument. Your original notes aren’t visible anymore because the fresh grid allows you to put marks in the same note-time grid point. The original notes do continue to play though. So as they do, you place new notes/chords with the new instrument and both will play at the appropriate time (when the cursor reaches them).
Repeat the process for the 3rd and 4th instrument and you can create something pretty darned cool.
The doodle was to celebrate Oskar Fischinger’s 117th birthday.
Who was Oskar Fischinger? He was an artist. One of the things he loved to do was combine music with his art, making musical animations. He did not invent the sequencer:-P. It just so happens that using a synthesizer-type sequencer like this, you can create musical animations like Oskar Fischinger’s.
You can only play the synth on the normal Google page today (June 22nd, 2017). So go play. If you’re reading this after the 22nd, go here to check it out: https://www.google.com/doodles
If you want to read more about Oskar Fischinger, click here.
Voice Over Recording Equipment
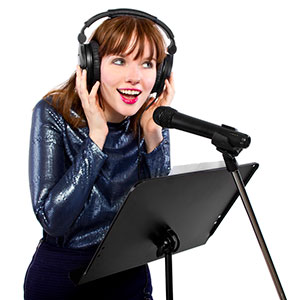 Voice over recording equipment is more powerful and more affordable than ever before in 2017. Unlike the needs for musicians, voice over actors need very little in order to produce professional sounding results from their voice recording studio right from home.
Before I start claiming that all you need is a mic and a computer (which is pretty much true), or that the mic can be cheap (also true), I should qualify something.
Time Versus Money
In general, the cheaper the microphone and/or interface, the longer it will take you to record professional sounding voice overs. It is possible. But you sort of trade time for money. And for some, that’s OK. They may have more time than money. Lots of people do.
I actually include “time” in my list of voice over recording equipment. The reason for this is that you CAN record decent quality sound from a mic costing about 50 bucks (what I consider the minimum). But the less expensive gear tends to also record noise.
It is definitely possible to fix most noise problems with software after your record your voice. But that takes time. Some noise removal takes quite a lot of time.
What Takes So Long?
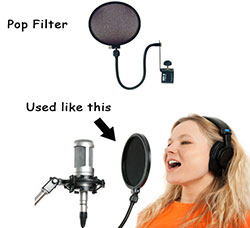
For instance, fixing p-pops (see our post How to Fix a “P-Pop” in Your Audio With Sound Editing Software for more on that) takes a lot more time to fix than to actually read the script you are recording. Removing saliva noises (see my post on that here How To Remove Saliva Noises From Voice Recordings) can take just as long. So if you are doing both, well you see where this is going.
I’ve now mentioned two bits of voice over recording equipment – time and a pop-filter. The pop filter will help prevent most of the p-popping, that bane of voice over recording. But I have never yet recorded a vocal where the filter prevented ALL p-pops. So you’ll want to know how to get rid of them after the fact, which is covered in the article linked above.
So What Are The Other Pieces Of Voice Over Recording Equipment You’ll Need?
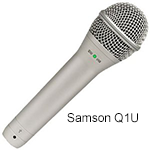
Earlier I mentioned a microphone. I also said I thought you’d need to spend at least $50 or so, minimum, in order to get into the realm of professional sounding audio. That is how much it costs for a USB mic called the Samson Q2U (or Q1U). [update: The Q2U, which is the latest version of the Q1U, now has BOTH an XLR output AND a USB. That’s huge news. I’ll be doing a review of this mic in the coming weeks. Watch this space.]
If you can afford a bit more, I recommend the kind of set-up used my most professionals. By that I mean a standard (non-USB) microphone and an audio interface. The interface is a box that plugs into a computer, usually via USB. You plug the microphone into the interface.
The KIND of mic I recommend as your first upgrade from a USB mic is a “large diaphragm condenser” microphone. There are terrific for vocals. A good entry-level large diaphragm mic is an Audio-Technica AT2020, which you can get for about $99.
As for the interface, a great option is a Focusrite Scarlett Solo. One of those will also run about $99. Then along with that, of course you’ll need accessories like a mike stand and cable, and headphones to allow you to listen very closely to your recording, making sure you have no little noises between words and phrases. Those can be hard to hear with just speakers alone.
Amazon has a studio kit that has all you need to get started. It has the Focusrite interface, microphone, mic cable and headphones. Here is a link to the Focusrite Scarlett Solo Studio Bundle. That bundle, plus the addition of a mic stand and pop-filter, will run about $256.
the last piece of your voice over recording studio puzzle is the software. Fortunately, the free Audacity is truly all you need to get started. You can learn how to use it in our course, the Newbies Guide To Audio Recording Awesomeness.
As you are able to afford it, you can easily upgrade this studio by trying out better and better mics. But you may not ever need to! You may find the studio bundle is all you need to sound as professional as necessary to become a pro.
Digital Audio Workstation: What Is A DAW Anyway?
 What is a DAW, you ask? It stands for Digital Audio Workstation. Yeah it is a term that gets thrown around a lot when talking about audio recording. But what does it really mean?
Okay, I said it stands for Digital Audio Workstation. But that isn’t a whole lot of help is it? Like so many other terms in the audio recording world, it feels a bit overly complex for what it is trying to describe.
Let’s make it easy. A digital audio workstation is audio recording software that allows you to record multiple tracks, which you then mix together to create a final audio file.
So Why Call It A DAW Rather Than Just “Recording Software?”
In general, there are two types of audio recording software – DAWs and audio editors. I say “in general,” because there is sometimes cross-over between the two. Some editors also have DAW (multi-track recording) functionality. And most DAWs have some editing capability. So things can get a little confusing.
So can we simplify things even more?
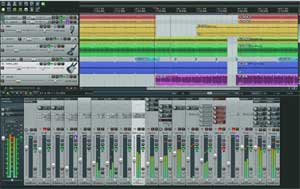
I think so. Let’s say we have a recording program. We want to record several tracks, like your voice first, on track one. Then maybe you want to put some music on track two. You might also want to add some sound effects on a track, some drums on another track, etc. When you’re done, you’ll have lots of tracks.
What do you do with all the tracks? Adjust all the volumes so you can hear everything together. this is called “mixing.” You might also want to pan each track – some to the left, some to the right. And then you might want to add some effects, like reverb, etc.
When all that is done, you export (the DAW term is usually “render” or “mix down”) the final result into one single audio file.
All the above is done using a DAW – lots of different actions to help you create a final piece of audio.
If That’s A DAW, What Is an Audio Editor?
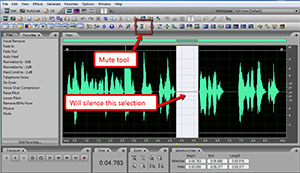
In a digital audio workstation, you work with lots of different audio items and mix them together. An audio editor works on one file at a time (remember, we’re making things simple here). For example, if you have a voice recording, you open that in an editor. You do all sorts of things to that one file, such as zero in on different areas of the file and adjust the volume up or down. You can slice out bits of audio, speed it up or slow it down, remove noise, add reverb, and dozens of other things.
Eventually, you get the file sounding just the way you want and save/export the edited file.
The editor allows you to quickly do a lot of things to a single audio file, whereas the DAW mixes lots of different audio files together to create something new. That’s not an exact definition, but it is a useful description.
The Tasks Often Overlap
Sometimes a DAW can do editing tasks, and editors can do multitrack/DAW tasks. So the line can be pretty blurry sometimes. Adobe Audition is an example of software that actually does both things. There is a toggle control that allows you to work in MultiTrack mode. When you do that, you are basically using Audition as a DAW. Then you can switch to Edit Mode for editing. I use Audition as my primary editor and never use its DAW capabilities.
Why Even Use An Editor?
One main reason why I exit my DAW (Reaper is my DAW of choice) to use and editor is that I often prefer working on one audio item/track/channel at once. It can get confusing and cluttered to work with multiple tracks. Also, editors don’t slice up audio waveforms into multiple pieces in a track like DAWs do. So again, you can have a less fractured experience when working with an editor.
Here is just one example. Let’s say that in a DAW, I select 5 seconds of audio that I would like to edit. Maybe there is a p-pop there, and I want to apply an EQ effect to correct that. I CAN do this in a DAW. But I would first have to place a slice before and after my p-pop, making that 5-second selection a separate audio item. That’s the only way to apply an effect to JUST a small section. Otherwise, the effect would apply to the entire track or audio file.
So I would end up with 3 audio items in my track after just that one edit – the section before the p-pop, the p-pop selection, and the audio after it. Now imagine I had 10 p-pops to fix in this track. I’d have w whole bunch of sliced up bits of audio in my track.
In an editor, you highlight a section, apply the effect and it’s done. All the audio is still intact, no matter how many times you do an edit.
What Are Some Examples Of DAWs and Editors?
Remember that I said most digital audio workstations do some editing, and vice versa? Keep that in mind as I present some examples of DAWs and editors here.
Popular DAWs
- Avid Pro Tools – The industry standard
- Reaper
- Cakewalk by Bandlab
- Logic Pro
- Cubase
- Garage Band
Popular Editors
There are lots of programs I could add to each list, but those are some of the biggies.
I hope that helps to answer the question “what is a DAW?”
In my course – The Newbies Guide To Audio Recording Awesomeness, I teach how to use Audacity (an editor with some DAW capabilities which is free) and Reaper (a DAW which only costs $60) to create professional quality audio at home.
If you’d like to get started with the step-by-step using an audio editor AND a DAW, check out the free videos below:
