 In our recent article about compression in audio recording, you learned what compression actually means. There’s even a video (but don’t pay attention to the messy book case, which has been cleaned up since then)! Basically it is a way to even out the loudness levels in your audio. This is sort of like using a trash compactor on your audio waveform, which then allows you to turn it up louder before the loudest bit of audio hits the limit for maximum volume.
But why would you want to do this? Is having louder audio always a good thing? Well, that depends on who you ask. And you definitely don’t want to over-use compression because too much tends to give you odd audio weirdness like pumping or extra sibilance. But here is an article that will show you some ways to use a compressor for extra punch and presence in your audio. The article focuses a bit more on music than voice over recording, but the concepts are the same.
Read the article here: http://www.prosoundweb.com/article/guerrilla_recording_compression/
Auto-Tune – Any Tool Can Be Abused
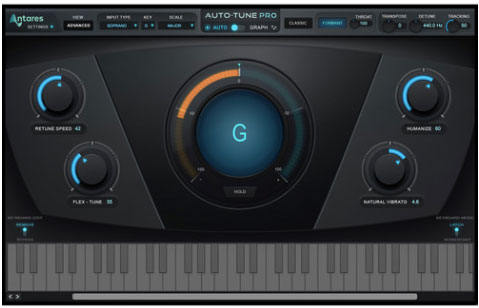 Has anyone else gotten a little tired of singers on the radio sounding so pitch-perfect that it sounds more like a machine than a human? Me too. It has to do with the over-use and abuse (in my mind) of pith corrections tools, such as Melodyne and Auto-Tune.
Now let me go on record right now as a fan of Auto-Tune. It’s a tool. When a singer puts out a recording, I believe they have a responsibility to ensure the performance is good.
For a singer, that means in tune, on-key, on pitch, however you want to describe it. When you sing live, if you’re good enough to be a pro, you should be good, yes. But humans will inevitably be imperfect and may even hit one or two downright off-key notes here and there. But when it’s live, it’s fleeting.
As an audience member you may or may not even notice. If you do, you’ll probably forget it 5 seconds later. Not true for recordings! When fans are listening to the same performance over and over again, those one or two wonky notes will grate on them.
Before there was Auto-Tune, it was common practice to have a singer sing a track 3 or more times so the engineer could “comp” (short for composite) one vocal track made up of the best pieces from all three tracks. Is this any more genuine than fixing it after the fact with tuning software? My answer is that if the singer can bring it live, then no, it is no more genuine to use Auto-Tune than it is to comp a track.
In fact, I have found that if a singer knows things can be tightened up after the fact, they are more likely to sing without worry or stress. Studio singing often makes singers too careful and they don’t give their best performance. So the very idea of Auto-Tune can actually help the singer sing better before a single note has been “fixed!”
However, what seems to be happening is that engineers and producers are over-doing the Auto-Tune thing. They wash every note through a program that snaps all the notes to a pitch grid. It results in an unnatural sounding vocal. I think that is wrong. It may take longer, but I firmly believe that tuning should only be applied to specific (and infrequent if the singer is decent) notes that missed the mark. That way it sounds like an actual human sang the note, not a machine.
It may take longer, but I firmly believe that tuning should only be applied to specific (and infrequent if the singer is decent) notes that missed the mark. That way it sounds like an actual human sang the note, not a machine.
The other use of Auto-Tune lately is as an effect, a la T-Pain or the Songify-type applications made popular by things like Auto-Tune The News. This is a totally different thing. It isn’t trying to make you think someone can sing better than they can. It’s just trying to create a funky sound to add creativity or something different, although as common as it has become, I don’t think “different” is the right word. I say go for it when it comes to that. It allows people to get funky and be creative.
So there you have it. Auto-Tune is a tool like any other. I love what it can do for singers. But as with any other tool, in the wrong hands it can be ugly.
Using a Click Track For Recording Music
 The click track is a tool in audio recording, especially for recording music, that allows a person to hear the tempo or timing information of project. For example, in Reaper (though this is pretty common for all recording software), if you want to listen to a click track while recording, you simply click (no pun intended) the little button in the tool bar that looks like a metronome.
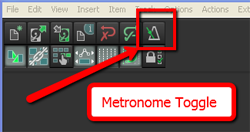 This will then play through the speakers and headphones when in Record or Play mode.
Yes, I see your hands up. I know what you’re going to ask. Yes, you absolutely must use headphones, with the speakers turned OFF (or muted) when recording to a click track. Also, you’ll want to use closed-back headphones if you can. Otherwise the sound of the click track will leak out of the headphones and straight into the mic while you’re recording.
Why even use a metronome/click track in the first place? Musicians recorded without one for decades. True. And I sometimes do record music without one. But most of the time I wish I hadn’t foregone the click-clack (actually it sounds more like “cleek-clock” to me, but I digress). This is due to the fact that I often wish to remove or add entire sections of a song after it is recorded. I also frequently copy and paste sections and maybe loop them. If I hadn’t recorded to a click track, these different bits and pieces of the song would all be at slightly different tempos, and trying to get them to work and play well together is murder. So if at all possible, I record music to a click.
Some people say they cannot record to a click because of how it sounds. Typically, the default sound of a metronome in recording software is sort of like a real metronome, only more annoying. It usually sounds like somebody is tapping a salad mixing bowl with a chop-stick. Not only is it irritating and sometimes hard to “groove” to, but the frequencies of the default click sounds are perfectly designed to explode out of headphones and stampede for the microphone, even closed-back ones sometimes.
So what to do? One solution is to replace the sound of the click with drum sounds, which are much more natural and musical sounding. There are two ways to do this.
First, in the Metronome Options (right-click on the Metronome button), you can replace the primary (downbeat) and secondary beat sounds with any audio file on your computer. If you have a drum, you could record a couple of hits and use those files. Or you can use any drum-hit sample you may have on your computer.
 The second option is to not use the metronome at all. That’s what I do. You simply create a new track (ctrl-T), change the Input to MIDI and insert a virtual instrument drum program using the FX button. Then simply record a measure or two of drum hits. I usually use a kick, hi-hat and snare. Edit the MIDI file (double-click on the item in the track) to make sure your hits are on the right beats. Then trim the MIDI item to make sure it is exactly one measure long and starts exactly on beat #1. Then all you have to do is drag the right edge of the MIDI item to the right (this loops it) for the length of the song.
When you’re done recording, you can simply delete the MIDI track if you want.
The reason this works is that both the metronome and any MIDI items in your project will automatically correspond to your project time (4/4, 3/4 etc.) and tempo (in beats per minute – BPM), which you set in Project Settings in Reaper.
So here are two ways to record you song to the right beat, and have it STAY on that beat all the way through. It’s definitely faster to just use the Metronome tool and its default clip-clop (or more like “cleep-clope” – are you getting the idea that I don’t like this sound?) sound. It doesn’t require you to create any tracks or deal with virtual instrument plug-ins, etc. On the other hand, with a little extra time spent up front, you can have a more natural and musical sound to keep time to.
By the way, our newest recording tutorial course – The Newbies Guide to Audio Recording Awesomeness 2: Pro Recording with Reaper – walks you step-by-step through this and many other awesome Reaper tips. To find out more about those Reaper tutorial videos, including taking a peek inside every lesson, CLICK HERE.
Happy pleep-plopping!
Ken
Do You Know a PA From a Distributed Power System?
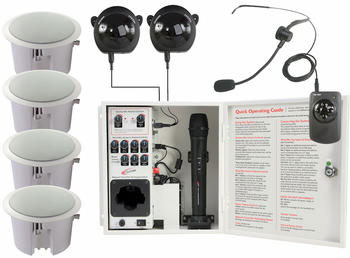 Entering into the live sound realm for a bit – do you know the difference between a PA and a distributed power system? You’ve probably heard of a PA (public address) system system before. These are what live bands use, as well as even coordinators, etc. It’s usually heavy box (mixer and amplifier combined) with lots of holes and knobs on it, along with two heavy speakers. You plug a microphone or two into the “input” holes, and two cables into the “output” holes on the heavy box. Finally you plug the other end of each cable into a speaker. You plug the power cable on the box into a wall, flip the “on” switch on the big box, and presto! You’re ready to talk or sing into a microphone and have it be heard by everyone in the room.
PA systems are usually sort of self-contained, the speakers and amplifier going together as set. So the electronics are well suited for each of the components. Plus you only have (usually) 2 speakers on one system.
A distributed power system is what is commonly used in super markets, hotels, office intercoms, etc. The main difference between a PA and a distributed power system is that the latter has special electronics built in to the speakers, like transformers, and special amplifiers are used to power the speakers properly. The speakers’ onboard electronics distribute the power from the amplifier evenly and safely. That allows several speakers to be chained together with a minimum of worry that any of them will “blow.”
Click here for the full article on distributed power systems from B&H.
Guitar Recordings For That Thing You Do Cover – Line 6 POD Farm
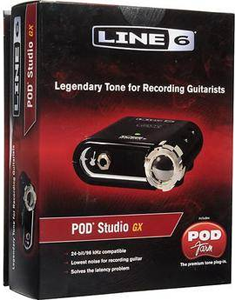 After putting up the audio and then the video for our cover recording of That Thing You Do, which are in the post Cover of “That Thing You Do” – Record a Rock Song on Your Computer, I have been asked numerous times about how I recorded the guitar parts. Did I use amps? If so, what amps did I use, and how did I mic them? The answer to whether or not I used an amp is “nope.” At least I didn’t use a physical guitar amplifier. It was all virtual amps from s software program called Pod Farm by Line 6. I used the hardware/software combination called the POD Studio GX.
All you do is hook up the little interface box like the one on the box to the left, to your computer via USB. Then you install the POD Farm software that comes with it, and you have access to a large variety of different guitar and bass amplifier models.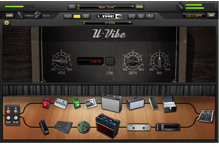 See the picture on the right for an example. When you select an amplifier model, POD Farm loads a picture of that amplifier, along with the controls for it and a stomp box effects chain into the screen. Line 6 describes the selection as containing and arsenal of vintage and modern amps, cabs, studio-standard effects, classic stompboxes and preamps.
So the way I used POD Farm to record the cover of That Thing You Do was to plug my guitar (a Carvin DC200) into the POD Studio interface box, and then launch POD Farm. In order to get that jangly beatle-esque sound, I selected the 1967 Class A-30 Top Boost as my amplifier, and a 2×12 1967 Class A-30 as the cab model.
 So how did I know to choose that amp and cab combination? The most common way to do it is to just experiment with all the different choices of guitar sounds you have available to you in POD Farm. But beware this method. If you’re anything like me you’ll spend all kinds of time playing with all the different sounds, and before you know it, you’ve blown 2 hours with a silly grin on your face. At least that is how my wife described my experience.
But ultimately I found the right tone by going to another Line 6 site called GuitarPort On-line, or GPO for short. This site, www.guitarport.com is pretty awesome. Not only do they have hundreds of lessons and guitar tabs for tons of popular songs, they also have performances for these songs using POD Farm tones, and links to download the exact tones used in their recordings right onto your computer where you can load them up in POD Farm. One little caveat here is that in order to listen to the performances and download the tones, you’ll need a version of POD Farm’s predecessor, called GearBox, which is free for download here: http://line6.com/software/. Just select “Gearbox” from the “all software” drop-down menu. NOTE: The link to download Gearbox directly from the GuitarPort site is not working as of Feb 6th, 2012. You definitely have to get it from the Line 6 link above.
Anyway, on the GuitarPort site, I found that they had a lesson/recording of All My Lovin’ by the Beatles. So I downloaded the tone for that with GearBox and then loaded up in POD Farm. Presto! Instant jangly 60s guitar sound. Very cool indeed.
Since I was recording in Reaper software, I set the audio device to the POD Studio interface, loaded up my All My Lovin’ tone pushed the “record” button, and simply played the guitar. I did that for tree guitar tracks in Reaper, one for the guitar on the left, one for the guitar on the right (the one that plays the little run-riff on the first parts of the verses), and one for the lead guitar.
Next I did the same basic (no pun intended) thing with the bass guitar. I plugged my Samick bass into the POD Studio interface, dialed up the Brit Pop 101 bass sound in POD Farm and did the same thing as with the guitars to create a bass track.
So that is how the guitars and bass were recorded for the That Thing You Do cover. I guarantee that if you are a guitar player, you will truly dig the Line 6 POD Farm, which now allows you to use any ASIO interface. That means you don’t have to have a Line 6 interface anymore to use the software, though they still recommend that you do. Plus, the interface boxes all come with POD Farm already bundled for you convenience.
So get yourself some POD Farm, but be warned that it can be habit-forming.
Cheers!
Ken