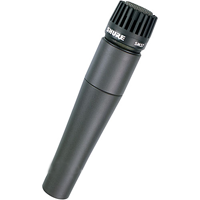
Ah yes, the venerable and ubiquitous Shure SM57. These are veterans of the stage and studio and have always, it seems to me, been a mic you could get for just around a hundred bucks. But these days everyone will say that recording is all about condenser mics, not dynamic mics (the SM57 is a dynamic mic). Well, that isn’t really true. Dynamic mics have their place. But still, some folks will turn their noses up when the SM57 comes into the conversation.
However, there are still really good reasons for having one or two of these at your disposal. Here is an article that spells out three of those reasons:
http://therecordingrevolution.com/2012/03/19/3-reasons-to-own-a-shure-sm-57-microphone/
The New Shure Open-Back Headphones
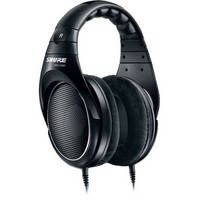
 Shure, the company known primarily for their excellent microphones, made a pretty big splash in 2010 when they released some studio headphones (the SRH440 and SRH840). But these were closed-back headphones, which are a type needed by folks when recording in the studio, mainly so that the sound coming into their headphones doesn’t get picked up by the mics, as happens with open-back cans. The closed-back kind can also help isolate the listener from outside noise. But the open-back design has a big advantage in that it allows sound to move around in the air and allows the driver to move with less restriction, creating a better and usually more accurate playback.
The new Shure SRH 1440 is the open-back kind. They are also “circumaural,” which means that they go on over and around your ears as opposed to the kind that sort of smash your ears into the side of your head. This makes them much more comfortable. Anyone who has spent a few hours with the other kind on their noggins can attest to how sore your ears can get. And pain is just not conducive to long hours in the studio. Bottom line – these things are really comfy.
So what makes these so special?
They are deadly accurate, which means you can hear everything, even if it isn’t something that should be heard. This is a good thing for headphones in the studio. You don’t want to be lulled into a false sense of security by headphones that make audio sound better than it really is because the first time you hear your mixes somewhere else, like in the car, or on a CD player, it might sound really awful. What you need is the truth. And accurate headphones like the SRH1440 can give you that.
The reason this is such a big deal, especially now, is that so many of us record and mix in less-than-ideal rooms, usually spare bedrooms. We do the best we can to mix our audio accurately but poor listening rooms will always impart something to the sound that makes us react by cutting or boosting the wrong frequencies, or panning incorrectly. It might then sound good in that room, but as soon as that room is no longer imparting it’s two cents to the sound, like when we play it on a friend’s stereo, we usually find the mix doesn’t sound good anymore. The mix is not “portable.”
Then there is the age-old advice that we should never mix exclusively with headphones because they lie to us, or they lie MORE than the monitor speakers in our bad rooms. The logic behind that is that it is more natural to hear audio through the air.
So if we take it as given that we don’t have ideal spaces to listen critically, and loudspeakers, even though they play through the air, will still be too affected by room dynamics, we are really only left with headphones as the next best choice. And because the SRH1440 headphones are so accurate and allow the sound to move in the air due to their open-back design, we can go a long way toward overcoming bad rooms and maybe bad speakers to create great mixes by using headphones like these.
The SRH1440s cost $399, which may sound like a lot, but consider this. A decent pair of monitor speakers will start out at about $400 or $500 per speaker. And then you still probably have a bad listening room to put them in. So compared to $800-$1,000 to get better mixes, the cost of these headphones is an excellent investment in your audio.
Happy mixing!
What is Re-Amping?
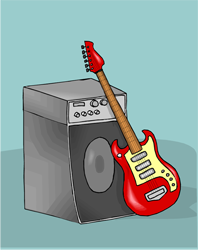
 Have you ever heard of re-amping? If you play electric guitar or bass, you’re probably used to playing them through an amplifier. And while recording your electric guitar by simply setting up a microphone (such as a Shure SM57 for example) in front of the amp is the typical way to do it, there is a cool trick that can allow you to be more flexible with guitar tones, as well as free you up for experimenting. That trick is called re-amping.
Basically what that means is that you record your electric guitar clean, with no amp, usually through a DI (direct inject, though Wikipedia says: “variously claimed to stand for direct input, direct injection or direct interface) box. If you really need that amped sound to even play the part like I do, you can use a splitter and have one cable go to the amp and the other to a separate track through the DI box. Then you can send it (the clean guitar part) to an amplifier after it is recorded.
For example let’s say you do it the old fashioned way and lay down an electric guitar track by recording the output of the amp. But later you realize you didn’t get the right sound from the amp, or you want to try a different setting. At that point you would have to record the part again with that different setting. But with re-amping, you have a clean signal already recorded and all you have to do is play back that part while sending it (routing it out of the computer or recorder) through a cable that you plug into the guitar amp. That way you can pick whatever amp sound and settings you like and see what that sounds like. If you don’t like that sound, simply dial up another sound and do it again.
I’ve heard of folks doing all kinds of weird stuff when re-amping, like putting the amp into a bathtub. Hey, whatever works to get that perfect, or even whacky, sound. Once the clean guitar part is recorded you don’t have to actually play the part again. Just keep letting the recording program (or recorder – this technique started well before computer recording) “play” the part while you experiment with different amp settings and locations. Heck, you don’t even need to use a guitar amp. Try plugging the signal into a PA, an effects box, a bass amp, etc. It’s all limited by your imagination at this point.
Here is an article on re-amping techniques that should give you even more ideas and “how-tos” – http://en.audiofanzine.com/recording-mixing/editorial/articles/a-guide-to-re-amping-techniques.html
Digital Performer 8 Will Work on Windows
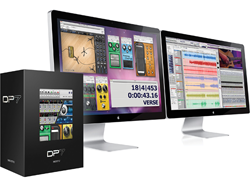
 Mark of the Unicorn (MOTU) Digital Performer, one of the top audio recording workstation software programs in the industry, has traditionally only been available for the Mac. But the next incarnation, Digital Performer 8, will be available for Windows also, both 32 and 64-bit versions. This is fabulous news for PC owners who have wanted to get in on the MOTU magic.
DP 8 was announced at the NAMM trade show (the National Association of Music Merchants) in Januar, 2012. The release date was said to be “Spring.” Well the blue bonnets are in full bloom here in Texas and as of today (March 21st), it is not available to the general public yet. Sigh. Well, it’s available now! Click Here to find out more or buy your own copy!
Features
There are tons of new features in DP8, including a new thing called Punch Guard, which records 4 seconds of audio both before and after you hit the record button. This is designed to make you punch-ins fit in without cutting off any of the audio either of the already-recorded stuff, or of the thing you’re punching in.
In addition, there are 15 new plug-ins including guitar amp models, pedals, multi-band EQ, a kick-drum enhancer, and lots more. And of course, it still has the awesome editing, notation, and music-for-film tools that have set DP apart from other DAWs.
Keep your channel tuned to this space for updates on when Digital Performer 8 will be available. DP8 is here now, and for $499 it can be yours. Click Here to get it. If you already have an earlier version, look for special upgrade pricing.
Yay for multi-platform audio recording software!
Ken
Buss Compression Tips
 Now that you have had a bit of a primer on what a mixer bus (or “buss”) is (see the last post, What Is a Buss in Audio Recording?, I thought it would be a good time to tell you about a good article on using buss compression. Since most often the output of a buss is going to contain signal from multiple sources, you have to think about compression a bit differently than you do when simply applying compression to a single track with a single sound source like a voice, guitar, piano, bass, etc. This article from Audio Fanzine gives some tips and suggestions for settings when using buss compression.
Read the full article here: http://en.audiofanzine.com/recording-mixing/editorial/articles/buss-compression.html