 Once you’ve mixed enough songs, you start to develop automatic habits that can be real time-savers. For example, You might always arrange the tracks so that the guitars are on tracks 1 and 2, the bass on track 3 and the lead vocal always on track 4, etc. You might then also have automatic habits like immediately reaching for certain effects (EQ, compression and so on) on your tracks and even start dialing up settings for those effects before you’ve really even listened to the mix.
But it might be prudent to stop all that and just listen first before you do anything. Take stock of what you’ve got when everything is raw and do more listening before you do any acting. This is good advice that I will be taking for my next mix since I read Graham Cochrane’s article this morning – Stop And Think Before You Mix.
Check out his article here: http://therecordingrevolution.com/2012/11/12/stop-and-think-before-you-mix/
MIDI Step Sequencer For iPad
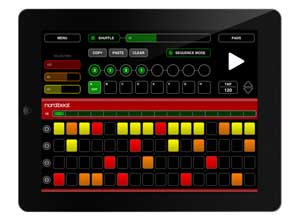 There are so many cool music making and recording apps for the iPad that it’s hard to keep up with them all. Here is a recent one that is a 4-track MIDI sequencer called the Nord Beat CoreMIDI Step Sequencer. If you don’t know what sequencer does – well, it’s sort of like the drum machines of old (though the sounds a sequencer uses don’t have to be drums). There is a tempo and time signature you can assign to a box (in this case, an iPad app). Then there are buttons that correspond to up to 16 beats in one “sequence.” You can assign a sound – usually a drum hit – to each button to create a pattern over the sequence. Then you can build songs by stitching together a bunch of sequences.
Anyway, here is some info on the Nord Beat: http://en.audiofanzine.com/virtual-instrument-iphone-ipod-touch-ipad/clavia/nord-beat/news/a.play,n.14074.html
Two New Studio Quality iPad Microphones
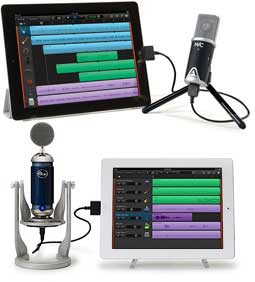 Lately there have been a lot of audio devices for iOS – meaning for iPad, iPhone and iPod Touch. So far it has been difficult to get really great audio recording using an iOS microphone (like the IK Multimedia iRig Mic – see our review of that here –
Review of IK Multimedia’s iRig Microphone For iPhone, iPad, and iPod Touch) or iOS mic interface/preamp (such as the IK Multimedia iRig PRE). both of which attach to the iPad via the mic/headphone jack. But even though the quality of those is pretty good, the interface via the mic/headphone jack limits the audio quality.
Enter two notable microphones for iOS, the Blue Spark Digital, and the Apogee Electronics MiC. Both of these microphones use the Apple 30-pin connector as opposed to the mic/headphone jack, and both double as USB mics that you can use with both Mac and/or PC (the Blue works with both but the Apogee only mentions working with Mac). And of course, the names Blue and Apogee Electronics are well-respected manufacturers of excellent quality audio gear. I read an article yesterday that proclaimed the Blue Spark Digital to be the “first studio grade condenser mic available for iPad.” While it may have been first, it is no longer the “only” mic in that category with the availability of the Apogee MiC.
Blue Spark Digital
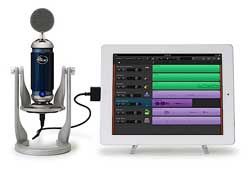
The Blue Spark Digital microphone is a USB/iOS version of Blue’s solid state Spark cardioid condenser mic, sharing all the top-notch components. It also has a headphone jack on the mic. In addition, it has a feature called the Focus control, a button that offers two sonic modes. Normal mode is for increased low frequency sensitivity, and Focus mode is for “even greater clarity and detail.” It’s perfect for recording vocals and acoustic instruments. It comes with a desk stand with integrated shock mount, a Y-cable with USB, iPad and headphone connectors, and Blue’s Cloud Production bundle for audio back-up and sharing on-line. $199.99
Apogee Electronics MiC
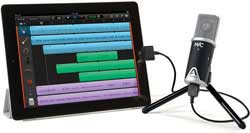
The Apogee MiC, is also designed primarily for vocals and acoustic instruments and, like the Blue, also has a cardioid pickup pattern. Also as with the Blue, the Apogee has a control knob for input level adjustment as well as a meter to monitor input signal levels. It comes with a tripod desk stand, an iOS connection cable and a Mac connection cable.
Both mics sound fantastic and as far as I know, the highest quality mics available for recording on an iPad, iPhone, or iPod touch. And don’t forget that both can also be used with a computer via USB (though the Apogee can only be used with a Mac). $199.
Audio for Video Tutorials By Sennheiser
 One of the biggest opportunities for improvement in audio almost across the board – amateur to professional videos – is the audio quality on videos. For some reason it just seems to get ignored. I preach from this soapbox a lot. See my post Audio For Videos: Do Not Let Bad Sound Ruin Great Video. Well, Sennheiser, maker of excellent quality microphones and headphones (see my review of the Sennheiser MKH 416 shotgum mic – my “desert island” mic), has been running a series of video tutorials on getting good audio quality on videos. See the first video below, where the talk about shogun mics like the MKH 416, as well as other kinds of mics good for video production.
Working with Multiple Takes In Logic Pro 9 and Reaper
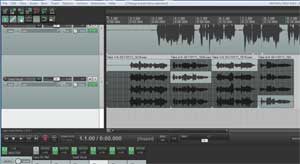
I found a great little tutorial from AudioTuts+ about editing all your takes at once using Apple’s Logic Pro 9 recording and mixing software. This tutorial reminded me that you can also do the same thing in Reaper.
One of the many differences between Apple’s Garage Band recording software, and Logic Pro is the ability to record multiple “takes” of something. That means that you can set a region in your song to loop while you record take after take of the same part. This is awesome for particularly difficult vocal or instrument parts. Each time the region loops, a take gets recorded and saved. When you’ve recorded as many takes as you feel you need to, every take is visible on the track. You can even divide that audio region in segments and pick the best performances in each segment to build the perfect part.
The tutorial I mentioned will show you how to apply certain edits so that they apply to every take simultaneously.
By the way, this exact thing – recording multiple takes and having them all visible on the same track afterward – is a feature of Reaper recording software as well (which is available for PC and Mac). You simply record your first take of a track, rewind to the beginning and record your next take. You can also use the loop function like I described above for Logic Pro. Just highlight your region (you want to make sure to put enough time into the segment as a lead-in for each time it loops), click the “Toggle Repeat [R] button,” and start recording take after take as above. You can also composite (build from bits and pieces from all the takes) a perfect take from region segments just like in Logic Pro. To view all the takes in one track, make sure to hit Ctrl L or choose Options, Show all takes in lanes (when room).
We have a 19-video tutorial course on audio recording with Reaper – The Newbies Guide To Audio Recording Awesomeness 2: Pro Recording With Reaper for $47.
The Logic Pro tutorial can be found here: http://audio.tutsplus.com/tutorials/mixing-mastering/how-to-edit-all-your-takes-at-once-in-logic-pro-9/