Even though Reaper rivals the much more expensive digital audio workstation, Pro Tools, making the leap from Pro Tools to Reaper was not as simple as it might sound. Long-time Pro Tools users often get used to using the proprietary plugins (effects and virtual instruments). Pro Tools used a format called RTAS exclusively for most of its existence. But some plugin providers are now creating VST (Windows) and AU (Mac) versions of their plugins, which is awesome because Reaper uses those formats.
One example of a plugin provider who has done this is AIR Music Technology with their AIR Creative FX Collection. Below is a video from the Reaper Blog reviewing these effects in Reaper:
Archives for March 2016
Glue Effect Of Reverb
Are you familiar with the “glue effect” of reverb? Basically, ithe more or less signal you send from each of the tracks towards this bus, the more coherent the overall mix should sound. Did you get it? Do you want to know more about it? Here’s an article by Audio Fanzine and explains more about this glue effect.
Using Easy Drum Pattern Variations
Here’s a video tutorial from The Reaper Blog which talks about how to use the nudge function in FXpansion Geist or REAPERs MIDI editor actions to quickly and easily make multiple pattern variations. Here is the link to the video.
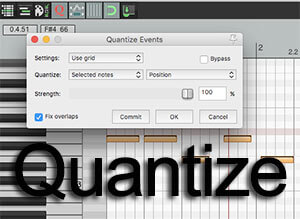
What Does Quantize Mean In MIDI?
 When using MIDI (for a review of what MIDI is, see our article MIDI Recording – What Is It And Why Is It Awesome?), one of the coolest things you can do is edit the timing of each note AFTER it is already recorded, which is super hard to do with recorded audio.
You can even tell every note in a song to “snap” to the exact beat the song. So the answer to the question, “what does quantize mean in MIDI?” is automatically shifting every note in a MIDI file to align with a timing grid. That’s my own definition, but that’s basically what it means.
So for instance, let’s say you used a MIDI keyboard to play a drum part for a song. If you are ever ahead or behind the beat when you record, it’s OK. You can just go to the MIDI notes in the MIDI editor of whatever program you’re using (and yes, you can do this in Reaper:)), select all the notes, and tell them to shift left or right to get on the proper beat.
There are always settings you can choose when quantizing MIDI notes. For example, if you make each note absolutely perfectly on the beat of the song, it might sound a bit artificial and machine-like. That’s because we’re used to hearing music played by humans. And humans – even the most talented humans – can never be mathematically perfect in music. So slight timing variations OFF the beat of a song can actually sound better to us – more natural. That’s why there is usually a “Humanize” setting in quantizing tools.
Below is an AudiotTuts/EnvatoTuts lesson on quantizing MIDI using Cubase software. But like I said, the lessons will be applicable to just about any program with a MIDI editor.
See the Cubase quantizing article here: http://music.tutsplus.com/tutorials/quantize-a-brief-introduction–cms-25428
Rode Wireless Kit For Better Audio On Your Videos
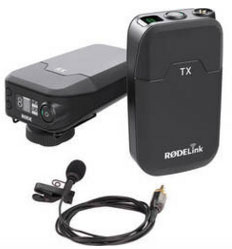
 Here is a wireless lavalier (lapel mic) kit by Rode to help you get better audio on your videos. I harp a lot on the prevalence of bad sounding audio that so many people seem to have on their videos. It isn’t that hard or expensive to get awesome quality on videos. See my post, How To Get Good Audio On Your Videos on ways to do this. There’s even a video of my talking head with both good and bad audio so you can hear the effect of some of the solutions. Anyway…
One of the ways I mention for improving the quality of the audio on your videos is to use a lavalier microphone, also known as a lapel microphone. This gets the mic close to your mouth, which is the key to better audio. And wireless kits like the RodeLink Wireless Filmmaker’s Kit allow the speaker to move around the room without worrying about wandering too far away from the mic. Plus they are more convenient than setting up a boom mic stand with a shotgun mic.
I’ve used a fairly cheap wireless lav kit called the Azden WMS-Pro, which runs only $149.70. It’s terrific for people like me who don’t shoot video more than few times a month. But it isn’t very rugged. I’d want something better if I were shooting video in the field and doing it super often. The RodeLink Wireless kit is $394, but offers more features and can stand up better to everyday use.
DSLR Video Shooter did a review – video and article – on the RodeLink kit, which you can read (and watch) all about here: http://dslrvideoshooter.com/rodelink-wireless-filmmakers-kit-review/
So here is yet another way to sound professional AND look professional by making sure you have better audio on your videos.