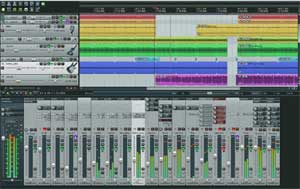
 Propellerhead Reason was originally program that focused only on making music by providing the user with a virtual “rack.” Into this rack, you could put virtual instruments, effects, and mixers. It has been around since 2000, and up until last year (2012) it was a MIDI only program, meaning you could not record audio with it. That relegated it to the realm of a support program, requiring you to sort of attach it to a real recording program like Reaper or Pro Tools.
Recently though – with the release of version 6 – Reason became a a real stand-alone digital audio workstation (DAW), being given the ability to record audio.
Though you can record audio into Reason with any audio interface, you might want to check out Propellerhead’s own Balance, which has a few very interesting and awesome features. One that sounds like something I’d like to see on more interface units is something called Clip Safe. When activated, Clip Safe records two versions of your audio – one as normal, and another that has a limiter applied automatically to prevent any extra loud audio from distorting (clipping). Very cool.
One limitation with Reason, which truly holds it back from competing better with the big-boy DAWs, is its lack of support of VST. Propellerhead has such a large collection of effects and instruments already, that it might not be a problem for some. But most users feel severely hampered by the inability to easily use VST instruments and effects (I say “easily” because it is still possible to use them, but you have to use a thing called “rewire” to do it. So be warned.
Here is a link to a short tutorial on how to record audio with Reason:
http://www.musictech.net/2013/09/reason-power-recording-1/
Archives for September 2013
Use Ducking For Electronic Dance Music Effect
 I originally wrote this article in September of last year – before I saw the movie, “Now You See Me.” I’m updating it because we just watched that excellent movie, and the effect I describe below for using ducking in electronic music can be clearly heard in the soundtrack at the end of the movie, during the credits. On the soundtrack album, the song is track number 8, “Now You See Me – Robert DeLong Remix.” It’s an electronic variation of the “Now You See Me” theme composed by Brian Tyler. Take a listen at the iTunes store here.
Ducking in audio recording is a really useful effect for any number of things. The basic idea is that when the audio on one track (you need multi-track recording software for this) gets louder, the audio on another track (or even all the other tracks) get less loud. It’s like one track pushes the other track(s) down and out of the way. Or put another way – the other track(s) “duck” out of the way of of the controlling track.
I wrote about how to do this using Reaper multi-track software in my article What is Ducking In Audio Recording? The object is most commonly to allow a single voice to be clearly heard over some background music. So whenever the audio on the vocal track is sounding, the volume on the music track gets correspondingly less loud. When listening to JUST the music track in that case, it sounds a bit weird. But when combined with the vocal track, you don’t even notice that the music is getting softer at those points because the voice fills in the void.
The way that one track controls another is by use of something called “side-chaining,” which just means that you send some of the output of one track to another track. In ducking, you put a compressor effect on the track that you want to do the ducking – the music track in the above example. But instead of the music controlling the action of the compressor, you bring in the audio from a different track (the vocal track in our example) to feed/control the compressor on the track doing the ducking.
But remember that I said ducking can be used for a lot of different effects? And remember when I said that listening to JUST the track doing the ducking can sound weird, since it is inexplicably lowering and raising its volume at seemingly random times? Well we can use THAT in Electronic Dance Music (EDM).
The idea is to set up a music track with a pad (synthesizer playing a long, sustained sound – a note or chord), and then to cause the the volume of that music to drop almost completely out periodically – typically to the rhythm of the song. So you set up a drum track to be the controlling track, and whenever a drum hit happens, the volume of the music track drops, gving out a sort of pulsing, throbbing sound perfect for EDM. Then just mute the drum track, and you have a very rhythmic and dance-to-able synth pad track.
The following article shows you how to do the EDM ducking thing using Cakewalk’s Sonar X2 Producer software. Of course you can do the same thing in Reaper using the same technique I described in the article linked at the top of the page.
Red that article here: http://blog.cakewalk.com/edm-ducking-synth-melodies/
Using Compression To Punch Up The Kick and Snare Drums
 Compression is an effect often used to add punch and power to kick and snare drums, especially in pop and rock music. Adding compression to the drums in your recordings is a simple matter nowadays (yes, I’m still all geeky about how much easier it is to do recording now that everything is software – even 15+ years since I was able to make the transition from analog tape).
Anyway, the process of adding the compressor effect (now usually a plugin on the tracks in your software) is the same with pretty much all recording software. Below is an article showing you how to do it using Cakewalk’s SONAR X2 Producer software. I did a video showing you how to add compression in Reaper using the built-in compressor plug-in, “ReaComp” in my post, Vocal Compression Using Reaper’s ReaComp Effect Plugin.
Read the article on drum percussion in Sonar here: http://blog.cakewalk.com/make-kick-and-snare-sound-more-aggressive/
Reaper 4.5 Has Awesome MIDI Improvements

Reaper, the incredibly awesome recording software (DAW – digital audio workstation), just released a major update in version 4.5 yesterday, Sep 2nd. If you are not aware already, you don’t pay for for this update if you already have Reaper. This is one of the unique and awesome features of Reaper ownership. By the way, I have no affiliation with Reaper other than how much I like it.
Despite the incredible features and community of Reaper – totally unique honor-based pricing system, uncrippled 60-day trial that never actually stops working, lightweight code (and hence, download), same basic professional features you find on DAWs costing 3 times more, etc., etc., (read our post about Reaper for more detail here – Why Reaper Rocks as a DAW ), one common complaint has always been its weakness in MIDI features and capability. This update has changed that!
Make no mistake, this update is huge across the board. But the MIDI changes are the coolest. Here are just a few of the improvements:
- See all the midi tracks/items in the editor
- Draw CC events on multiple tracks at once
- See the next/all items in the track
- New Track List (in MIDI Editor) that allows you to not only see, but also edit (!) multiple tracks and items ath the same time
One person in the Reaper forum said he used to dread getting up in the morning knowing he had to face the Reaper MIDI Editor, and now he looks forward to it. Of course, it’s only been 2 days;).
But that brings up another point. Reaper has ALREADY pushed an update to 4.5 (4.51) with even more improvements! That’s 24 hours between updates. Short of some iOS apps, can you think of any other software companies that do this?
To see the complete list of the new stuff in the new version of Reaper, see it here – http://forum.cockos.com/showthread.php?t=127648 . Be sure to read through the entire thread for some explanations and pics of some of these updates.
To download Reaper, and/or find out everything about it, go here: http://www.cockos.com/reaper/