 Here is an article about synchronizing recording devices so that there is a common time reference for all machines and people involved in a recording project involving either just audio, or both audio and video. In the days of tape recording (and for those who still use tape) it was common to “stripe” the tape with SMPTE (Society of Motion Picture and Television Engineers) time code, essentially using up one of your precious available tracks, for the sole purpose of providing the common time reference, which was really handy if you were using several MIDI instruments.
For many of us recording on our computers, this is not as necessary anymore. And a lot of us will never use it, especially those of us recording solely for voice-over applications. But it is always good for the recording enthusiast to understand other aspects of the game. See the article by Brent Hoover here: http://www.prosoundweb.com/article/synchronization_and_timecode_basics/
Archives for June 2013
Compression: What Needs It And What Doesn't?
 I’ve talked about compression quite a lot because it is an excellent, useful, and very powerful tool in your audio recording arsenal. But like anything powerful, you can also use too much.
For a review of what compression is, see these Home Brew Audio Articles:
Vocal Compression Using Reaper’s ReaComp Effect Plugin
Improve Or Ruin Your Audio With an Effect Called Compression, and
Should You Use Compression In Audio Recording?
Those will give you the basics of what compression is. The last one has a white-board video of me explaining the concept.
You can see all the articles on the site that mention compression by going to our “Compression” tag page here: https://www.homebrewaudio.com/tag/compression/
Important! Only use compression (or any audio effect, for that matter( if you know WHY you’re using, and can tell whether it did what you wanted after you apply it. You’d be surprised how many people use compression “because they think they should,” and not with any particular objective in mind. OK, moving on…
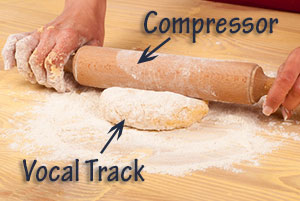
Like with most tools, you don’t always want to compress every sound source in your recording. The main job of a compressor is to even out audio levels or loudness. So if you have something that has some loud parts and some really quiet parts, it probably could benefit from some compression so that the person listening to it doesn’t have to turn it up when it’s too quiet, and then turn it down again when it’s too loud. Compression does that for you. That’s its job.
The human voice is pretty dynamic, meaning we express ourselves with our voices with a large variety of loud and very soft sounds. So a pretty good rule of thumb is that a lead vocal in a song will almost always benefit from at least some compression. Acoustic guitar can also be quite variable in volume and is also usually a good candidate for compression. Likewise with drums (especially the audio from drum overhead mics, which capture the entire kit).
But other things may rarely need compression. I’d say that electronic keyboards and their software synthesizer cousins are rarely in need of much, if any compression. Electric guitar often does not NEED compression, per se. But there are other results – sort of like side-effects – that you can use compression for, like adding punch or sustain to enhance the way something sounds. Electric guitar is often the recipient of such treatment. For example, if you are familiar with the electric guitar sound of the group, Boston, you have heard super-compressed electric guitar.
At the end of the day, though, you need to be the judge of what should be compressed and what shouldn’t when it comes to your mixes. Oh yeah, I forgot to mention final mixes. Those almost always benefit from some compression as well. Anyway, as I was saying, you should use your own ears and judgement on using compression.
And when you DO use it, be careful! Too much compression (using extreme settings) can cause unpleasant artifacts (a fancy way of saying unwanted sounds) like unnatural “pumping” where the audio attack and release cause the audio to sound even more uneven than before (ironically). Another thing that is common with vocal over-compression is excess sibilance, where all the “S’s” started sounding way too hot. So avoid hissing and pumping vocals by using compression responsibly;).
If you have any other examples of when and when not to use compression, please leave a comment below. We’d love to hear from you.
Cheers!
Ken
Recording Vocals In a Bedroom Studio
 Do you record vocals in a bedroom? Most folks who record in a home recording studio do so in a converted bedroom (or maybe not even converted – if you sleep in there too, I mean). Bedrooms are notoriously rectangular. I know, that’s a profound observation , right? Well, the reason I point it out is that rectangles (and a square is a rectangle too, which you should remember from your math classes) have opposite sides that are equal and parallel. That means sound will bounce around in a very predictable and interfering way, creating multiples and even nulls at certain frequencies. In English, this means that what you hear in rooms like this will NOT be a good representation of the REAL sound. Certain frequencies will be hyped and others will be barely audible or even missing entirely (wave mechanics is pretty interesting and very applicable to audio – I’m talking about destructive and constructive interference here, btw).
Why bedrooms can also sound bad while recording
So that is the main reason why having a studio in a bedroom can be problematic. But that stuff applies mainly to mixing and mastering, where you’re more concerned with what you hear. What about sound sources like vocals? How does a rectangular room affect the input of sound into a recording? The biggest problem is echo/reverb. You notice this most, perhaps, when someone records a video and the person speaking in the video is several feet away from the camera. It sounds all echo-y, right? And not very professional.
Here are some ways to fix the problem
Well you can fix that, or minimize it greatly, by simply getting closer to the microphone. I recommend just a few inches if possible, but things can still be improved greatly by having a mic just a foot or two away. You can hear and see the dramatic difference of this in video I made for the post How To Get Good Audio On Your Videos. [update: We also posted a 6-part series to help with this, which you can access here: Improve The Quality Of The Audio You Record At Home]
But there are other things you can do to get better sound on vocals recorded in a bedroom. I detailed them all in my post How to Build a Home Recording Studio: Part 2 – Four Tips For Preventing Noise. Since preventing noise of any kind (background noise from computers, lawnmowers, barking dogs, the TV downstairs, echo, microphone self-noise, etc.) is one of the the primary goals of recording good audio, the four tips in that post should help a lot, regardless of what kind of mic you use.
What about recording with reverb?
But there is one aspect I had not thought much about, which is singing. Once you are avoiding as much noise as possible while recording, is there anything about recording ind a bedroom that can still impart negative stuff on your voice recording? I recently read an article that suggested that bedrooms make your vocals sound “flat.” That’s not in the musical sense of being off-pitch, or in the frequency sense of being equally loud across the spectrum. The article used the term “flat” to mean boring or uncolored in any way by any pleasant reflections or natural ambiance. OK, I can buy into that. A lot of the best commercial studios have recording spaces that flatter a vocal with the natural reverb and spacious sound. But the author stated that one way to fix that was to apply a reverb effect BOTH while recording the vocalist, AND after the fact in the mix.
As a singer who used to record with reverb, I must strongly disagree that letting a singer hear their voice in the headphones with reverb improves their performance – at least not for everybody. I found that when I monitored my voice with reverb while singing, I was more likely to be off-pitch more often. It wasn’t until I made the decision to always record dry and apply the reverb (if any) only to the recording in the mix that I was able to get the most accurate pitch down on tape (yeah, back in the old days;)). It makes sense. Reverb may sound nice, but it does blur things a bit, giving you a nice sound maybe, but not an accurate one. You may be really happy while you’re singing, but then be horrified by the result. That’s how it was with me anyway. I admit that for some, it may help them relax and feel better while recording, which may be a good thing. But I think you should try to record without any reverb at all if possible. Adding it in the mix will help get rid of any “flat-ness” a bedroom may impart.
I hope all of those tips will help you get a much more professional result when recording vocals in a bedroom.
Cheers,
Ken
My New Vocal Compression Technique
 For years I’ve been following the common and age-old advice for vocal compression, which is to start at about a 3:1 ratio, using a fast attack time (like 0-to-10 millseconds so little-to-none of the vocal is heard above the threshold), and medium slow release time (50-to-80 milliseconds so the notes decay naturally). Then set the threshold to -20 dB. You’ll then need to adjust the threshold setting until only the loudest notes are being reduced, and that reduction should not be much more than about 3 dB. Then just use your ears to make adjustments until you get things just right. To review what the heck I’m talking about with all these settings, see my video post Vocal Compression Using Reaper’s ReaComp Effect .
But as with all things audio, you should use your ears to determine what is “right.” Still though, it’s hard to stray too far from what you’ve been taught is the “normal” way of doing things. I just re-watched a video (see my post An Interesting Vocal Compression Tip) that I wrote about here a few months ago that suggests a bit of a different approach to vocal compression. At the time, I sort of thought it was interesting and suggested you might want to try it out. However, I did not take my own advice! Now I have, though. And I have a new normal.
In the video, Andrew Koss explains his technique of using super fast attack AND release times (like zero on both), with a very low ratio (try 1.5:1 or 2:1), and gain reduction of -10 or -12 dB. I tried it and really like the way it makes my vocals sound.
One thing to be careful of, though, is sibilance (that enhanced SSSSSS sound) being hyped, which can happen on some compressors (or compressor plugins) when extreme settings are selected. If you REALLY like the added pop in the voice that this technique gives you, and you get a bit of excess sibilance, you can always use EQ to reduce it. See our article – How to Fix SSS-Sibilance in Your Audio With Sound Editing Software.
Try it and see what you think!
Cheers,
Ken
Focus Control On The Blue Spark Microphones
 Blue, an awesome microphone company, recently [this post was written in 2013] released a condenser microphone called the Blue Spark. Very shortly thereafter, Blue released the Blue Spark Digital, which (according to Blue) is the first studio condenser microphone that you can use as both a USB mic AND an iPad mic. The Apogee MiC can do this also, but the USB mode only works with Macs!
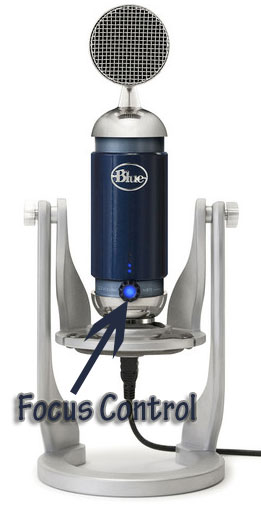
Anyway, both models of the Blue Spark mic come with something called “Focus Control,” which is a button that creates two different types of sound, depending on whether it is activated (pushed in) or not.
Now at first blush, this sounded to me like a simple pad switch, which is common on a lot of different condenser mics. All a pad switch does is reduce (attenuate) audio below a target frequency.
Blue describes Focus control when in the “off” position (button sticking out) as providing an “enhanced low end.” They say you can get the “big radio voice” in this mode, so voice-over folks pay heed. Then when you decide you want a “more present” sound, you push the Focus Control Button in. This provides “greater clarity and detail.”
However, Blue says this is different from standard attenuator “pad” switches because it doesn’t treat the mic’s signal output, but instead changes the input driver, essentially creating an entirely different microphone in a way. When an attenuator is applied to the output signal, as in the case of those pad switches, the quality of the signal can be degraded based on the quality of the mechanism on the mic. But by changing the input driver by “altering the voltage loading of the capsule,” you get a change in the behavior of the capsule that is more nuanced.
I very much wish I had one of these mics here (hey, I can’t buy every mic out there – sadly) [update Sep 2016 – I DID manage to get my hands on one for review. And the result is here: My Review Of The Blue Spark Digital USB And iOS Microphone. You can listen to several audio tests, including the focus control, to hear what that does.