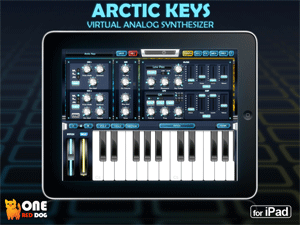
 Here is another cool music making app for your iPhone, iPad or iPod Touch – Arctic Keys Virtual Analog Synthesizer. This is an instrument that emulates hardware synthesizers, which create sounds via oscillators. This one has two LFOs (low frequency oscillators) and the same kinds of controls you would expect from an analog synthesizer to create your own sounds by endless tweaking, including arpeggiator, 16×4 step sequencer, pitch and mod wheels.
You can save your performances as 16-bit 44.1KHz wav files or as MIDI files. And as with most iOS music apps, you then share it via one of several methods.
The app costs $4.99 in the Apple app store. For a complete description of the specs and features, see the article here: http://www.idesignsound.com/arctic-keys-virtual-analog-synthesizer-ipad/
Archives for December 2012
RØDE Rec Audio Recording App For iPhone And iPod Touch
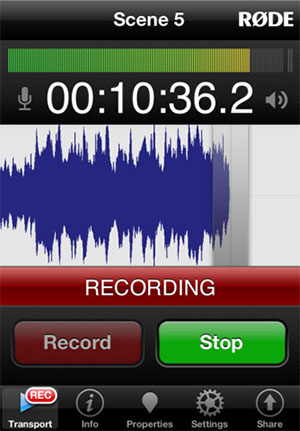 RØDE, the company that makes excellent microphones (my everyday go-to mic is the large diaphragm condenser called the RØDE NT2-A), has just come out with an audio recording app for iPhone and iPod Touch. And they’ve done it together with another big name in audio recording, iZotope, maker of fabulous mastering (Ozone) and other audio effects and tools.
You can record direct into the device with the built-in mic, or you can use something like the iRig Mic ( see our review of the iRig Mic here – Review of IK Multimedia’s iRig Microphone For iPhone, iPad, and iPod Touch) or other iOS compatible mic or mic/interface connection. Then you can use the built-in processing presets, such as Dictation, Interview, Lecture, Office Mode, Live Concert Outdoors, Outside Noise reducer, Rumble Reducer, or Hiss Reducer. You can also apply compression and EQ. When you’re done, you can share your audio in a bunch of different ways, including SoundCloud, Dropbox, iTunes & Browser Sharing, eMail or FTP. You can also save the audio as anyone of a number of formats, such as AAC, Podcast, Apple Lossless, FLAC and Ogg Vorbis.
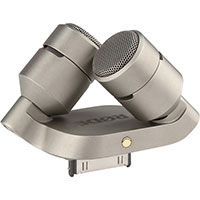
This is pretty darned awesome even without an external microphone. And with the right microphone connector, such as the Tascam IM2 Stereo Microphone for Apple iOS products, or the soon-to-be available RODE iXY Stereo Microphone for iPhone/iPad (see picture on the right) you can turn your phone into the only field recorder you’ll ever need. Use it for interviews, gathering sound effects, dictation, recording lectures, etc.
It costs $6.99 at the Apple App Store, a pretty amazing value.
New Home Recording Bundles: Rode and Pro Tools Vocal Studio
I just found out about some killer home recording studio bundles now available from B&H Pro Audio. Both use the Rode NT1-A large diaphragm condenser microphone, which is one of the most amazing vocal mics on the market for recording your voice. And both of these bundles fall into my home studio classification of “configuration 2,” which means they are standard XLR microphones that get plugged into an audio interface, which in turn gets plugged into a computer, via USB in this case.
Mbox Mini Vocal Studio
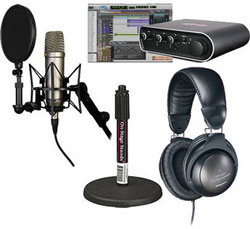
The Avid Mbox Mini Vocal Studio (the “mini” is for the product called the Mbox Mini) consists of the awesome Rode NT1-A large diaphragm condenser mic, along with the Rode shock mount and integrated pop-filter and 20-ft. mic cable; the Avid Mbox Mini audio interface with ProTools Express recording software; Audio-Technica ATH-M20 Closed-Back Headphones, and the On-Stage Round Base Desktop Microphone Stand.
This is no-kidding professional stuff for anyone recording voice-overs, podcasts, or 1-man-band music, or doing Skype calls, webinars, etc.
If you were to buy each item separately it would cost $517.31. But for the bundle, the price is: $459.95! CLICK HERE for more details and/or to buy.
MBox Mini Vocal Studio + Pro Tools 10 + Studio Monitors
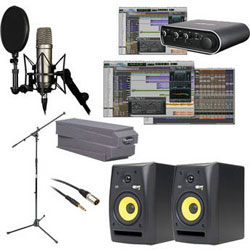
This package starts with the same contents as the one above, but then cranks up the “awesome” by using the full version of the audio recording industry standard Pro Tools 10, a pair of KRK RoKit 45W 5″ active monitor speakers, a full-size microphone boom stand, 2 mic cables, and a set of Auralex MoPAD Isolation Pads for the monitors.
This version of the package gives you all you need to rock-solid professional voice-over work, but also to record vocals and instruments, add virtual drums and other instruments with Pro Tools, and produce professional sounding multitrack music projects as well.
This would cost $1,450.70 if each item were bought separately.The cost for this one is $1,039.50. You save $411! CLICK HERE for more details and/or to buy.
Reasons To Use EQ On Your Recorded Audio
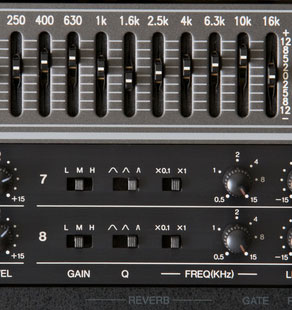 I’ve been writing a lot about EQ this past week – starting with a basic explanation of frequencies and equalization in Some Good Equalization and Frequency Basics. I’ve talked a little about how to use an equalizer effect (EQ for short) to improve your recordings by either removing or turning down unwanted frequencies, or boosting certain frequencies. Now we should pull back a bit and talk about the bigger picture. Why should you use EQ? Like a lot of tools in audio recording, once you learn about how cool an effect is, you start to feel like you have to use it all the time. But that is the road to audio hell. Before you use any tool, ask yourself why you’re doing it. Does your audio really need the effect? If not, it is better to not apply any treatment. It’s kind of like medication. Often we find ourselves just taking it out of habit even if we don’t need it anymore. But all things being equal, our bodies, like our audio, are probably better off clean and sober. Don’t get me wrong. I’m a big believer in better living through chemistry, and I love me some EQ and compression and reverb on my tracks too. Just make sure you’re doing it for the right reasons.
So that being said – what are the reasons for using EQ? Let’s review what an EQ is. It is basically a bunch of volume knobs, each targeting a small band of frequencies (this describes a graphic EQ type, as opposed to a parametric EQ where you “dial-in” the frequency and the bandwidth you want to turn up or down), whereas a master volume knob turns up or down ALL frequencies equally. This allows us to JUST boost or cut, say the frequencies around 6Khz. That’s usually where sibilance is located, so a reduction in that area can help reduce overly hot “SSS” sounds, for example. So you really should always ask yourself some questions before applying EQ. Graham Cochrane just wrote an article about this called “3 Questions I Always Ask When Using EQ.” His questions are:
What Frequencies Are Not Adding to The Track?
What Frequencies Are Hurting The Track?
What Frequencies Make This Track Sound Great?
I think these are excellent questions to help guide yo in the responsible use of powerful effects.
See Graham’s explanation of these questions here:
http://therecordingrevolution.com/2012/12/21/3-questions-to-ask-when-using-eq/
Getting That Phone Effect With EQ
 You’ve heard it before. It’s a common effect on lead vocals in pop music and has been for many year. I’m referring to the effect that makes the vocal sound like it’s coming through a telephone line. In fact, when I think of this effect the first song that pops into my head is the song by ELO called, interestingly enough, Telephone Line. Other uses for the effect that are common include making the drums sound like they are being played over a phone line at the beginning of the song and then opening up the sound later in the song to the full thing.
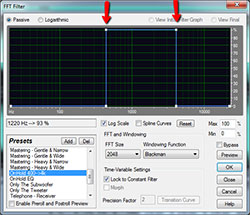 The way this is achieved is by severely limiting the frequencies that are audible on the target track to a very narrow range in the “mids” – between about 400 Hz and 4 KHz. See the picture on the right. You can use an EQ for this, or you can use frequency filters like the one in the picture in Adobe Audition called an FFT filter. FFT stands for Fast Fourier Transform, which you can learn more about here – http://en.wikipedia.org/wiki/Fast_Fourier_transform. In the Adobe Audition FFT filter, the preset is called “OnHold 400–>4K,” the “on-hold” part being a reference to being on the phone.
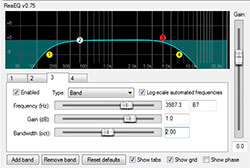 In Reaper, you can just add the ReaEQ equalizer effect that comes with the program, and change bands 1 and 4 to high-pass and low-pass, respectively, in the Type drop-down menu. Then drag the band circles until #2 is at 400 Hz and #3 is at 4KHz. Easy-peesy-lemon-squeezy!
BTW,in yet another attempt to confuse you the term high-pass filter actually means that you are preventing the low frequencies (those to the left of the target frequency) from being heard and only allowing the frequencies that are higher than that to “pass” through the filter. So you’ll usually find a high-pass-filter set up in the low frequencies (in the Reaper pic, band #1 is a high-pass filter, but it is located on the left of the spectrum – the low part). And the opposite is true for a low-pass filter. So in reality you could call a high-pass filter a “low-cut filter” and a low-pass filter a “high-cut” filter. I always have to do a mental translation in my head anyway. Sheesh. But there you have it.
Now you know how to create that phone effect in your recordings.
By the way, if you want to learn more about Reaper recording software, check out our latest recording tutorial course The Newbies Guide To Audio Recording Awesomeness 2: Pro Recording With Reaper.
