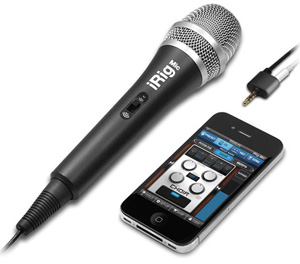
Home recording is our thing at Home Brew Audio. And in that capacity we are making it our mission to spread the word that professional sounding audio is do-able for just about anyone. The technology leaps in the past few years make professional audio recording affordable to pretty much everyone with a computer and microphone. That’s what we’ve been saying. But IK Multimedia is challenging even the need for a computer now! We’re still a bit shell-shocked about their new products for iPhone, iPad, and iPod Touch. These include the iRig Mic, iRig AmpliTube electric guitar/bass adapter, and the iKlip microphone stand adapter for the iPad. Today we’re going to talk about the iRig Mic.
So what is the iRig Mic? It is a condenser microphone that you can plug into your iPhone, iPad or iPod Touch. So you don’t even need a computer to record good quality audio. You can download free apps to you device to use as your recording studio software. You’ll want to get the iRig Recorder Free and VocaLive Free apps immediately. The iRig Recorder is an incredible app that lets you record AND edit or process audio right from your device. The recording format is 16-bit 44.1 kHz uncompressed, another way of saying “CD quality,” which is amazing for a set-up of this size.
The mic has a 3-position (low, medium and high) sensitivity setting switch that allows you some control over the input volume being sent to
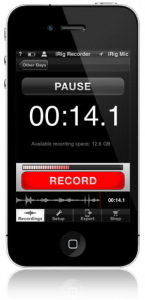
your device. You should leave this setting in the middle (medium sensitivity) as a default. If your source audio is too faint, you can move the switch up. Likewise, you’ll want to move it to the low-sensitivity setting if the source audio is very loud. In addition to these settings, the app itself has input and output level settings you can adjust so that your levels are just right. You’ll definitely want to test this before each recording session. Once all that is set up, you simply point the mic at whatever you are recording and tap the large and prominent “RECORD” button on your device. Tap it again when you’re done recording.
The iRig Recorder will then store your recorded file on your device. At this point, you can apply any number of processing effects (available as in-app purchases for just a few bucks apiece) such as volume and tone optimization, compression, EQ, noise reduction and pitch/timing adjustment. Of course, you’re also free to simply export the audio and then edit it on your computer if you have recording software to do that with.
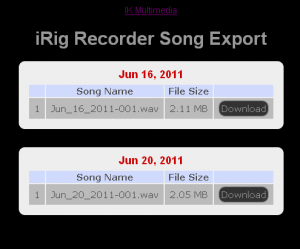
How do you get the audio from your device onto your computer? Get this. You have a choice of posting the audio onto a webiste via Wi-Fi so you can download it, e-mail it to yourself, iTunes file sharing, FTP upload of SoundCloud (the social audio-sharing site). I used the Wi-Fi option for my test of a voice recording. This particular option is available once you grab the Hi-Quality Wav Processor app for $2.00. Then once you tap the Wi-Fi button, you are presented with a web ip address. Simply type that into a browser and you’ll be presented with screen allowing you do play or download (via the right-mouse-click/save link as action) the wav file to your computer. Easy-peasy-lemon-squeezy!
You can then do what you want with your audio, such as import it into a recording program, put a music track beside it, and voila! You have a voice-over ready to go. For my test I did not add any background music since I wanted you to hear it as clearly as possible. Here is the result:
Since I am a voice over actor and frequently hire other voice over actors, I can tell you that the quality of this audio is very competitive with the best results in a typical audition, and is a good deal better than a good percentage of audios in any given audition. But I am a big believer in the proof of the pudding being in the eating, so I’m putting the audio right here for you to listen to. Don’t take it from me. You be the judge.
[jwplayer config=”Custom Audio Player” mediaid=”4023″]
I mentioned another app earlier called VocaLive, which is geared more toward music, as it has several effects and tools specifically for singers. As with the iRig Recorder, many of the VocaLive tools are available as in-app purchases from the iTunes App Store. The free version of VocaLive comes with a reverb effect, along with tools such as a metronome, a vocal “trainer,” and voice cancel, which allows you to sing along with your iPod song library. Here are some of the other available apps:
- Doubler
- De-Esser
- Choir
- PitchFix
- Morph
- Delay
- Chorus
- Compressor
- Parametric EQ
- Envelope Filter
- Phazer
- Four-Track Recorder
Each of these effects is only $2.99! Let me say that again. Each of these effects is only $2.99! What? I know. It’s freakin’ mind-boggling. The Four-Track Recorder, which adds multi-track recording functionality to VocaLive, is a bit more expensive at $4.99. It’s too bad you can’t hear the sarcasm in my voice when I say “expensive.” To put this in perspective, when I bought my first 4-track tape recorder it cost me over $500.00 clams! With that app you can import any song into VocaLive and record yourself singing along with it, add harmony or other music tracks, etc.
Okay, so to test the VocaLive out I recorded just a few lines of myself singing. It’s just one voice with no backing tracks and only the reverb app applied. Obviously you have the option to treat your voice with any of the above effects as well. As I said in the iRig Recorder review, I am a big believer in the proof of the pudding being in the eating, so again I’m putting the audio right here for you to listen to. You be the judge.
[jwplayer config=”Custom Audio Player” mediaid=”4026″]
That was just the bare minimum! Not only can you add any of the effects mentioned above, but as with the iRig Recorder, you can export your audio, though in a slightly different way. You have the options of: File Sharing (sends to iTunes), e-mail, and Song (puts a wav version into the VocaLive Player). It exports only in m4a format, which is the iPod format. I did not see an option for a Hi-Quality Wav Processor app as with the iRig Recorder. I simply e-mailed my file to myself. This isn’t a huge problem for most folks, since the audio is the same quality as pretty much everything you hear in iTunes. But you should be aware that “m4a” is a “lossy” audio format like you get with other data-compressed files like aac and mp3. But I defy any but the most trained ears out there to reliably tell the difference between wav and mp3 files in 2011. So for use in the real world, this is hardly much of an issue at all.
Whew! So welcome to the future. IK Multimedia are charting new territory here with the iRig Mic and their other iOS products and apps. If someone had shown this to me 10 years ago I probably would have keeled over from shock. That is how amazing the iRig products are. Will they eliminate the need for a computer if you want to produce professional quality audio on the go or from home? For some people, absolutely yes! For those folks who need 12+ tracks and complex routing or midi applications, or those who need big-screen sound-track or audiophile level production capability, you may want to hang onto your computer rigs, at least for now. But if you’re a song-writer, a voice-over actor, podcaster, audio-blogger or otherwise have simply a basic need to produce professional sounding audio quickly and conveniently, wherever you are, get the iRig as soon as you can.
The iRig Mic sells for a street price of about $47. This basically means that if you have an iPhone, iPad or iPod Touch, you can have multi-track recording studio with a suite of effects and tools for between $47 and about $70, once you add in the price of the other apps you’ll want to download.
To see more details and/or to purchase your own iRig Mic, CLICK HERE.
Find out more about these products here:
iRig Mic: Ikmultimedia.com/irigmic
iRig Recorder: Ikmultimedia.com/irigrecorder
VocaLive: Ikmultimedia.com/vocalive
Cheers!
Ken
ps- The demo song I sang part of for the review is from “The Bluest Eyes in Texas,” by Tim DuBois, Dave Robbins and Van Stephenson.
 If you’ve been a regular reader of this blog, then hopefully you know that your computer is an excellent home recording studio, an you can record professional voice-overs (as well as music and any other audio recording projects) right from home. If you are one of the many voice-over actors on our list who daily answer voice casting auditions at