So it turns out not everyone can afford expensive software for recording. Maybe they had one decent microphone, maybe a USB mic to plug into their totally regular computer, but no more money left over to go to a recording studio or to purchase expensive software (not to mention expensive hardware) to record and then create something really awesome. Is it possible to still come up with something professional sounding using only free recording software and plug-ins?
If you are asking me, the answer is “yes.” But there are some qualifiers. As with many things, it is going to take you longer to get good results than it would if you were able to afford the paid versions of software and plugins. It’s the whole trading time for money thing and vice versa. Also, if you have some basic knowledge of audio recording, you will be more likely to achieve good results. Luckily that knowledge not terribly difficult (at least it doesn’t HAVE to be) and is something you can get from tutorials like our Newbies Guide to Audio Recording Awesomeness , but I digress.
Here is an article that shares my view that it is possible to get a great sounding mix with cheap/free software.
http://www.audiorecording.me/can-you-achieve-quality-audio-mix-using-only-free-plugins.html
Archives for January 2012
Queen Harmony Demo
 What do you do when you don’t have anyone else to sing harmony with? You sing harmony with yourself!
Okay, what the heck is Ken talking about this time? Well, I was watching Glee a while back, and one of the songs in the show was the Queen song, Fat Bottomed Girls, which opens with a killer a capella harmony. I couldn’t get the song out of my head, so I decided to sing it (the intro anyway)…all 9 parts…myself…at the same time.
Normally one person can’t sing harmony with themselves, which is something I have wished for since high school. I think there ought to be a surgery that allows it:). Anyway, with a computer and a mic, you can be every person in a Glee Club! Listen to what it sounds like when one person sings 9 vocal tracks (each of 3 harmony parts sung 3 times) by clicking on the audio player below for the intro (just the intro, so don’t get all disappointed when the rest of the song doesn’t follow;)) to Fat Bottomed Girls as sung once again by me, myself and me 2.
Audio Player
Here’s how I did it.
1. I Opened Reaper Software
Reaper is my favorite tracking and mixing software (You can read more about it in this article I wrote about it – Why Reaper Rocks as a DAW). I started a new track, and then saved the project as “Fat Bottomed Girls.”
2. I Sang The Melody Part

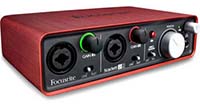
I sang all parts into a microphone called the Rode NT2-A, which is connected to my computer through an interface like the Focusrite Scarlett 2i2.
Unlike the “Carry on Wayward Son” demo I did, which only needed 6 voices, this song needed 9. It was still only 3 parts (the melody and two harmonies), but each one needed at least 3 voices on it. So I sang the melody once on the first track. Then I opened another track and sang it again while listening to the first one. Ditto for the 3rd pass.
Here is the audio for the melody:
| Audio Player |
3. I Sang The Middle Harmony Part

I repeated the above steps for the middle harmony part, requiring me to open up 3 more tracks in turn, singing the second harmony part on each one. I now had 6 tracks playing two harmony parts.
Here is the audio for the middle part:
| Audio Player |
4. I Sang The Low Harmony Part
And I just repeated the same steps for the last 3 tracks, singing the 3rd harmony part onto each track. I now had 9 tracks.
Here is the audio for the low part:
| Audio Player |
5. Mixing Down & Editing
The final steps were to tweak each track to make sure the timing and pitch of all parts were correct. Next, I panned the tracks across the stereo spectrum (like spreading 6 playing cards out in a fan). Then I made sure the volumes were all even and rendered/”mixed down” all the tracks to one stereo file.
6. Mastering

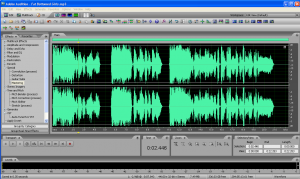
Finally, I opened the stereo file in Adobe Audition, my favorite audio editing software. I added a few effects like EQ and compression to the file, normalized it for good powerful volume, and Saved it as an mp3. Done.
I don’t know how many folks there are out there who dig vocal harmony as much as I do, but I know there are at least some. I don’t think The TV show, Glee would be as popular as it is otherwise. Who knows? I just think it’s cool to be able to sing harmony with yourself and turn yourself into your own glee club if you want to. You couldn’t do that when I was in high school.
If you’d like to learn more about how to record pro audio from your computer, visit Home Brew Audio frequently for our many articles and audio recording how-to tutorials.
Happy recording!
Ken
M-Audio Fast Track C600 Desktop Audio Interface
 Here is the new M-Audio Fast Track C600 USB audio interface. Say hello to a new trend, the desktop audio interface. This is as opposed to the usual audio interface, which is designed to fit in a rack space. That makes them have to have all the controls and plugs, etc. on the front face with nothing on the top. The desktop interface like the M-Audio C600 utilizes the top as well as the sides, making it perfect for sitting on a desk or table top and very easily using the controls.
So what else is cool about the Fast Track C600? It has 4 microphone inputs, which is what I was most interested in. But there are some truly awesome features that I did not expect from an interface.
Several Speaker Outputs
There are 6 outputs set up as pairs A (output 1/2), B (outputs 3/4) and C (outputs 5/6). Each pair has an on/off button on the top of the unit so you can set up different speakers and easily switch between them to hear mixes on different speakers, which can help with monitoring.
MIDI Transport Controls
This is fantastic. There are physical controls for Play, Record, Stop, Fast-Forward and Rewind on the top of the unit. You can assign these controls, via MIDI, to your audio recording software program. The thing most people feel like they miss when doing computer audio recording is the physical controls. You either have to use a mouse to do everything, or you figure out keyboard shortcuts. Audio interfaces traditionally do not have these, probably because they have been traditionally designed to be in a rack and not on a desktop. But it makes total sense to have controls like this on an audio interface.
And The Rest
OK so what else is on this thing? Here’s the rest of the story. It has 6 inputs and 8 outputs, four mic preamps, digital I/O (input/output) (S/PDIF), MIDI I/O, and 24-bit/96KHz recording. It is also USB Bus powered, so you don’t have to deal with a wall-wart type power cable.
And you get all this for $399.99 at B&H PHto/Video/Pro Audio. Go check it out at that link back there to see more details, pictures and to purchase.
Cheers!
2 Things You Should Know About Your PC Recording Studio
 What? You say you don’t have a PC recording studio? Let me ask you this. Do you have a computer? Was it made in the last 10 years? Does it have a sound card? If you answered “yes” to all 3 questions, you have a PC recording studio. Maybe you just didn’t know it.
So now that you DO know, you can create awesome audio for, well, for whatever. Record your songs and release an album. Send out a podcast. Narrate an audio book. Do voiceover recording for any videos you might be making, or to start a voiceover business of your own. There are so many possibilities.
Now before anyone raises their hand to protest that you can’t record really good audio using just a home computer unless you also spend a gazillion dollars on an audio interface, microphones, and special software, let me just say something first. You CAN record really good audio using just a home computer without having to spend a gazillion dollars on an audio interface, microphones, and special software. In fact, getting back to the title of this article, there are two important things about home recording you should know. First, good audio is more about knowledge than money, knowledge anyone can learn quite easily given the right lessons. Second, most people can create excellent sounding audio without spending more than about 30 dollars (for a USB mic if you don’t already have one).
1. The Basics of Home Recording are Easy to Learn
Most home recording needs will center around voiceover recording for any of a number of reasons, such as podcasts, audio for video, audio books, etc. You will probably have noticed that a lot of amateur narrated audio such as you find in videos on YouTube is really quite bad. It’s thin, echo-y, noisy, hard-to-understand, or any combination of the above. But that isn’t because the people recording this audio just have cheap gear. They could make much better audio with just a little knowledge, mainly about how to avoid and/or reduce noise, where to put the mic, etc.
2. You Can Create Good Audio With Your Current Computer and Free Recording Software
There are some good audio recording programs available free of charge on the web. Probably the best known is called Audacity. When I say “free,” I mean open source, not just a trial version. Audacity is amazingly powerful for the price ($0.00). I recommend you download it before someone figures out how good a deal it really is. Audacity is both a multi-track recording and sound editing software. It comes with lots of built-in effects like EQ, compression, reverb, and great editing capability. For many folks, especially the ones just recording vocal narration, this is the only home recording software they’ll ever need.
So now you know where to get the hardware, but you are wondering where you can gain the knowledge I said was so easy to understand. There are many tutorials on the web, but Home Brew Audio is dedicated to teaching home recording skills so that anyone can understand them, using enjoyable and humorous video tutorial videos. Why not give us a visit at www.homebrewaudio.com if you have a few moments? I bet you’ll be glad you did.