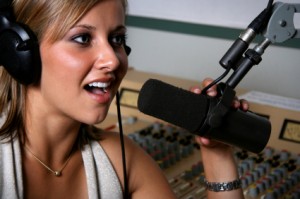
 Radio ready voice recordings are possible to create at home.
We just received the following from someone who had just completed The Newbies Guide To Audio Recording Awesomeness 1 video tutorial course on home recording:
First I want to congratulate you on an excellent job. The home brew audio [Newbies Guide To Audio Recording Awesomeness (ed.)] is the best home recording tutorial I’ve invested in. I am simply amazed at what you were able to do on a home computer without using expensive recording equipment. I’m particularly interested in knowing more about the narration. Did you use special compression, EQ or effects on your voice during or post recording to get it to sound so rich and radio-ready? I’d sure would like to duplicate that sound on my project.
Thanks
Wow! That was quite a nice testimonial to the course, for which we are VERY grateful. And we felt his question about the process we go through to create what he calls “the rich and radio-ready” (don’t you just love the alliteration?) voice quality deserved a thorough answer. So here is what we wrote back:
Thanks so much Larry! I actually do use a pretty simple set of EQ, compression and noise reduction treatments on everything I do. Here’s how it goes.
The Recording Process
I record my voice in Reaper with no compression at all. I ALWAYS use a pop screen/filter to reduce p-pops (plosives) and I get my mouth about 3-5 inches from the mic, which helps with the “deep/low” energy on the voice. Also, I try to address the mic slightly off-axis, just about 15-30 degrees, which also helps with the p-pops. I do not run my narration voice through any filters or effects when recording. I just make sure the recorded level is high enough that the loudest bits are just below peaking/clipping.
Once I have the dry vocal recorded, I double-click on the audio item to open the audio in my editing program. I use Adobe Audition, but the effects I use can be found in most any decent editing program. If the ambient noise level is low enough (it’s important to keep the noise in the recording space as low as possible, especially computer drive noise), Audacity can handle the noise reduction, though I have to say that Audacity’s NR is not the best. I use Adobe Audition myself.
The Editing Process
Once the audio is in the editor, here are my steps. I never vary from this process.
- Noise Reduction. Sample (copy to the clip board) a second or two of the file where there is no voice or breath. This will contain ONLY the ambient noise. Then open the Noise Reduction tool in Audition, select the “Entire File” from inside the NR window, and click OK to reduce the ambient noise across the entire file.
- Eliminate p-pops. Listen to the audio from start and note EVERY time you hear a p-pop. Zoom in on just the part of the voice saying the “P” (or “B” or whatever the offending consonant is) and highlight it. Open the Graphic Equalizer tool in Audition. View the “10 Bands” screen. Starting with the 250 Hz slider, I progressively reduce the volumes to the left until the slider for the left-most band at <31 Hz is all the way to the bottom, which is 124 dB. For me, that works out to -5 dB at 250 Hz, -11 Hz at 125 Hz, and -17 Hz at 63 dB. You’ll have to experiment with your own settings for your own voice. Go through the entire file and run this EQ setting for each instance of a plosive. This is made MUCH faster is you create (save as) a preset in the Graphic EQ tool and then make it a “Favorite” so it always shows up in the “Favorites” pallet, which I always have open. That way I can just highlight the plosive and click my “Plosives” favorite, and it runs the preset.
- Compress. Once all the plosives are out, I run a subtle compression treatment. I created a preset Audition’s compressor tool, which they call “Dynamics Processing.” This preset has the settings: ratio of 2:1, threshold of -12 dB, output gain of 0 dB, Attack Time of 24 ms, Release Time of 100 ms in the Gain Processor, Input Gain of 0 dB, Attack Time of .5 ms and Release Time of 300 ms, and RMS (as opposed to Peak) selected in the Level Detector. Under General Settings I use a look-ahead time of 3 ms. Before I run the compression though, I highlight the entire file and (if needed) raise the level until the loudest bits are higher than the -3 dB line. If I have to lower the volume of one or two especially loud bits, I’ll do that first in order to get several peaks beyond the -3 dB line. I do this to ensure that enough of the audio is above the compressor setting threshold of -12dB. Then I run my preset compression settings as described above. To find out more about what compression is, see my post Vocal Compression Using Reaper’s ReaComp Effect Plugin.
- Normalize. After this light compression scheme that evens out the audio loudness, I want to make sure that the very loudest part of the compressed audio is RIGHT below or at 0 dB (without clipping), to optimize for loudness. That’s exactly what the tool called Normalize is for. See my post Audio Normalization: What Is It And Should I Care? I simply select the entire file and click on the Normalize tool in Audition. I always choose the “Normalize to 100%” setting, which puts the very loudest peak right at 0 dB.
That’s it! Less expensive editors will have the same tools as Audition. I only use that because I have been using a version of that program since 1996 or so when it was called Cool Edit Pro. I used to do EVERYTHING with it, including recording and mixing. But as with many things, when a program designed to specialize in one thing tries to offer “the entire enchilada,” they won’t be as good at those ancillary functions. This is true for Adobe Audition’s multitrack and mixing functions.
They are very good now, and one could do everything in Audition. But it makes for a bloated program (which accounts now for its price tag) that is still an excellent editor with some mediocre ancillary functions. That’s why I use Reaper for my recording, multitrack, MIDI and mixing needs. For a more affordable editing program that isn’t bloated with tacked-on extras (including price!), you can still use Audacity, though if you can afford it, I think ease and work-flow are better with a program like GoldWave Digital Audio Editor ($60) or WavePad Sound Editor ($79 normally). There are others of course that are more expensive, like Sony Sound Forge ($350) and Adobe Audition ($234).
I hope that helps!
Cheers!
Ken
