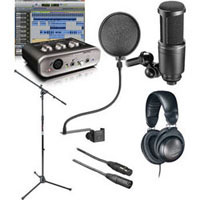
Below is another common question I pulled from Yahoo Answers. “What is the best home recording equipment package?” It isn’t a bad questions as far as it goes, but it’s a little like asking “what is the best car?” It depends very much on what you want the car to do for you, what your budget is, how important certain factors like maintenance requirements, fuel efficiency, etc. are to you.
So as usual, I have added my reply below, after the reply that came in to the original question.
Q: I would like to buy some home recording equipment (software, hardware, etc.), but I don’t know much about this stuff. Can anyone give me some guidance on what I should buy? Thank you!
A: When you say “best” do you mean cheapest? Or do you really mean “best? (I agree totally – K)
Cheap (~$175) but good: Tascam Track Pack T1 US122L Soundcard with Microphone Pack (no longer available)
Good but still far from the best: http://www.sweetwaveaudio.com/home_recording_package.php (and costs about $2,000).
If you really mean “best” then I hope you are prepared to spend a lot of money (maybe $500,000 or more).
My answer is to start with a question like this: “What do you want to do with your home studio?” If the answer is anything like “I want to do voice-overs,” or “I need to record audio for my podcast,” my answer would be to point the person in the direction of a MUCH less expensive set-up (at least to start) than either of the above suggestions. I’d probably suggest something like: “Get yourself a USB mic like the Samson Q1U Handheld USB Microphone for about $49. Then download Audacity software, which is free. You can get some amazing quality with just that! If that doesn’t give you what you need, you can move up the price range, but you might as well start affordable, no?
My next question would be: “How is your home recording knowledge?” If the person is a total newbie, my answer would definitely be the same as above, combined with advice to find some tutorials on the web designed to teach newbies how to record audio from home. Once good place like that would be this site – Home Brew Audio (just off the top of my head:)). However, if the person has some experience and knowledge already, I might add a few different items to the mix, such as downloading Reaper (by Cockos) for a 30-day trial of their excellent software that will eventually cost you a mere $60, if you make less than about $20,000 per year using it. If your audio work using Reaper makes you more than $20K a year, you probably won’t mind spending the $220. And these are the same software “versions.” BTW, I have no affiliation with Reaper. I just love and use their product.
If the person is wanting to record a rock band and put out a CD, well then things change quite a lot in that a few different kinds of mic will be needed, as well as the ability to record 6 or 8 (or more) tracks at the same time. I’d probably recommend something like the: Focusrite Clarett 8Pre that has 8 preamp inputs for about $800.
Of course there is a lot of middle-ground here as well. B&H Pro Audio asked me for advice on home recording equipment bundles and based on my input, set up two starter kits. One is geared (no pun intended:)) more toward the absolute beginner on a budget who expects to do mostly voice-over, podcast, video narration type stuff. It’s called the Fast Track Home Recording Starter Kit for just about $300.
So before you run out and ask your music store guy “what the best home recording studio equipment package” is, do yourself (and your bank account) a favor and ask someone who can help you match the gear you need to your budget and your recording goals.
HappyRecording!
Ken

Archives for October 2010
Distance Between Monitors
The distance between your monitors is important when you’re mixing. If they aren’t the right distance apart you are likely to have problems getting your levels right.
If the monitors are too far apart then sounds panned to the sides will sound louder (and sounds in the center quieter) and conversely if the monitors are too […]
[Read more…] about Distance Between Monitors
Echo Audiofire 4 Audio Interface
This is from an article by Jonny Caine, from the website Home Studio Essentials.
After doing a ton of research (reading lots of reviews mostly) I’ve decided on the firewire/1394 based Echo Audiofire 4 Audio Interface to replace my E-MU 1616M which I had for about a year and half.
The E-MU1616M started causing random glitches & pops and I couldn’t find anyway to stop them. During my search around the internet for a solution to this problem I found that it’s a common issue. So I would probably not recommend it to you, although I was reasonably happy with it before the problem began.
Read the original article here.
Cheers,
Jake
What home recording systems for vinyl records did people have in the 1960s?
More Q&A stuff from the interwebs on home recording. I don’t completely agree with the person who answered this question. My thoughts follow below.
Q: What home recording systems did they have in the 1960s for recording vinyl records? How did they record Vinyl records at home? Was this a common?
A: actually most people didn’t do much in the way of home recording. If we needed to record something it was on reel to reel tape. You had to go into a professional recording studio to have a record recorded.
To add the above answer, it really must be said that though home recording was MUCH less common, it did exist. But those folks weren’t recording directly to vinyl. Tape recorders were the order of the day. As a matter of fact by the 1960s, they were all the rage. One great example was Ross Bagdasarian, Sr. In 1958 the actor and song-writer was down to his last $200. He spent most of that on a V-M tape recorder, which allowed him to vary recording and playback speeds. This home recording project gave birth to Alvin and the Chipmunks, and the rest is history. Ross Bagdasarian was also responsible for the hit, My Friend the Witchdoctor.
So even before the 1960s it was possible to do home recording, but the medium was tape, not vinyl.
Are You a Gleek? Want To Get That "Glee" Sound?
Are you a “gleek?” (if you have been hiding for the past year, a “gleek” is someone who is a fan of the show Glee). I confess that I definitely am. I love music, recording, singing harmony, and ….well, OK, not high school. What a horror show-except for the music! Choir, musicals, my rock bands, singing Beach Boys and Asia harmonies at Carl’s Junior with my friends–THOSE were the things I loved about high school. And that is what Glee is mostly about. Plus there’s the hilarious Jane Lynch as Sue Sylvester to keep the show from sliding into a pool of syrupy glurge.
But I digress. Have you noticed anything odd about how all the singers sound on that show? The cast members were selected because they could really sing (apart from looking the part and acting and all that too). But when they produce the musical numbers, the voices sound a bit artificial don’t you think? Every note is perfect–maybe too perfect. It sounds kind of, well, computer-y to some folks. Love it or hate it, this is down to the popularity of an audio processor called Auto-Tune, and its ilk. And it pretty much defines what I am calling the “Glee sound.” and you can have it too, if you want to.
Antares Auto-Tune Vocal Studio Pitch Correcting Software is an awesome tool that can really help in the studio, though like anything else, it can definitely be over-used, and frequently is. The program has two modes that can be used to treat a vocal track, the auto mode and the graphical mode. In auto mode, all the singer’s notes are run through Auto-Tune’s processor and corrected automatically. The entire track gets washed through a filter that snaps the vocal track’s pitch to a musical grid similar to the way a graphics program snaps shapes to a visual grid. The auto mode is much faster to use. You basically just flip a switch. But when you wash an entire vocal track through the processor, you usually get a somewhat artificial and computer-y sounding product.
The graphical mode is like having the “snap-to-grid” option turned off in a graphics program. It may take longer to get certain things lined up, but at least you can put everything exactly where you want it. You can SEE the grid in graphical mode, but you choose which notes to correct and which ones to leave alone by dragging the pitch curve from the recorded voice closer to a grid line. You also have several choices as to how intense the corrections you make should be. Generally the smaller and less extreme the correction (just bumping an off-note a bit closer to the target pitch, say) the more natural it sounds. This mode is much more hands-on and takes a bit longer. But it can result in a much more natural sounding product.
If you would like to have that “Glee sound,” all you need to do is add the Auto-Tune plug-in to your pc recording studio software. Don’t have your PC recording studio set up yet? No problem. You can do that in about 30 minutes by following the instructions in the free tutorials at Home Brew Audio, which you can access by clicking right here.
From one Gleek to another…happy recording!